High-strength steel
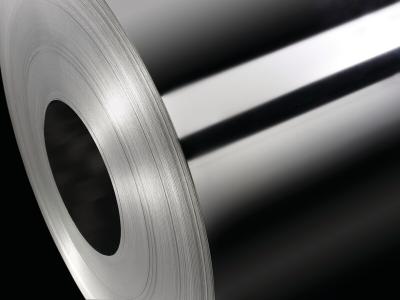
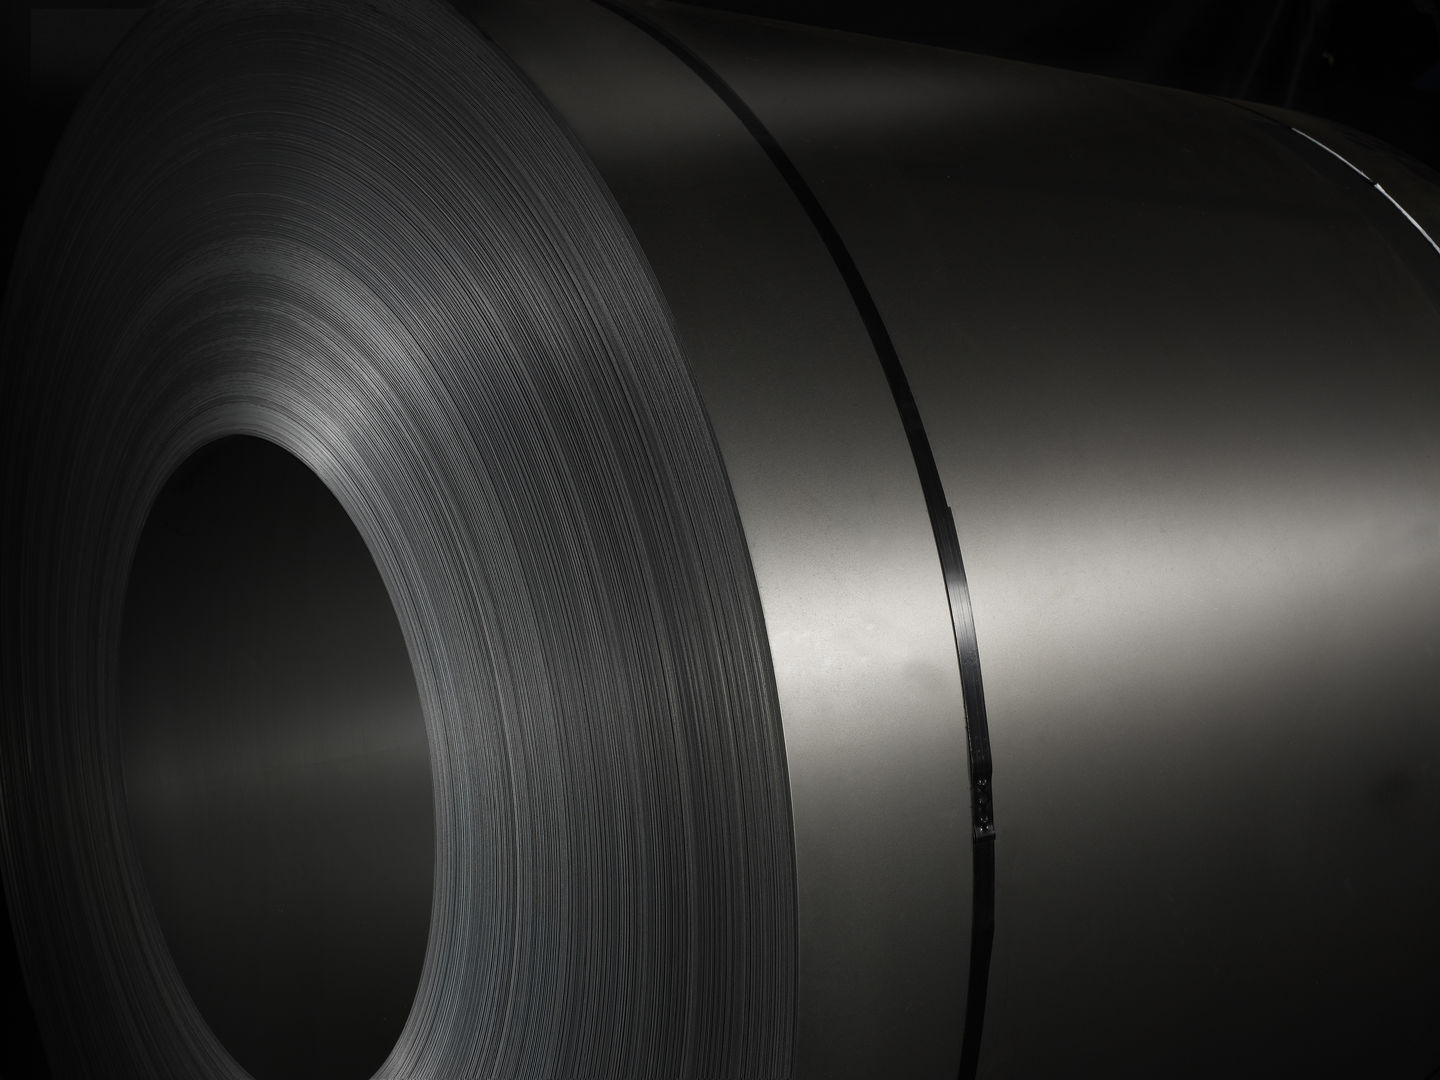
Tata Steel offers a range of cold-rolled steels for applications requiring high strength without the weight penalty.
The range comprises micro-alloyed and rephosphorised high-strength steels in cold-rolled uncoated condition.
These steels are ideal for strong, thin-gauge products.
EN-Automotive-Product-Cold-rolled-HSS-HSLA220 TSE
EN-Automotive-Product-Cold-rolled-HSS-All Grades OverviewTSE
Micro-alloyed grades
Micro-alloyed grades have high-strength levels through precipitation and grain refinement hardening. Careful use of alloying elements ensures high mechanical resistance and good weldability. Micro alloyed grades are suited to pressed or stamped parts that require high strength and good formability eg. in seating or body in white structural parts.
Tata Steel supplies high-strength micro-alloyed (HSLA) steel which complies with European standard EN 10268:2006+A1:2013 and to VDA 239-100.
Rephosphorised grades
These grades deliver high mechanical resistance and good suitability for cold forming due to solid solution hardening by phosphorus. Our rephosphorised grades are highly suited to the manufacture of car body panels and structural components because of their good resistance to impact and fatigue.
Applications
Automotive components.
Relationship with standards
Tata Steel can supply the following cold-rolled high-strength steel grades:
Micro-alloyed grades
| Tata Steel | VDA (L) | EN 10268:2006+A1:2013 (T) | EN 10268:1998 (L) |
|---|---|---|---|
| Grade | Grade | Grade | Grade |
| HSLA220 | CR210LA | - | - |
| HSLA260 | CR240LA | HC260LA | H240LA |
| HSLA300 | CR270LA | HC300LA | H280LA |
| HSLA340 | CR300LA | HC340LA | H320LA |
| HSLA380 | CR340LA | HC380LA | H360LA |
| HSLA420 | CR380LA | HC420LA | H400LA |
L = longitudinal test direction, T= transverse test direction
Test direction can be specified
Rephosphorised grades
| Tata Steel | VDA | SEW 094 |
|---|---|---|
| Grade | Grade | Grade |
| P260 | - | ZSt E260P |
EN-EngineeringAutomotive-Product-Cold-rolled-All Grades Surface aspectsTSE
Surface quality
Surface quality A
Defects that do not influence the formability or the application of surface coatings are permitted. They are defects such as pores, minor scratches, slight indentations, small grooves or slight discolouration.
Surface quality B
The better side must be free of defects that can spoil the uniform appearance of a high-quality paint or of an electrolytic coating. The other side must at least conform to surface quality A. Not all combinations of thickness and width are available in surface quality B. Please contact us for details.
Inspected side
As a rule, the upper side of the strip is inspected; on request, the strip can be wound so that the inspected side is the underside.
Surface texture/roughness
Cold-rolled annealed and skin-passed steel is available in several surface textures. Unless specified otherwise, Tata Steel will supply normal roughness. The table below shows the range of surface textures according to EN 10130:2006.
|
|
Roughness Ra (µm) |
|
|---|---|---|
|
EN 10130: 2006 |
Symbol |
cut off 0.8 mm |
|
extra-bright 1 |
- |
≤ 0.3 |
|
bright |
b |
≤ 0.4 |
|
semi-bright |
g |
≤ 0.9 |
|
normal |
m |
0.6 - 1.9 |
|
rough |
r |
> 1.6 |
|
extra-rough 2 |
- |
3.5 - 5 |
1. Not in EN 10130:2006 - Tata Steel’s own specification. Please contact us regarding the availability
2. Not in EN 10130:2006 - Tata Steel’s own specification, measured with a cut off of 2.5 mm
Other surface textures are available to meet your requirements - please contact us for details.
Preservative oil
The standard oil applied by Tata Steel acts as a protective coating. Other types of oil may be available to meet your requirement.
Tata Steel offers a range of oiling levels from 0.25 - 1.7 g/m2 per side.
Other oiling levels are available on request. Tata Steel is not responsible for the risk of corrosion during storage or shipment if material is ordered in the un-oiled condition.
Surface cleanliness
Tata Steel can guarantee improved surface cleanliness on request for batch-annealed products. The cleanliness is tested with a tape test, in which the loss of reflection is measured. The reflection gives an indication of the oil residue on the annealed product. Two levels of loss of reflectivity are available for batch annealed products: a maximum of 20% or a maximum of 30%.
EN-Automotive-Product-Cold-rolled-HSS-HSLA220-Properties TSE
Properties
Mechanical properties
The available grades have the following mechanical properties - these are measured parallel to the rolling direction (longitudinal test pieces):
Micro-alloyed grades
| VDA 239-100-16 | Grade | CR210LA |
|---|---|---|
| Yield strength Rp0,2 1 | N/mm2 | 210 - 300 |
| Tensile strength Rm | N/mm2 | 310 - 410 |
| Elongation 2 | % | 29 |
| Min. r-value r90 3 | 1.0 | |
| Min. n-value n90 | 0.15 |
1. If the yield strength is pronounced (yield flag), the values apply to the lower yield point (ReL).
2. When thickness ≤ 0.7mm, the minimum value for elongation is reduced by 2%.
Elongation after fracture A uses test piece length L0 = 80 mm.
3. For products with thickness > 2mm the minimum r90 is reduced by 0.2.
Chemical composition
Cold-rolled high-strength steels supplied by Tata Steel comply to the following cast analysis with maximum values unless otherwise shown:
Micro-alloyed grades
| VDA 239-100-16 | Grade | CR210LA |
|---|---|---|
| C | Max. | 0.10 |
| Mn | Max. | 1.00 |
| Si | Max. | 0.50 |
| P | Max. | 0.080 |
| S | Max. | 0.030 |
| Al | Min. | 0.015 |
| Ti 1 | Max. | 0.15 |
| Nb 1 | Max. | 0.10 |
1. These additional elements may be used individually or in combination where they appear in the definition of the steel within the composition limits indicated. Vanadium and boron may also be added. However, the sum of the contents of these four dispersoidal elements shall not exceed 0.22%.
All values are in weight%.
EN-Automotive-Product-Cold-rolled-HSS-HSLA220-Dimensions TSE
Dimensional capability – Batch annealed (BA)
Dimensions in mm.
| Thickness | Max. width |
|---|---|
| From - up to | CR210LA |
| 0.40 - 0.50 | 1600 |
| 0.50 - 0.55 | 1670 |
| 0.55 - 0.60 | 1700 |
| 0.60 - 0.65 | 1730 |
| 0.65 - 0.70 | 1760 |
| 0.70 - 0.80 | 1800 |
| 0.80 - 0.90 | 1840 |
| 0.90 - 1.00 | 1890 |
| 1.00 - 1.75 | 1950 |
| 1.75 - 2.00 | 1840 |
| 2.00 - 2.10 | 1800 |
| 2.10 - 2.30 | 1680 |
| 2.30 - 2.40 | 1600 |
| 2.40 - 2.50 | 1540 |
| 2.50 - 2.60 | 1480 |
| 2.60 - 2.70 | 1400 |
| 2.70 - 2.80 | 1350 |
| 2.80 - 2.90 | 1290 |
| 2.90 - 3.00 | - |
Minimum width is 900 mm.
Other dimensions are available on request - please contact us.
Tolerances
Tolerances comply with standard EN 10131: 2006.
Tighter tolerances are available, please contact us for details.
EN-EngineeringAutomotive-Product-Cold-rolled-All Grades Shape and Dimensional TolerancesTSE
Tolerances on shape and dimensions comply with standard EN 10131: 2006
Tolerances on thickness
Tolerance (EN 10131: 2006) | Availability |
|---|---|
| Full thickness tolerance | Available |
| Special thickness tolerances | Available |
| 50% of full thickness tolerance | Refer before ordering |
Tolerances closer than special tolerances may be agreed at the time of enquiry.
Tolerances in mm.
Tolerances on thickness for steel grades with a specified minimum yield strength
Re < 260 N/mm2.
Nominal | Normal tolerances for a nominal width of 1 | Special tolerances (S) for a | |||||
|---|---|---|---|---|---|---|---|
| ≤ 1200 | > 1200 | > 1500 | ≤ 1200 | > 1200 | > 1500 | |
| ≤ 1500 |
|
| ≤ 1500 |
| ||
| ≥ 0.35 | ≤ 0.40 | ± 0.03 | ± 0.04 | ± 0.05 | ± 0.020 | ± 0.025 | ± 0.030 |
| > 0.40 | ≤ 0.60 | ± 0.03 | ± 0.04 | ± 0.05 | ± 0.025 | ± 0.030 | ± 0.035 |
| > 0.60 | ≤ 0.80 | ± 0.04 | ± 0.05 | ± 0.06 | ± 0.030 | ± 0.035 | ± 0.040 |
| > 0.80 | ≤ 1.00 | ± 0.05 | ± 0.06 | ± 0.07 | ± 0.035 | ± 0.040 | ± 0.050 |
| > 1.00 | ≤ 1.20 | ± 0.06 | ± 0.07 | ± 0.08 | ± 0.040 | ± 0.050 | ± 0.060 |
| > 1.20 | ≤ 1.60 | ± 0.08 | ± 0.09 | ± 0.10 | ± 0.050 | ± 0.060 | ± 0.070 |
| > 1.60 | ≤ 2.00 | ± 0.10 | ± 0.11 | ± 0.12 | ± 0.060 | ± 0.070 | ± 0.080 |
| > 2.00 | ≤ 2.50 | ± 0.12 | ± 0.13 | ± 0.14 | ± 0.080 | ± 0.090 | ± 0.100 |
| > 2.50 | ≤ 3.00 | ± 0.15 | ± 0.15 | ± 0.16 | ± 0.100 | ± 0.110 | ± 0.120 |
1. Around cold-rolled welds - the pickling welds - an increase of 20% at the most over the thickness
is allowed over a length of 15 metres.
2. For special tolerances, not all combinations of thickness and width are available in every product.
Please contact us for more details.
Tolerances on thickness for steel grades with a specified minimum yield strength
260 N/mm2 ≤ Re < 340 N/mm2.
Nominal | Normal tolerances for a nominal width of 1 | Special tolerances (S) for a | |||||
|---|---|---|---|---|---|---|---|
| ≤ 1200 | > 1200 | > 1500 | ≤ 1200 | > 1200 | > 1500 | |
| ≤ 1500 |
|
| ≤ 1500 |
| ||
| ≥ 0.35 | ≤ 0.40 | ± 0.04 | ± 0.05 | ± 0.06 | ± 0.025 | ± 0.030 | ± 0.035 |
| > 0.40 | ≤ 0.60 | ± 0.04 | ± 0.05 | ± 0.06 | ± 0.030 | ± 0.035 | ± 0.040 |
| > 0.60 | ≤ 0.80 | ± 0.05 | ± 0.06 | ± 0.07 | ± 0.035 | ± 0.040 | ± 0.050 |
| > 0.80 | ≤ 1.00 | ± 0.06 | ± 0.07 | ± 0.08 | ± 0.040 | ± 0.050 | ± 0.060 |
| > 1.00 | ≤ 1.20 | ± 0.07 | ± 0.08 | ± 0.10 | ± 0.050 | ± 0.060 | ± 0.070 |
| > 1.20 | ≤ 1.60 | ± 0.09 | ± 0.11 | ± 0.12 | ± 0.060 | ± 0.070 | ± 0.080 |
| > 1.60 | ≤ 2.00 | ± 0.12 | ± 0.13 | ± 0.14 | ± 0.070 | ± 0.080 | ± 0.100 |
| > 2.00 | ≤ 2.50 | ± 0.14 | ± 0.15 | ± 0.16 | ± 0.100 | ± 0.110 | ± 0.120 |
| > 2.50 | ≤ 3.00 | ± 0.17 | ± 0.18 | ± 0.18 | ± 0.120 | ± 0.130 | ± 0.140 |
1. Around cold-rolled welds - the pickling welds - an increase of 20% at the most over the thickness
is allowed over a length of 15 metres.
2. For special tolerances, not all combinations of thickness and width are available in every product.
Please contact us for more details.
Tolerances on thickness for steel grades with a specified minimum yield strength
340 N/mm2 ≤ Re ≤ 420 N/mm2.
Nominal | Normal tolerances for a nominal width of 1 | Special tolerances (S) for a | |||||
|---|---|---|---|---|---|---|---|
| ≤ 1200 | > 1200 | > 1500 | ≤ 1200 | > 1200 | > 1500 | |
| ≤ 1500 |
|
| ≤ 1500 |
| ||
| ≥ 0.35 | ≤ 0.40 | ± 0.04 | ± 0.05 | ± 0.06 | ± 0.030 | ± 0.035 | ± 0.040 |
| > 0.40 | ≤ 0.60 | ± 0.05 | ± 0.06 | ± 0.07 | ± 0.035 | ± 0.040 | ± 0.050 |
| > 0.60 | ≤ 0.80 | ± 0.06 | ± 0.07 | ± 0.08 | ± 0.040 | ± 0.050 | ± 0.060 |
| > 0.80 | ≤ 1.00 | ± 0.07 | ± 0.08 | ± 0.10 | ± 0.050 | ± 0.060 | ± 0.070 |
| > 1.00 | ≤ 1.20 | ± 0.09 | ± 0.10 | ± 0.11 | ± 0.060 | ± 0.070 | ± 0.080 |
| > 1.20 | ≤ 1.60 | ± 0.11 | ± 0.12 | ± 0.14 | ± 0.070 | ± 0.080 | ± 0.100 |
| > 1.60 | ≤ 2.00 | ± 0.14 | ± 0.15 | ± 0.17 | ± 0.080 | ± 0.100 | ± 0.110 |
| > 2.00 | ≤ 2.50 | ± 0.16 | ± 0.18 | ± 0.19 | ± 0.110 | ± 0.120 | ± 0.130 |
| > 2.50 | ≤ 3.00 | ± 0.20 | ± 0.20 | ± 0.21 | ± 0.130 | ± 0.140 | ± 0.150 |
1. Around cold-rolled welds - the pickling welds - an increase of 20% at the most over the thickness
is allowed over a length of 15 metres.
2. For special tolerances, not all combinations of thickness and width are available in every product.
Please contact us for more details.
Tolerances on thickness for steel grades with a specified minimum yield strength
Re > 420 N/mm2.
Nominal | Normal tolerances for a nominal width of 1 | Special tolerances (S) for a | |||||
|---|---|---|---|---|---|---|---|
| ≤ 1200 | > 1200 | > 1500 | ≤ 1200 | > 1200 | > 1500 | |
| ≤ 1500 |
|
| ≤ 1500 |
| ||
| ≥ 0.35 | ≤ 0.40 | ± 0.05 | ± 0.06 | ± 0.07 | ± 0.035 | ± 0.040 | ± 0.050 |
| > 0.40 | ≤ 0.60 | ± 0.05 | ± 0.07 | ± 0.08 | ± 0.040 | ± 0.050 | ± 0.060 |
| > 0.60 | ≤ 0.80 | ± 0.06 | ± 0.08 | ± 0.10 | ± 0.050 | ± 0.060 | ± 0.070 |
| > 0.80 | ≤ 1.00 | ± 0.08 | ± 0.10 | ± 0.11 | ± 0.060 | ± 0.070 | ± 0.080 |
| > 1.00 | ≤ 1.20 | ± 0.10 | ± 0.11 | ± 0.13 | ± 0.070 | ± 0.080 | ± 0.100 |
| > 1.20 | ≤ 1.60 | ± 0.13 | ± 0.14 | ± 0.16 | ± 0.080 | ± 0.100 | ± 0.110 |
| > 1.60 | ≤ 2.00 | ± 0.16 | ± 0.17 | ± 0.19 | ± 0.100 | ± 0.110 | ± 0.130 |
| > 2.00 | ≤ 2.50 | ± 0.19 | ± 0.20 | ± 0.22 | ± 0.130 | ± 0.140 | ± 0.160 |
| > 2.50 | ≤ 3.00 | ± 0.22 | ± 0.23 | ± 0.24 | ± 0.160 | ± 0.170 | ± 0.180 |
1. Around cold-rolled welds - the pickling welds - an increase of 20% at the most over the thickness
is allowed over a length of 15 metres.
2. For special tolerances, not all combinations of thickness and width are available in every product.
Please contact us for more details.
Tolerances on width
Tolerance | Availability |
|---|---|
| Normal width tolerances | Available |
| Special width tolerances | Refer (± 0.50 mm available on 750 - 2000 mm width) |
Nominal width w | Normal tolerances | Special tolerances (S) | ||
|---|---|---|---|---|
| Under | Over | Under | Over |
| w ≤ 1200 | 0 | 4 | 0 | 2 |
| 1200 < w ≤ 1500 | 0 | 5 | 0 | 2 |
| w > 1500 | 0 | 6 | 0 | 3 |
Out-of-squareness (products supplied as cut sheets only)
The deviation does not exceed 1% of the actual width of the sheet according to the EN 10131: 2006 standard. The deviation from the edge camber does not exceed 5 mm for a length of 2 metres as specified in EN 10131: 2006.
Flatness (products supplied as skin-passed cut sheets only)
Flatness complies with EN 10131: 2006
If there is a dispute about the flatness of material that was ordered to the special tolerances shown in table 8 of EN 10131:2006, then the minimum acceptable standards of flatness described below must be verified.
Criteria in case of disputes over special (FS) flatness tolerances (ReL < 260 N/mm2)
Dimensions in mm.
Nominal width | Edge-wave length | Maximum acceptable wave height |
|---|---|---|
| < 1500 | > 200 | < 1% of edge-wave length |
| ≥ 1500 | > 200 | < 1.5% of edge-wave length |
| – | < 200 | 2 mm |
Winding
For winding, there may be a maximum width gap of 3mm between two consecutive windings. The total width stagger across the coil wall will not exceed 10 mm.
Dimensions and coil weights
Tata Steel can supply cold-rolled steel with the following minimum and maximum dimensions and coil weights.
| Description | Availability |
|---|---|
| Coil diameter inner | 610 mm |
| (508 mm available on request) | |
| Coil diameter outer | 10/7 x width max. |
| 1000 mm min. | |
| 2800 mm max. | |
| Coil weight | 30 t max. |
| 30 - 45 t max. available after consultation | |
| Coil weight limited by maximum outer diameter | |
| Maximum weight allowed by road/rail transport | |
| Some products may have different coil weight ranges available | |
| Usually a minimum coil weight up to 85% of the maximum coil weight can be requested | |
| KIM: width ≤ 1200 mm | 11.9 - 21.5 kg/mm width |
| KIM: 1200mm < width ≤ 1700 mm | 11.9 - 21 kg/mm width |
| KIM: width > 1700 mm | 10.3 kg/mm width and 11.9 - 21 kg/mm width |
| Minimum tonnage per order | Refer to price list for order quantity details |
| Minimum order quantities may apply |
Coil welds
For batch-annealed coils, in general, pickling line welds are included. The number of permissible recoiling line welds is determined in consultation with the customer. If welds are permitted, Tata Steel is better able to implement the best coil weight. A recoiling line weld is marked with a single hole in the centre of the strip, close to the weld. On request the identifying hole can be left out. You can find details on how to get in touch with us in 'Contact Us' below.
EN-EngineeringAutomotive-Product-Cold-rolled-All grades Further processingTSE
Further processing
We have a broad network of Tata Steel service centres across Europe, offering decoiling and slitting services from stock and against short lead times
Light gauge processing
| Processing type | Slitting | Decoiling | Blanking |
|---|---|---|---|
| Thickness range (mm) | 0.2 - 7.0 | 0.3 - 6.0 | 0.3 - 6.0 |
| Width range (mm) | 10 - 2050 | 50 - 2600 | 200 - 2600 |
| Length range | - | up to 6 m | up to 6 m |
| Locations | Netherlands Germany France Spain Sweden Norway Finland |
Netherlands Germany France Spain Sweden Norway Finland |
Netherlands |
For further information please visit our Service Centre webpages.
EN-Automotive-Product-Cold-rolled-HSS-HSLA260 TSE
EN-Automotive-Product-Cold-rolled-HSS-All Grades OverviewTSE
Micro-alloyed grades
Micro-alloyed grades have high-strength levels through precipitation and grain refinement hardening. Careful use of alloying elements ensures high mechanical resistance and good weldability. Micro alloyed grades are suited to pressed or stamped parts that require high strength and good formability eg. in seating or body in white structural parts.
Tata Steel supplies high-strength micro-alloyed (HSLA) steel which complies with European standard EN 10268:2006+A1:2013 and to VDA 239-100.
Rephosphorised grades
These grades deliver high mechanical resistance and good suitability for cold forming due to solid solution hardening by phosphorus. Our rephosphorised grades are highly suited to the manufacture of car body panels and structural components because of their good resistance to impact and fatigue.
Applications
Automotive components.
Relationship with standards
Tata Steel can supply the following cold-rolled high-strength steel grades:
Micro-alloyed grades
| Tata Steel | VDA (L) | EN 10268:2006+A1:2013 (T) | EN 10268:1998 (L) |
|---|---|---|---|
| Grade | Grade | Grade | Grade |
| HSLA220 | CR210LA | - | - |
| HSLA260 | CR240LA | HC260LA | H240LA |
| HSLA300 | CR270LA | HC300LA | H280LA |
| HSLA340 | CR300LA | HC340LA | H320LA |
| HSLA380 | CR340LA | HC380LA | H360LA |
| HSLA420 | CR380LA | HC420LA | H400LA |
L = longitudinal test direction, T= transverse test direction
Test direction can be specified
Rephosphorised grades
| Tata Steel | VDA | SEW 094 |
|---|---|---|
| Grade | Grade | Grade |
| P260 | - | ZSt E260P |
EN-EngineeringAutomotive-Product-Cold-rolled-All Grades Surface aspectsTSE
Surface quality
Surface quality A
Defects that do not influence the formability or the application of surface coatings are permitted. They are defects such as pores, minor scratches, slight indentations, small grooves or slight discolouration.
Surface quality B
The better side must be free of defects that can spoil the uniform appearance of a high-quality paint or of an electrolytic coating. The other side must at least conform to surface quality A. Not all combinations of thickness and width are available in surface quality B. Please contact us for details.
Inspected side
As a rule, the upper side of the strip is inspected; on request, the strip can be wound so that the inspected side is the underside.
Surface texture/roughness
Cold-rolled annealed and skin-passed steel is available in several surface textures. Unless specified otherwise, Tata Steel will supply normal roughness. The table below shows the range of surface textures according to EN 10130:2006.
|
|
Roughness Ra (µm) |
|
|---|---|---|
|
EN 10130: 2006 |
Symbol |
cut off 0.8 mm |
|
extra-bright 1 |
- |
≤ 0.3 |
|
bright |
b |
≤ 0.4 |
|
semi-bright |
g |
≤ 0.9 |
|
normal |
m |
0.6 - 1.9 |
|
rough |
r |
> 1.6 |
|
extra-rough 2 |
- |
3.5 - 5 |
1. Not in EN 10130:2006 - Tata Steel’s own specification. Please contact us regarding the availability
2. Not in EN 10130:2006 - Tata Steel’s own specification, measured with a cut off of 2.5 mm
Other surface textures are available to meet your requirements - please contact us for details.
Preservative oil
The standard oil applied by Tata Steel acts as a protective coating. Other types of oil may be available to meet your requirement.
Tata Steel offers a range of oiling levels from 0.25 - 1.7 g/m2 per side.
Other oiling levels are available on request. Tata Steel is not responsible for the risk of corrosion during storage or shipment if material is ordered in the un-oiled condition.
Surface cleanliness
Tata Steel can guarantee improved surface cleanliness on request for batch-annealed products. The cleanliness is tested with a tape test, in which the loss of reflection is measured. The reflection gives an indication of the oil residue on the annealed product. Two levels of loss of reflectivity are available for batch annealed products: a maximum of 20% or a maximum of 30%.
EN-Automotive-Product-Cold-rolled-HSS-HSLA260-Properties TSE
Properties
Mechanical properties
The available grades have the following mechanical properties - these are measured perpendicular to the rolling direction (transverse test pieces):
Micro-alloyed grades
| EN 10268: 2006+A1:2013 | Grade | HSLA260 |
|---|---|---|
| Yield strength Rp0,2 1 | N/mm2 | 260 - 330 |
| Tensile strength Rm | N/mm2 | 350 - 430 |
| Elongation 2 | % | 26 |
| Min. r-value r90 3 | - | |
| Min. n-value n90 | - |
1. If the yield strength is pronounced (yield flag), the values apply to the lower yield point (ReL).
2. When thickness ≤ 0.7mm, the minimum value for elongation is reduced by 2%.
Elongation after fracture A uses test piece length L0 = 80 mm.
3. For products with thickness > 2mm the minimum r90 is reduced by 0.2.
Chemical composition
Cold-rolled high-strength steels supplied by Tata Steel comply to the following cast analysis with maximum values unless otherwise shown:
Micro-alloyed grades
| EN 10268:2006+A1:2013 | Grade | HSLA260 |
|---|---|---|
| C | Max. | 0.10 |
| Mn | Max. | 1.00 |
| Si | Max. | 0.50 |
| P | Max. | 0.030 |
| S | Max. | 0.025 |
| Al | Min. | 0.015 |
| Ti 1 | Max. | 0.15 |
| Nb 1 | Max. | 0.09 |
1. These additional elements may be used individually or in combination where they appear in the definition of the steel within the composition limits indicated. Vanadium and boron may also be added. However, the sum of the contents of these four dispersoidal elements shall not exceed 0.22%.
All values are in weight%.
EN-Automotive-Product-Cold-rolled-HSS-HSLA260-Dimensions TSE
Dimensional capability - Continuously annealed (CA)
Dimensions in mm.
| Thickness | Max. width |
|---|---|
| From - up to | HSLA260 |
| 0.38 - 0.40 | 1390 |
| 0.40 - 0.43 | 1330 |
| 0.43 - 0.50 | 1390 |
| 0.50 - 0.60 | 1515 |
| 0.60 - 0.70 | 1600 |
| 0.70 - 0.90 | 1710 |
| 0.90 - 1.00 | 1820 |
| 1.00 - 1.20 | 1820 |
| 1.20 - 1.70 | 1750 |
| 1.70 - 1.80 | 1620 |
| 1.80 - 2.00 | 1500 |
Minimum width is 825 mm for all other grades
Dimensional capability – Batch annealed (BA)
Dimensions in mm.
| Thickness | Max. width |
|---|---|
| From - up to | HSLA260 |
| 0.40 - 0.50 | 1590 |
| 0.50 - 0.55 | 1640 |
| 0.55 - 0.60 | 1670 |
| 0.60 - 0.65 | 1700 |
| 0.65 - 0.70 | 1730 |
| 0.70 - 0.80 | 1760 |
| 0.80 - 0.90 | 1810 |
| 0.90 - 1.00 | 1840 |
| 1.00 - 1.10 | 1880 |
| 1.10 - 1.20 | 1920 |
| 1.20 - 1.30 | 1940 |
| 1.30 - 1.40 | 1970 |
| 1.40 - 1.50 | 1990 |
| 1.50 - 2.20 | 2000 |
| 2.20 - 2.30 | 1940 |
| 2.30 - 2.40 | 1880 |
| 2.40 - 2.50 | 1820 |
| 2.50 - 2.60 | 1750 |
| 2.60 - 2.70 | 1690 |
| 2.70 - 2.80 | 1650 |
| 2.80 - 2.90 | 1590 |
| 2.90 - 3.00 | 1530 |
Minimum width is 900 mm.
Other dimensions are available on request - please contact us.
Tolerances
Tolerances comply with standard EN 10131: 2006.
Tighter tolerances are available, please contact us for details.
EN-EngineeringAutomotive-Product-Cold-rolled-All Grades Shape and Dimensional TolerancesTSE
Tolerances on shape and dimensions comply with standard EN 10131: 2006
Tolerances on thickness
Tolerance (EN 10131: 2006) | Availability |
|---|---|
| Full thickness tolerance | Available |
| Special thickness tolerances | Available |
| 50% of full thickness tolerance | Refer before ordering |
Tolerances closer than special tolerances may be agreed at the time of enquiry.
Tolerances in mm.
Tolerances on thickness for steel grades with a specified minimum yield strength
Re < 260 N/mm2.
Nominal | Normal tolerances for a nominal width of 1 | Special tolerances (S) for a | |||||
|---|---|---|---|---|---|---|---|
| ≤ 1200 | > 1200 | > 1500 | ≤ 1200 | > 1200 | > 1500 | |
| ≤ 1500 |
|
| ≤ 1500 |
| ||
| ≥ 0.35 | ≤ 0.40 | ± 0.03 | ± 0.04 | ± 0.05 | ± 0.020 | ± 0.025 | ± 0.030 |
| > 0.40 | ≤ 0.60 | ± 0.03 | ± 0.04 | ± 0.05 | ± 0.025 | ± 0.030 | ± 0.035 |
| > 0.60 | ≤ 0.80 | ± 0.04 | ± 0.05 | ± 0.06 | ± 0.030 | ± 0.035 | ± 0.040 |
| > 0.80 | ≤ 1.00 | ± 0.05 | ± 0.06 | ± 0.07 | ± 0.035 | ± 0.040 | ± 0.050 |
| > 1.00 | ≤ 1.20 | ± 0.06 | ± 0.07 | ± 0.08 | ± 0.040 | ± 0.050 | ± 0.060 |
| > 1.20 | ≤ 1.60 | ± 0.08 | ± 0.09 | ± 0.10 | ± 0.050 | ± 0.060 | ± 0.070 |
| > 1.60 | ≤ 2.00 | ± 0.10 | ± 0.11 | ± 0.12 | ± 0.060 | ± 0.070 | ± 0.080 |
| > 2.00 | ≤ 2.50 | ± 0.12 | ± 0.13 | ± 0.14 | ± 0.080 | ± 0.090 | ± 0.100 |
| > 2.50 | ≤ 3.00 | ± 0.15 | ± 0.15 | ± 0.16 | ± 0.100 | ± 0.110 | ± 0.120 |
1. Around cold-rolled welds - the pickling welds - an increase of 20% at the most over the thickness
is allowed over a length of 15 metres.
2. For special tolerances, not all combinations of thickness and width are available in every product.
Please contact us for more details.
Tolerances on thickness for steel grades with a specified minimum yield strength
260 N/mm2 ≤ Re < 340 N/mm2.
Nominal | Normal tolerances for a nominal width of 1 | Special tolerances (S) for a | |||||
|---|---|---|---|---|---|---|---|
| ≤ 1200 | > 1200 | > 1500 | ≤ 1200 | > 1200 | > 1500 | |
| ≤ 1500 |
|
| ≤ 1500 |
| ||
| ≥ 0.35 | ≤ 0.40 | ± 0.04 | ± 0.05 | ± 0.06 | ± 0.025 | ± 0.030 | ± 0.035 |
| > 0.40 | ≤ 0.60 | ± 0.04 | ± 0.05 | ± 0.06 | ± 0.030 | ± 0.035 | ± 0.040 |
| > 0.60 | ≤ 0.80 | ± 0.05 | ± 0.06 | ± 0.07 | ± 0.035 | ± 0.040 | ± 0.050 |
| > 0.80 | ≤ 1.00 | ± 0.06 | ± 0.07 | ± 0.08 | ± 0.040 | ± 0.050 | ± 0.060 |
| > 1.00 | ≤ 1.20 | ± 0.07 | ± 0.08 | ± 0.10 | ± 0.050 | ± 0.060 | ± 0.070 |
| > 1.20 | ≤ 1.60 | ± 0.09 | ± 0.11 | ± 0.12 | ± 0.060 | ± 0.070 | ± 0.080 |
| > 1.60 | ≤ 2.00 | ± 0.12 | ± 0.13 | ± 0.14 | ± 0.070 | ± 0.080 | ± 0.100 |
| > 2.00 | ≤ 2.50 | ± 0.14 | ± 0.15 | ± 0.16 | ± 0.100 | ± 0.110 | ± 0.120 |
| > 2.50 | ≤ 3.00 | ± 0.17 | ± 0.18 | ± 0.18 | ± 0.120 | ± 0.130 | ± 0.140 |
1. Around cold-rolled welds - the pickling welds - an increase of 20% at the most over the thickness
is allowed over a length of 15 metres.
2. For special tolerances, not all combinations of thickness and width are available in every product.
Please contact us for more details.
Tolerances on thickness for steel grades with a specified minimum yield strength
340 N/mm2 ≤ Re ≤ 420 N/mm2.
Nominal | Normal tolerances for a nominal width of 1 | Special tolerances (S) for a | |||||
|---|---|---|---|---|---|---|---|
| ≤ 1200 | > 1200 | > 1500 | ≤ 1200 | > 1200 | > 1500 | |
| ≤ 1500 |
|
| ≤ 1500 |
| ||
| ≥ 0.35 | ≤ 0.40 | ± 0.04 | ± 0.05 | ± 0.06 | ± 0.030 | ± 0.035 | ± 0.040 |
| > 0.40 | ≤ 0.60 | ± 0.05 | ± 0.06 | ± 0.07 | ± 0.035 | ± 0.040 | ± 0.050 |
| > 0.60 | ≤ 0.80 | ± 0.06 | ± 0.07 | ± 0.08 | ± 0.040 | ± 0.050 | ± 0.060 |
| > 0.80 | ≤ 1.00 | ± 0.07 | ± 0.08 | ± 0.10 | ± 0.050 | ± 0.060 | ± 0.070 |
| > 1.00 | ≤ 1.20 | ± 0.09 | ± 0.10 | ± 0.11 | ± 0.060 | ± 0.070 | ± 0.080 |
| > 1.20 | ≤ 1.60 | ± 0.11 | ± 0.12 | ± 0.14 | ± 0.070 | ± 0.080 | ± 0.100 |
| > 1.60 | ≤ 2.00 | ± 0.14 | ± 0.15 | ± 0.17 | ± 0.080 | ± 0.100 | ± 0.110 |
| > 2.00 | ≤ 2.50 | ± 0.16 | ± 0.18 | ± 0.19 | ± 0.110 | ± 0.120 | ± 0.130 |
| > 2.50 | ≤ 3.00 | ± 0.20 | ± 0.20 | ± 0.21 | ± 0.130 | ± 0.140 | ± 0.150 |
1. Around cold-rolled welds - the pickling welds - an increase of 20% at the most over the thickness
is allowed over a length of 15 metres.
2. For special tolerances, not all combinations of thickness and width are available in every product.
Please contact us for more details.
Tolerances on thickness for steel grades with a specified minimum yield strength
Re > 420 N/mm2.
Nominal | Normal tolerances for a nominal width of 1 | Special tolerances (S) for a | |||||
|---|---|---|---|---|---|---|---|
| ≤ 1200 | > 1200 | > 1500 | ≤ 1200 | > 1200 | > 1500 | |
| ≤ 1500 |
|
| ≤ 1500 |
| ||
| ≥ 0.35 | ≤ 0.40 | ± 0.05 | ± 0.06 | ± 0.07 | ± 0.035 | ± 0.040 | ± 0.050 |
| > 0.40 | ≤ 0.60 | ± 0.05 | ± 0.07 | ± 0.08 | ± 0.040 | ± 0.050 | ± 0.060 |
| > 0.60 | ≤ 0.80 | ± 0.06 | ± 0.08 | ± 0.10 | ± 0.050 | ± 0.060 | ± 0.070 |
| > 0.80 | ≤ 1.00 | ± 0.08 | ± 0.10 | ± 0.11 | ± 0.060 | ± 0.070 | ± 0.080 |
| > 1.00 | ≤ 1.20 | ± 0.10 | ± 0.11 | ± 0.13 | ± 0.070 | ± 0.080 | ± 0.100 |
| > 1.20 | ≤ 1.60 | ± 0.13 | ± 0.14 | ± 0.16 | ± 0.080 | ± 0.100 | ± 0.110 |
| > 1.60 | ≤ 2.00 | ± 0.16 | ± 0.17 | ± 0.19 | ± 0.100 | ± 0.110 | ± 0.130 |
| > 2.00 | ≤ 2.50 | ± 0.19 | ± 0.20 | ± 0.22 | ± 0.130 | ± 0.140 | ± 0.160 |
| > 2.50 | ≤ 3.00 | ± 0.22 | ± 0.23 | ± 0.24 | ± 0.160 | ± 0.170 | ± 0.180 |
1. Around cold-rolled welds - the pickling welds - an increase of 20% at the most over the thickness
is allowed over a length of 15 metres.
2. For special tolerances, not all combinations of thickness and width are available in every product.
Please contact us for more details.
Tolerances on width
Tolerance | Availability |
|---|---|
| Normal width tolerances | Available |
| Special width tolerances | Refer (± 0.50 mm available on 750 - 2000 mm width) |
Nominal width w | Normal tolerances | Special tolerances (S) | ||
|---|---|---|---|---|
| Under | Over | Under | Over |
| w ≤ 1200 | 0 | 4 | 0 | 2 |
| 1200 < w ≤ 1500 | 0 | 5 | 0 | 2 |
| w > 1500 | 0 | 6 | 0 | 3 |
Out-of-squareness (products supplied as cut sheets only)
The deviation does not exceed 1% of the actual width of the sheet according to the EN 10131: 2006 standard. The deviation from the edge camber does not exceed 5 mm for a length of 2 metres as specified in EN 10131: 2006.
Flatness (products supplied as skin-passed cut sheets only)
Flatness complies with EN 10131: 2006
If there is a dispute about the flatness of material that was ordered to the special tolerances shown in table 8 of EN 10131:2006, then the minimum acceptable standards of flatness described below must be verified.
Criteria in case of disputes over special (FS) flatness tolerances (ReL < 260 N/mm2)
Dimensions in mm.
Nominal width | Edge-wave length | Maximum acceptable wave height |
|---|---|---|
| < 1500 | > 200 | < 1% of edge-wave length |
| ≥ 1500 | > 200 | < 1.5% of edge-wave length |
| – | < 200 | 2 mm |
Winding
For winding, there may be a maximum width gap of 3mm between two consecutive windings. The total width stagger across the coil wall will not exceed 10 mm.
Dimensions and coil weights
Tata Steel can supply cold-rolled steel with the following minimum and maximum dimensions and coil weights.
| Description | Availability |
|---|---|
| Coil diameter inner | 610 mm |
| (508 mm available on request) | |
| Coil diameter outer | 10/7 x width max. |
| 1000 mm min. | |
| 2800 mm max. | |
| Coil weight | 30 t max. |
| 30 - 45 t max. available after consultation | |
| Coil weight limited by maximum outer diameter | |
| Maximum weight allowed by road/rail transport | |
| Some products may have different coil weight ranges available | |
| Usually a minimum coil weight up to 85% of the maximum coil weight can be requested | |
| KIM: width ≤ 1200 mm | 11.9 - 21.5 kg/mm width |
| KIM: 1200mm < width ≤ 1700 mm | 11.9 - 21 kg/mm width |
| KIM: width > 1700 mm | 10.3 kg/mm width and 11.9 - 21 kg/mm width |
| Minimum tonnage per order | Refer to price list for order quantity details |
| Minimum order quantities may apply |
Coil welds
For batch-annealed coils, in general, pickling line welds are included. The number of permissible recoiling line welds is determined in consultation with the customer. If welds are permitted, Tata Steel is better able to implement the best coil weight. A recoiling line weld is marked with a single hole in the centre of the strip, close to the weld. On request the identifying hole can be left out. You can find details on how to get in touch with us in 'Contact Us' below.
EN-EngineeringAutomotive-Product-Cold-rolled-All grades Further processingTSE
Further processing
We have a broad network of Tata Steel service centres across Europe, offering decoiling and slitting services from stock and against short lead times
Light gauge processing
| Processing type | Slitting | Decoiling | Blanking |
|---|---|---|---|
| Thickness range (mm) | 0.2 - 7.0 | 0.3 - 6.0 | 0.3 - 6.0 |
| Width range (mm) | 10 - 2050 | 50 - 2600 | 200 - 2600 |
| Length range | - | up to 6 m | up to 6 m |
| Locations | Netherlands Germany France Spain Sweden Norway Finland |
Netherlands Germany France Spain Sweden Norway Finland |
Netherlands |
For further information please visit our Service Centre webpages.
EN-Automotive-Product-Cold-rolled-HSS-HSLA300 TSE
EN-Automotive-Product-Cold-rolled-HSS-All Grades OverviewTSE
Micro-alloyed grades
Micro-alloyed grades have high-strength levels through precipitation and grain refinement hardening. Careful use of alloying elements ensures high mechanical resistance and good weldability. Micro alloyed grades are suited to pressed or stamped parts that require high strength and good formability eg. in seating or body in white structural parts.
Tata Steel supplies high-strength micro-alloyed (HSLA) steel which complies with European standard EN 10268:2006+A1:2013 and to VDA 239-100.
Rephosphorised grades
These grades deliver high mechanical resistance and good suitability for cold forming due to solid solution hardening by phosphorus. Our rephosphorised grades are highly suited to the manufacture of car body panels and structural components because of their good resistance to impact and fatigue.
Applications
Automotive components.
Relationship with standards
Tata Steel can supply the following cold-rolled high-strength steel grades:
Micro-alloyed grades
| Tata Steel | VDA (L) | EN 10268:2006+A1:2013 (T) | EN 10268:1998 (L) |
|---|---|---|---|
| Grade | Grade | Grade | Grade |
| HSLA220 | CR210LA | - | - |
| HSLA260 | CR240LA | HC260LA | H240LA |
| HSLA300 | CR270LA | HC300LA | H280LA |
| HSLA340 | CR300LA | HC340LA | H320LA |
| HSLA380 | CR340LA | HC380LA | H360LA |
| HSLA420 | CR380LA | HC420LA | H400LA |
L = longitudinal test direction, T= transverse test direction
Test direction can be specified
Rephosphorised grades
| Tata Steel | VDA | SEW 094 |
|---|---|---|
| Grade | Grade | Grade |
| P260 | - | ZSt E260P |
EN-EngineeringAutomotive-Product-Cold-rolled-All Grades Surface aspectsTSE
Surface quality
Surface quality A
Defects that do not influence the formability or the application of surface coatings are permitted. They are defects such as pores, minor scratches, slight indentations, small grooves or slight discolouration.
Surface quality B
The better side must be free of defects that can spoil the uniform appearance of a high-quality paint or of an electrolytic coating. The other side must at least conform to surface quality A. Not all combinations of thickness and width are available in surface quality B. Please contact us for details.
Inspected side
As a rule, the upper side of the strip is inspected; on request, the strip can be wound so that the inspected side is the underside.
Surface texture/roughness
Cold-rolled annealed and skin-passed steel is available in several surface textures. Unless specified otherwise, Tata Steel will supply normal roughness. The table below shows the range of surface textures according to EN 10130:2006.
|
|
Roughness Ra (µm) |
|
|---|---|---|
|
EN 10130: 2006 |
Symbol |
cut off 0.8 mm |
|
extra-bright 1 |
- |
≤ 0.3 |
|
bright |
b |
≤ 0.4 |
|
semi-bright |
g |
≤ 0.9 |
|
normal |
m |
0.6 - 1.9 |
|
rough |
r |
> 1.6 |
|
extra-rough 2 |
- |
3.5 - 5 |
1. Not in EN 10130:2006 - Tata Steel’s own specification. Please contact us regarding the availability
2. Not in EN 10130:2006 - Tata Steel’s own specification, measured with a cut off of 2.5 mm
Other surface textures are available to meet your requirements - please contact us for details.
Preservative oil
The standard oil applied by Tata Steel acts as a protective coating. Other types of oil may be available to meet your requirement.
Tata Steel offers a range of oiling levels from 0.25 - 1.7 g/m2 per side.
Other oiling levels are available on request. Tata Steel is not responsible for the risk of corrosion during storage or shipment if material is ordered in the un-oiled condition.
Surface cleanliness
Tata Steel can guarantee improved surface cleanliness on request for batch-annealed products. The cleanliness is tested with a tape test, in which the loss of reflection is measured. The reflection gives an indication of the oil residue on the annealed product. Two levels of loss of reflectivity are available for batch annealed products: a maximum of 20% or a maximum of 30%.
EN-Automotive-Product-Cold-rolled-HSS-HSLA300-Properties TSE
Properties
Mechanical properties
The available grades have the following mechanical properties - these are measured perpendicular to the rolling direction (transverse test pieces):
Micro-alloyed grades
| EN 10268: 2006+A1:2013 | Grade | HSLA300 |
|---|---|---|
| Yield strength Rp0,2 1 | N/mm2 | 300 - 380 |
| Tensile strength Rm | N/mm2 | 380 - 480 |
| Elongation 2 | % | 23 |
| Min. r-value r90 3 | - | |
| Min. n-value n90 | - |
1. If the yield strength is pronounced (yield flag), the values apply to the lower yield point (ReL).
2. When thickness ≤ 0.7 mm, the minimum value for elongation is reduced by 2%.
Elongation after fracture A uses test piece length L0 = 80 mm.
3. For products with thickness > 2 mm the minimum r90 is reduced by 0.2.
Chemical composition
Cold-rolled high-strength steels supplied by Tata Steel comply to the following cast analysis with maximum values unless otherwise shown:
Micro-alloyed grades
| EN 10268:2006+A1:2013 | Grade | HSLA300 |
|---|---|---|
| C | Max. | 0.12 |
| Mn | Max. | 1.40 |
| Si | Max. | 0.50 |
| P | Max. | 0.030 |
| S | Max. | 0.025 |
| Al | Min. | 0.015 |
| Ti 1 | Max. | 0.15 |
| Nb 1 | Max. | 0.09 |
1. These additional elements may be used individually or in combination where they appear in the definition of the steel within the composition limits indicated. Vanadium and boron may also be added. However, the sum of the contents of these four dispersoidal elements shall not exceed 0.22%.
All values are in weight%.
EN-Automotive-Product-Cold-rolled-HSS-HSLA300-Dimensions TSE
Dimensional capability - Continuously annealed (CA)
Dimensions in mm.
| Thickness | Max. width |
|---|---|
| From - up to | HSLA300 |
| 0.38 - 0.50 | - |
| 0.50 - 0.60 | 1500 |
| 0.60 - 0.70 | 1545 |
| 0.70 - 1.00 | 1750 |
| 1.00 - 1.80 | 1750 |
| 1.80 - 2.00 | 1550 |
Minimum width is 825 mm.
Dimensional capability – Batch annealed (BA)
Dimensions in mm.
| Thickness | Max. width |
|---|---|
| From - up to | HSLA300 |
| 0.40 - 0.50 | - |
| 0.50 - 0.55 | 1520 |
| 0.55 - 0.60 | 1550 |
| 0.60 - 0.65 | 1570 |
| 0.65 - 0.70 | 1590 |
| 0.70 - 0.80 | 1620 |
| 0.80 - 0.90 | 1680 |
| 0.90 - 1.00 | 1710 |
| 1.00 - 1.10 | 1750 |
| 1.10 - 1.20 | 1780 |
| 1.20 - 1.30 | 1810 |
| 1.30 - 1.40 | 1830 |
| 1.40 - 1.50 | 1850 |
| 1.50 - 1.60 | 1870 |
| 1.60 - 1.80 | 1910 |
| 1.80 - 1.90 | 1900 |
| 1.90 - 2.00 | 1870 |
| 2.00 - 2.10 | 1840 |
| 2.10 - 2.20 | 1810 |
| 2.20 - 2.30 | 1770 |
| 2.30 - 2.40 | 1720 |
| 2.40 - 2.50 | 1670 |
| 2.50 - 2.60 | 1640 |
| 2.60 - 2.70 | 1570 |
| 2.70 - 2.80 | 1520 |
| 2.80 - 2.90 | 1460 |
| 2.90 - 3.00 | 1410 |
Minimum width is 900 mm.
Other dimensions are available on request - please contact us.
Tolerances
Tolerances comply with standard EN 10131: 2006.
Tighter tolerances are available, please contact us for details.
EN-EngineeringAutomotive-Product-Cold-rolled-All Grades Shape and Dimensional TolerancesTSE
Tolerances on shape and dimensions comply with standard EN 10131: 2006
Tolerances on thickness
Tolerance (EN 10131: 2006) | Availability |
|---|---|
| Full thickness tolerance | Available |
| Special thickness tolerances | Available |
| 50% of full thickness tolerance | Refer before ordering |
Tolerances closer than special tolerances may be agreed at the time of enquiry.
Tolerances in mm.
Tolerances on thickness for steel grades with a specified minimum yield strength
Re < 260 N/mm2.
Nominal | Normal tolerances for a nominal width of 1 | Special tolerances (S) for a | |||||
|---|---|---|---|---|---|---|---|
| ≤ 1200 | > 1200 | > 1500 | ≤ 1200 | > 1200 | > 1500 | |
| ≤ 1500 |
|
| ≤ 1500 |
| ||
| ≥ 0.35 | ≤ 0.40 | ± 0.03 | ± 0.04 | ± 0.05 | ± 0.020 | ± 0.025 | ± 0.030 |
| > 0.40 | ≤ 0.60 | ± 0.03 | ± 0.04 | ± 0.05 | ± 0.025 | ± 0.030 | ± 0.035 |
| > 0.60 | ≤ 0.80 | ± 0.04 | ± 0.05 | ± 0.06 | ± 0.030 | ± 0.035 | ± 0.040 |
| > 0.80 | ≤ 1.00 | ± 0.05 | ± 0.06 | ± 0.07 | ± 0.035 | ± 0.040 | ± 0.050 |
| > 1.00 | ≤ 1.20 | ± 0.06 | ± 0.07 | ± 0.08 | ± 0.040 | ± 0.050 | ± 0.060 |
| > 1.20 | ≤ 1.60 | ± 0.08 | ± 0.09 | ± 0.10 | ± 0.050 | ± 0.060 | ± 0.070 |
| > 1.60 | ≤ 2.00 | ± 0.10 | ± 0.11 | ± 0.12 | ± 0.060 | ± 0.070 | ± 0.080 |
| > 2.00 | ≤ 2.50 | ± 0.12 | ± 0.13 | ± 0.14 | ± 0.080 | ± 0.090 | ± 0.100 |
| > 2.50 | ≤ 3.00 | ± 0.15 | ± 0.15 | ± 0.16 | ± 0.100 | ± 0.110 | ± 0.120 |
1. Around cold-rolled welds - the pickling welds - an increase of 20% at the most over the thickness
is allowed over a length of 15 metres.
2. For special tolerances, not all combinations of thickness and width are available in every product.
Please contact us for more details.
Tolerances on thickness for steel grades with a specified minimum yield strength
260 N/mm2 ≤ Re < 340 N/mm2.
Nominal | Normal tolerances for a nominal width of 1 | Special tolerances (S) for a | |||||
|---|---|---|---|---|---|---|---|
| ≤ 1200 | > 1200 | > 1500 | ≤ 1200 | > 1200 | > 1500 | |
| ≤ 1500 |
|
| ≤ 1500 |
| ||
| ≥ 0.35 | ≤ 0.40 | ± 0.04 | ± 0.05 | ± 0.06 | ± 0.025 | ± 0.030 | ± 0.035 |
| > 0.40 | ≤ 0.60 | ± 0.04 | ± 0.05 | ± 0.06 | ± 0.030 | ± 0.035 | ± 0.040 |
| > 0.60 | ≤ 0.80 | ± 0.05 | ± 0.06 | ± 0.07 | ± 0.035 | ± 0.040 | ± 0.050 |
| > 0.80 | ≤ 1.00 | ± 0.06 | ± 0.07 | ± 0.08 | ± 0.040 | ± 0.050 | ± 0.060 |
| > 1.00 | ≤ 1.20 | ± 0.07 | ± 0.08 | ± 0.10 | ± 0.050 | ± 0.060 | ± 0.070 |
| > 1.20 | ≤ 1.60 | ± 0.09 | ± 0.11 | ± 0.12 | ± 0.060 | ± 0.070 | ± 0.080 |
| > 1.60 | ≤ 2.00 | ± 0.12 | ± 0.13 | ± 0.14 | ± 0.070 | ± 0.080 | ± 0.100 |
| > 2.00 | ≤ 2.50 | ± 0.14 | ± 0.15 | ± 0.16 | ± 0.100 | ± 0.110 | ± 0.120 |
| > 2.50 | ≤ 3.00 | ± 0.17 | ± 0.18 | ± 0.18 | ± 0.120 | ± 0.130 | ± 0.140 |
1. Around cold-rolled welds - the pickling welds - an increase of 20% at the most over the thickness
is allowed over a length of 15 metres.
2. For special tolerances, not all combinations of thickness and width are available in every product.
Please contact us for more details.
Tolerances on thickness for steel grades with a specified minimum yield strength
340 N/mm2 ≤ Re ≤ 420 N/mm2.
Nominal | Normal tolerances for a nominal width of 1 | Special tolerances (S) for a | |||||
|---|---|---|---|---|---|---|---|
| ≤ 1200 | > 1200 | > 1500 | ≤ 1200 | > 1200 | > 1500 | |
| ≤ 1500 |
|
| ≤ 1500 |
| ||
| ≥ 0.35 | ≤ 0.40 | ± 0.04 | ± 0.05 | ± 0.06 | ± 0.030 | ± 0.035 | ± 0.040 |
| > 0.40 | ≤ 0.60 | ± 0.05 | ± 0.06 | ± 0.07 | ± 0.035 | ± 0.040 | ± 0.050 |
| > 0.60 | ≤ 0.80 | ± 0.06 | ± 0.07 | ± 0.08 | ± 0.040 | ± 0.050 | ± 0.060 |
| > 0.80 | ≤ 1.00 | ± 0.07 | ± 0.08 | ± 0.10 | ± 0.050 | ± 0.060 | ± 0.070 |
| > 1.00 | ≤ 1.20 | ± 0.09 | ± 0.10 | ± 0.11 | ± 0.060 | ± 0.070 | ± 0.080 |
| > 1.20 | ≤ 1.60 | ± 0.11 | ± 0.12 | ± 0.14 | ± 0.070 | ± 0.080 | ± 0.100 |
| > 1.60 | ≤ 2.00 | ± 0.14 | ± 0.15 | ± 0.17 | ± 0.080 | ± 0.100 | ± 0.110 |
| > 2.00 | ≤ 2.50 | ± 0.16 | ± 0.18 | ± 0.19 | ± 0.110 | ± 0.120 | ± 0.130 |
| > 2.50 | ≤ 3.00 | ± 0.20 | ± 0.20 | ± 0.21 | ± 0.130 | ± 0.140 | ± 0.150 |
1. Around cold-rolled welds - the pickling welds - an increase of 20% at the most over the thickness
is allowed over a length of 15 metres.
2. For special tolerances, not all combinations of thickness and width are available in every product.
Please contact us for more details.
Tolerances on thickness for steel grades with a specified minimum yield strength
Re > 420 N/mm2.
Nominal | Normal tolerances for a nominal width of 1 | Special tolerances (S) for a | |||||
|---|---|---|---|---|---|---|---|
| ≤ 1200 | > 1200 | > 1500 | ≤ 1200 | > 1200 | > 1500 | |
| ≤ 1500 |
|
| ≤ 1500 |
| ||
| ≥ 0.35 | ≤ 0.40 | ± 0.05 | ± 0.06 | ± 0.07 | ± 0.035 | ± 0.040 | ± 0.050 |
| > 0.40 | ≤ 0.60 | ± 0.05 | ± 0.07 | ± 0.08 | ± 0.040 | ± 0.050 | ± 0.060 |
| > 0.60 | ≤ 0.80 | ± 0.06 | ± 0.08 | ± 0.10 | ± 0.050 | ± 0.060 | ± 0.070 |
| > 0.80 | ≤ 1.00 | ± 0.08 | ± 0.10 | ± 0.11 | ± 0.060 | ± 0.070 | ± 0.080 |
| > 1.00 | ≤ 1.20 | ± 0.10 | ± 0.11 | ± 0.13 | ± 0.070 | ± 0.080 | ± 0.100 |
| > 1.20 | ≤ 1.60 | ± 0.13 | ± 0.14 | ± 0.16 | ± 0.080 | ± 0.100 | ± 0.110 |
| > 1.60 | ≤ 2.00 | ± 0.16 | ± 0.17 | ± 0.19 | ± 0.100 | ± 0.110 | ± 0.130 |
| > 2.00 | ≤ 2.50 | ± 0.19 | ± 0.20 | ± 0.22 | ± 0.130 | ± 0.140 | ± 0.160 |
| > 2.50 | ≤ 3.00 | ± 0.22 | ± 0.23 | ± 0.24 | ± 0.160 | ± 0.170 | ± 0.180 |
1. Around cold-rolled welds - the pickling welds - an increase of 20% at the most over the thickness
is allowed over a length of 15 metres.
2. For special tolerances, not all combinations of thickness and width are available in every product.
Please contact us for more details.
Tolerances on width
Tolerance | Availability |
|---|---|
| Normal width tolerances | Available |
| Special width tolerances | Refer (± 0.50 mm available on 750 - 2000 mm width) |
Nominal width w | Normal tolerances | Special tolerances (S) | ||
|---|---|---|---|---|
| Under | Over | Under | Over |
| w ≤ 1200 | 0 | 4 | 0 | 2 |
| 1200 < w ≤ 1500 | 0 | 5 | 0 | 2 |
| w > 1500 | 0 | 6 | 0 | 3 |
Out-of-squareness (products supplied as cut sheets only)
The deviation does not exceed 1% of the actual width of the sheet according to the EN 10131: 2006 standard. The deviation from the edge camber does not exceed 5 mm for a length of 2 metres as specified in EN 10131: 2006.
Flatness (products supplied as skin-passed cut sheets only)
Flatness complies with EN 10131: 2006
If there is a dispute about the flatness of material that was ordered to the special tolerances shown in table 8 of EN 10131:2006, then the minimum acceptable standards of flatness described below must be verified.
Criteria in case of disputes over special (FS) flatness tolerances (ReL < 260 N/mm2)
Dimensions in mm.
Nominal width | Edge-wave length | Maximum acceptable wave height |
|---|---|---|
| < 1500 | > 200 | < 1% of edge-wave length |
| ≥ 1500 | > 200 | < 1.5% of edge-wave length |
| – | < 200 | 2 mm |
Winding
For winding, there may be a maximum width gap of 3mm between two consecutive windings. The total width stagger across the coil wall will not exceed 10 mm.
Dimensions and coil weights
Tata Steel can supply cold-rolled steel with the following minimum and maximum dimensions and coil weights.
| Description | Availability |
|---|---|
| Coil diameter inner | 610 mm |
| (508 mm available on request) | |
| Coil diameter outer | 10/7 x width max. |
| 1000 mm min. | |
| 2800 mm max. | |
| Coil weight | 30 t max. |
| 30 - 45 t max. available after consultation | |
| Coil weight limited by maximum outer diameter | |
| Maximum weight allowed by road/rail transport | |
| Some products may have different coil weight ranges available | |
| Usually a minimum coil weight up to 85% of the maximum coil weight can be requested | |
| KIM: width ≤ 1200 mm | 11.9 - 21.5 kg/mm width |
| KIM: 1200mm < width ≤ 1700 mm | 11.9 - 21 kg/mm width |
| KIM: width > 1700 mm | 10.3 kg/mm width and 11.9 - 21 kg/mm width |
| Minimum tonnage per order | Refer to price list for order quantity details |
| Minimum order quantities may apply |
Coil welds
For batch-annealed coils, in general, pickling line welds are included. The number of permissible recoiling line welds is determined in consultation with the customer. If welds are permitted, Tata Steel is better able to implement the best coil weight. A recoiling line weld is marked with a single hole in the centre of the strip, close to the weld. On request the identifying hole can be left out. You can find details on how to get in touch with us in 'Contact Us' below.
EN-EngineeringAutomotive-Product-Cold-rolled-All grades Further processingTSE
Further processing
We have a broad network of Tata Steel service centres across Europe, offering decoiling and slitting services from stock and against short lead times
Light gauge processing
| Processing type | Slitting | Decoiling | Blanking |
|---|---|---|---|
| Thickness range (mm) | 0.2 - 7.0 | 0.3 - 6.0 | 0.3 - 6.0 |
| Width range (mm) | 10 - 2050 | 50 - 2600 | 200 - 2600 |
| Length range | - | up to 6 m | up to 6 m |
| Locations | Netherlands Germany France Spain Sweden Norway Finland |
Netherlands Germany France Spain Sweden Norway Finland |
Netherlands |
For further information please visit our Service Centre webpages.
EN-Automotive-Product-Cold-rolled-HSS-HSLA340 TSE
EN-Automotive-Product-Cold-rolled-HSS-All Grades OverviewTSE
Micro-alloyed grades
Micro-alloyed grades have high-strength levels through precipitation and grain refinement hardening. Careful use of alloying elements ensures high mechanical resistance and good weldability. Micro alloyed grades are suited to pressed or stamped parts that require high strength and good formability eg. in seating or body in white structural parts.
Tata Steel supplies high-strength micro-alloyed (HSLA) steel which complies with European standard EN 10268:2006+A1:2013 and to VDA 239-100.
Rephosphorised grades
These grades deliver high mechanical resistance and good suitability for cold forming due to solid solution hardening by phosphorus. Our rephosphorised grades are highly suited to the manufacture of car body panels and structural components because of their good resistance to impact and fatigue.
Applications
Automotive components.
Relationship with standards
Tata Steel can supply the following cold-rolled high-strength steel grades:
Micro-alloyed grades
| Tata Steel | VDA (L) | EN 10268:2006+A1:2013 (T) | EN 10268:1998 (L) |
|---|---|---|---|
| Grade | Grade | Grade | Grade |
| HSLA220 | CR210LA | - | - |
| HSLA260 | CR240LA | HC260LA | H240LA |
| HSLA300 | CR270LA | HC300LA | H280LA |
| HSLA340 | CR300LA | HC340LA | H320LA |
| HSLA380 | CR340LA | HC380LA | H360LA |
| HSLA420 | CR380LA | HC420LA | H400LA |
L = longitudinal test direction, T= transverse test direction
Test direction can be specified
Rephosphorised grades
| Tata Steel | VDA | SEW 094 |
|---|---|---|
| Grade | Grade | Grade |
| P260 | - | ZSt E260P |
EN-EngineeringAutomotive-Product-Cold-rolled-All Grades Surface aspectsTSE
Surface quality
Surface quality A
Defects that do not influence the formability or the application of surface coatings are permitted. They are defects such as pores, minor scratches, slight indentations, small grooves or slight discolouration.
Surface quality B
The better side must be free of defects that can spoil the uniform appearance of a high-quality paint or of an electrolytic coating. The other side must at least conform to surface quality A. Not all combinations of thickness and width are available in surface quality B. Please contact us for details.
Inspected side
As a rule, the upper side of the strip is inspected; on request, the strip can be wound so that the inspected side is the underside.
Surface texture/roughness
Cold-rolled annealed and skin-passed steel is available in several surface textures. Unless specified otherwise, Tata Steel will supply normal roughness. The table below shows the range of surface textures according to EN 10130:2006.
|
|
Roughness Ra (µm) |
|
|---|---|---|
|
EN 10130: 2006 |
Symbol |
cut off 0.8 mm |
|
extra-bright 1 |
- |
≤ 0.3 |
|
bright |
b |
≤ 0.4 |
|
semi-bright |
g |
≤ 0.9 |
|
normal |
m |
0.6 - 1.9 |
|
rough |
r |
> 1.6 |
|
extra-rough 2 |
- |
3.5 - 5 |
1. Not in EN 10130:2006 - Tata Steel’s own specification. Please contact us regarding the availability
2. Not in EN 10130:2006 - Tata Steel’s own specification, measured with a cut off of 2.5 mm
Other surface textures are available to meet your requirements - please contact us for details.
Preservative oil
The standard oil applied by Tata Steel acts as a protective coating. Other types of oil may be available to meet your requirement.
Tata Steel offers a range of oiling levels from 0.25 - 1.7 g/m2 per side.
Other oiling levels are available on request. Tata Steel is not responsible for the risk of corrosion during storage or shipment if material is ordered in the un-oiled condition.
Surface cleanliness
Tata Steel can guarantee improved surface cleanliness on request for batch-annealed products. The cleanliness is tested with a tape test, in which the loss of reflection is measured. The reflection gives an indication of the oil residue on the annealed product. Two levels of loss of reflectivity are available for batch annealed products: a maximum of 20% or a maximum of 30%.
EN-Automotive-Product-Cold-rolled-HSS-HSLA340-Properties TSE
Properties
Mechanical properties
The available grades have the following mechanical properties - these are measured perpendicular to the rolling direction (transverse test pieces):
Micro-alloyed grades
| EN 10268: 2006+A1:2013 | Grade | HSLA340 |
|---|---|---|
| Yield strength Rp0,2 1 | N/mm2 | 340 - 420 |
| Tensile strength Rm | N/mm2 | 410 - 510 |
| Elongation 2 | % | 21 |
| Min. r-value r90 3 | - | |
| Min. n-value n90 | - |
1. If the yield strength is pronounced (yield flag), the values apply to the lower yield point (ReL).
2. When thickness ≤ 0.7mm, the minimum value for elongation is reduced by 2%.
Elongation after fracture A uses test piece length L0 = 80 mm.
3. For products with thickness > 2mm the minimum r90 is reduced by 0.2.
Chemical composition
Cold-rolled high-strength steels supplied by Tata Steel comply to the following cast analysis with maximum values unless otherwise shown:
Micro-alloyed grades
| EN 10268:2006+A1:2013 | Grade | HSLA340 |
|---|---|---|
| C | Max. | 0.12 |
| Mn | Max. | 1.50 |
| Si | Max. | 0.50 |
| P | Max. | 0.030 |
| S | Max. | 0.025 |
| Al | Min. | 0.015 |
| Ti 1 | Max. | 0.15 |
| Nb 1 | Max. | 0.09 |
1. These additional elements may be used individually or in combination where they appear in the definition of the steel within the composition limits indicated. Vanadium and boron may also be added. However, the sum of the contents of these four dispersoidal elements shall not exceed 0.22%.
All values are in weight%.
EN-Automotive-Product-Cold-rolled-HSS-HSLA340-Dimensions TSE
Dimensional capability - Continuously annealed (CA)
Dimensions in mm.
| Thickness | Max. width |
|---|---|
| From - up to | HSLA340 |
| 0.38 - 0.55 | - |
| 0.55 - 0.60 | 1500 |
| 0.60 - 1.00 | 1515 |
| 1.00 - 1.80 | 1545 |
| 1.80 - 2.00 | 1500 |
Minimum width is 825 mm
Dimensional capability – Batch annealed (BA)
Dimensions in mm.
| Thickness | Max. width |
|---|---|
| From - up to | HSLA340 |
| 0.40 - 0.60 | - |
| 0.60 - 0.65 | 1420 |
| 0.65 - 0.70 | 1450 |
| 0.70 - 0.80 | 1500 |
| 0.80 - 1.00 | 1600 |
| 1.00 - 1.10 | 1610 |
| 1.10 - 1.20 | 1620 |
| 1.20 - 1.30 | 1630 |
| 1.30 - 1.40 | 1680 |
| 1.40 - 1.50 | 1700 |
| 1.50 - 1.60 | 1670 |
| 1.60 - 1.70 | 1650 |
| 1.70 - 1.80 | 1620 |
| 1.80 - 1.90 | 1590 |
| 1.90 - 2.00 | 1560 |
| 2.00 - 2.10 | 1520 |
| 2.10 - 2.20 | 1480 |
| 2.20 - 2.30 | 1440 |
| 2.30 - 2.40 | 1400 |
| 2.40 - 2.50 | 1360 |
| 2.50 - 2.60 | 1320 |
| 2.60 - 2.70 | 1260 |
| 2.70 - 2.80 | 1200 |
| 2.80 - 2.90 | 1150 |
| 2.90 - 3.00 | - |
Minimum width is 900 mm.
Other dimensions are available on request - please contact us.
Tolerances
Tolerances comply with standard EN 10131: 2006.
Tighter tolerances are available, please contact us for details.
EN-EngineeringAutomotive-Product-Cold-rolled-All Grades Shape and Dimensional TolerancesTSE
Tolerances on shape and dimensions comply with standard EN 10131: 2006
Tolerances on thickness
Tolerance (EN 10131: 2006) | Availability |
|---|---|
| Full thickness tolerance | Available |
| Special thickness tolerances | Available |
| 50% of full thickness tolerance | Refer before ordering |
Tolerances closer than special tolerances may be agreed at the time of enquiry.
Tolerances in mm.
Tolerances on thickness for steel grades with a specified minimum yield strength
Re < 260 N/mm2.
Nominal | Normal tolerances for a nominal width of 1 | Special tolerances (S) for a | |||||
|---|---|---|---|---|---|---|---|
| ≤ 1200 | > 1200 | > 1500 | ≤ 1200 | > 1200 | > 1500 | |
| ≤ 1500 |
|
| ≤ 1500 |
| ||
| ≥ 0.35 | ≤ 0.40 | ± 0.03 | ± 0.04 | ± 0.05 | ± 0.020 | ± 0.025 | ± 0.030 |
| > 0.40 | ≤ 0.60 | ± 0.03 | ± 0.04 | ± 0.05 | ± 0.025 | ± 0.030 | ± 0.035 |
| > 0.60 | ≤ 0.80 | ± 0.04 | ± 0.05 | ± 0.06 | ± 0.030 | ± 0.035 | ± 0.040 |
| > 0.80 | ≤ 1.00 | ± 0.05 | ± 0.06 | ± 0.07 | ± 0.035 | ± 0.040 | ± 0.050 |
| > 1.00 | ≤ 1.20 | ± 0.06 | ± 0.07 | ± 0.08 | ± 0.040 | ± 0.050 | ± 0.060 |
| > 1.20 | ≤ 1.60 | ± 0.08 | ± 0.09 | ± 0.10 | ± 0.050 | ± 0.060 | ± 0.070 |
| > 1.60 | ≤ 2.00 | ± 0.10 | ± 0.11 | ± 0.12 | ± 0.060 | ± 0.070 | ± 0.080 |
| > 2.00 | ≤ 2.50 | ± 0.12 | ± 0.13 | ± 0.14 | ± 0.080 | ± 0.090 | ± 0.100 |
| > 2.50 | ≤ 3.00 | ± 0.15 | ± 0.15 | ± 0.16 | ± 0.100 | ± 0.110 | ± 0.120 |
1. Around cold-rolled welds - the pickling welds - an increase of 20% at the most over the thickness
is allowed over a length of 15 metres.
2. For special tolerances, not all combinations of thickness and width are available in every product.
Please contact us for more details.
Tolerances on thickness for steel grades with a specified minimum yield strength
260 N/mm2 ≤ Re < 340 N/mm2.
Nominal | Normal tolerances for a nominal width of 1 | Special tolerances (S) for a | |||||
|---|---|---|---|---|---|---|---|
| ≤ 1200 | > 1200 | > 1500 | ≤ 1200 | > 1200 | > 1500 | |
| ≤ 1500 |
|
| ≤ 1500 |
| ||
| ≥ 0.35 | ≤ 0.40 | ± 0.04 | ± 0.05 | ± 0.06 | ± 0.025 | ± 0.030 | ± 0.035 |
| > 0.40 | ≤ 0.60 | ± 0.04 | ± 0.05 | ± 0.06 | ± 0.030 | ± 0.035 | ± 0.040 |
| > 0.60 | ≤ 0.80 | ± 0.05 | ± 0.06 | ± 0.07 | ± 0.035 | ± 0.040 | ± 0.050 |
| > 0.80 | ≤ 1.00 | ± 0.06 | ± 0.07 | ± 0.08 | ± 0.040 | ± 0.050 | ± 0.060 |
| > 1.00 | ≤ 1.20 | ± 0.07 | ± 0.08 | ± 0.10 | ± 0.050 | ± 0.060 | ± 0.070 |
| > 1.20 | ≤ 1.60 | ± 0.09 | ± 0.11 | ± 0.12 | ± 0.060 | ± 0.070 | ± 0.080 |
| > 1.60 | ≤ 2.00 | ± 0.12 | ± 0.13 | ± 0.14 | ± 0.070 | ± 0.080 | ± 0.100 |
| > 2.00 | ≤ 2.50 | ± 0.14 | ± 0.15 | ± 0.16 | ± 0.100 | ± 0.110 | ± 0.120 |
| > 2.50 | ≤ 3.00 | ± 0.17 | ± 0.18 | ± 0.18 | ± 0.120 | ± 0.130 | ± 0.140 |
1. Around cold-rolled welds - the pickling welds - an increase of 20% at the most over the thickness
is allowed over a length of 15 metres.
2. For special tolerances, not all combinations of thickness and width are available in every product.
Please contact us for more details.
Tolerances on thickness for steel grades with a specified minimum yield strength
340 N/mm2 ≤ Re ≤ 420 N/mm2.
Nominal | Normal tolerances for a nominal width of 1 | Special tolerances (S) for a | |||||
|---|---|---|---|---|---|---|---|
| ≤ 1200 | > 1200 | > 1500 | ≤ 1200 | > 1200 | > 1500 | |
| ≤ 1500 |
|
| ≤ 1500 |
| ||
| ≥ 0.35 | ≤ 0.40 | ± 0.04 | ± 0.05 | ± 0.06 | ± 0.030 | ± 0.035 | ± 0.040 |
| > 0.40 | ≤ 0.60 | ± 0.05 | ± 0.06 | ± 0.07 | ± 0.035 | ± 0.040 | ± 0.050 |
| > 0.60 | ≤ 0.80 | ± 0.06 | ± 0.07 | ± 0.08 | ± 0.040 | ± 0.050 | ± 0.060 |
| > 0.80 | ≤ 1.00 | ± 0.07 | ± 0.08 | ± 0.10 | ± 0.050 | ± 0.060 | ± 0.070 |
| > 1.00 | ≤ 1.20 | ± 0.09 | ± 0.10 | ± 0.11 | ± 0.060 | ± 0.070 | ± 0.080 |
| > 1.20 | ≤ 1.60 | ± 0.11 | ± 0.12 | ± 0.14 | ± 0.070 | ± 0.080 | ± 0.100 |
| > 1.60 | ≤ 2.00 | ± 0.14 | ± 0.15 | ± 0.17 | ± 0.080 | ± 0.100 | ± 0.110 |
| > 2.00 | ≤ 2.50 | ± 0.16 | ± 0.18 | ± 0.19 | ± 0.110 | ± 0.120 | ± 0.130 |
| > 2.50 | ≤ 3.00 | ± 0.20 | ± 0.20 | ± 0.21 | ± 0.130 | ± 0.140 | ± 0.150 |
1. Around cold-rolled welds - the pickling welds - an increase of 20% at the most over the thickness
is allowed over a length of 15 metres.
2. For special tolerances, not all combinations of thickness and width are available in every product.
Please contact us for more details.
Tolerances on thickness for steel grades with a specified minimum yield strength
Re > 420 N/mm2.
Nominal | Normal tolerances for a nominal width of 1 | Special tolerances (S) for a | |||||
|---|---|---|---|---|---|---|---|
| ≤ 1200 | > 1200 | > 1500 | ≤ 1200 | > 1200 | > 1500 | |
| ≤ 1500 |
|
| ≤ 1500 |
| ||
| ≥ 0.35 | ≤ 0.40 | ± 0.05 | ± 0.06 | ± 0.07 | ± 0.035 | ± 0.040 | ± 0.050 |
| > 0.40 | ≤ 0.60 | ± 0.05 | ± 0.07 | ± 0.08 | ± 0.040 | ± 0.050 | ± 0.060 |
| > 0.60 | ≤ 0.80 | ± 0.06 | ± 0.08 | ± 0.10 | ± 0.050 | ± 0.060 | ± 0.070 |
| > 0.80 | ≤ 1.00 | ± 0.08 | ± 0.10 | ± 0.11 | ± 0.060 | ± 0.070 | ± 0.080 |
| > 1.00 | ≤ 1.20 | ± 0.10 | ± 0.11 | ± 0.13 | ± 0.070 | ± 0.080 | ± 0.100 |
| > 1.20 | ≤ 1.60 | ± 0.13 | ± 0.14 | ± 0.16 | ± 0.080 | ± 0.100 | ± 0.110 |
| > 1.60 | ≤ 2.00 | ± 0.16 | ± 0.17 | ± 0.19 | ± 0.100 | ± 0.110 | ± 0.130 |
| > 2.00 | ≤ 2.50 | ± 0.19 | ± 0.20 | ± 0.22 | ± 0.130 | ± 0.140 | ± 0.160 |
| > 2.50 | ≤ 3.00 | ± 0.22 | ± 0.23 | ± 0.24 | ± 0.160 | ± 0.170 | ± 0.180 |
1. Around cold-rolled welds - the pickling welds - an increase of 20% at the most over the thickness
is allowed over a length of 15 metres.
2. For special tolerances, not all combinations of thickness and width are available in every product.
Please contact us for more details.
Tolerances on width
Tolerance | Availability |
|---|---|
| Normal width tolerances | Available |
| Special width tolerances | Refer (± 0.50 mm available on 750 - 2000 mm width) |
Nominal width w | Normal tolerances | Special tolerances (S) | ||
|---|---|---|---|---|
| Under | Over | Under | Over |
| w ≤ 1200 | 0 | 4 | 0 | 2 |
| 1200 < w ≤ 1500 | 0 | 5 | 0 | 2 |
| w > 1500 | 0 | 6 | 0 | 3 |
Out-of-squareness (products supplied as cut sheets only)
The deviation does not exceed 1% of the actual width of the sheet according to the EN 10131: 2006 standard. The deviation from the edge camber does not exceed 5 mm for a length of 2 metres as specified in EN 10131: 2006.
Flatness (products supplied as skin-passed cut sheets only)
Flatness complies with EN 10131: 2006
If there is a dispute about the flatness of material that was ordered to the special tolerances shown in table 8 of EN 10131:2006, then the minimum acceptable standards of flatness described below must be verified.
Criteria in case of disputes over special (FS) flatness tolerances (ReL < 260 N/mm2)
Dimensions in mm.
Nominal width | Edge-wave length | Maximum acceptable wave height |
|---|---|---|
| < 1500 | > 200 | < 1% of edge-wave length |
| ≥ 1500 | > 200 | < 1.5% of edge-wave length |
| – | < 200 | 2 mm |
Winding
For winding, there may be a maximum width gap of 3mm between two consecutive windings. The total width stagger across the coil wall will not exceed 10 mm.
Dimensions and coil weights
Tata Steel can supply cold-rolled steel with the following minimum and maximum dimensions and coil weights.
| Description | Availability |
|---|---|
| Coil diameter inner | 610 mm |
| (508 mm available on request) | |
| Coil diameter outer | 10/7 x width max. |
| 1000 mm min. | |
| 2800 mm max. | |
| Coil weight | 30 t max. |
| 30 - 45 t max. available after consultation | |
| Coil weight limited by maximum outer diameter | |
| Maximum weight allowed by road/rail transport | |
| Some products may have different coil weight ranges available | |
| Usually a minimum coil weight up to 85% of the maximum coil weight can be requested | |
| KIM: width ≤ 1200 mm | 11.9 - 21.5 kg/mm width |
| KIM: 1200mm < width ≤ 1700 mm | 11.9 - 21 kg/mm width |
| KIM: width > 1700 mm | 10.3 kg/mm width and 11.9 - 21 kg/mm width |
| Minimum tonnage per order | Refer to price list for order quantity details |
| Minimum order quantities may apply |
Coil welds
For batch-annealed coils, in general, pickling line welds are included. The number of permissible recoiling line welds is determined in consultation with the customer. If welds are permitted, Tata Steel is better able to implement the best coil weight. A recoiling line weld is marked with a single hole in the centre of the strip, close to the weld. On request the identifying hole can be left out. You can find details on how to get in touch with us in 'Contact Us' below.
EN-EngineeringAutomotive-Product-Cold-rolled-All grades Further processingTSE
Further processing
We have a broad network of Tata Steel service centres across Europe, offering decoiling and slitting services from stock and against short lead times
Light gauge processing
| Processing type | Slitting | Decoiling | Blanking |
|---|---|---|---|
| Thickness range (mm) | 0.2 - 7.0 | 0.3 - 6.0 | 0.3 - 6.0 |
| Width range (mm) | 10 - 2050 | 50 - 2600 | 200 - 2600 |
| Length range | - | up to 6 m | up to 6 m |
| Locations | Netherlands Germany France Spain Sweden Norway Finland |
Netherlands Germany France Spain Sweden Norway Finland |
Netherlands |
For further information please visit our Service Centre webpages.
EN-Automotive-Product-Cold-rolled-HSS-HSLA380 TSE
EN-Automotive-Product-Cold-rolled-HSS-All Grades OverviewTSE
Micro-alloyed grades
Micro-alloyed grades have high-strength levels through precipitation and grain refinement hardening. Careful use of alloying elements ensures high mechanical resistance and good weldability. Micro alloyed grades are suited to pressed or stamped parts that require high strength and good formability eg. in seating or body in white structural parts.
Tata Steel supplies high-strength micro-alloyed (HSLA) steel which complies with European standard EN 10268:2006+A1:2013 and to VDA 239-100.
Rephosphorised grades
These grades deliver high mechanical resistance and good suitability for cold forming due to solid solution hardening by phosphorus. Our rephosphorised grades are highly suited to the manufacture of car body panels and structural components because of their good resistance to impact and fatigue.
Applications
Automotive components.
Relationship with standards
Tata Steel can supply the following cold-rolled high-strength steel grades:
Micro-alloyed grades
| Tata Steel | VDA (L) | EN 10268:2006+A1:2013 (T) | EN 10268:1998 (L) |
|---|---|---|---|
| Grade | Grade | Grade | Grade |
| HSLA220 | CR210LA | - | - |
| HSLA260 | CR240LA | HC260LA | H240LA |
| HSLA300 | CR270LA | HC300LA | H280LA |
| HSLA340 | CR300LA | HC340LA | H320LA |
| HSLA380 | CR340LA | HC380LA | H360LA |
| HSLA420 | CR380LA | HC420LA | H400LA |
L = longitudinal test direction, T= transverse test direction
Test direction can be specified
Rephosphorised grades
| Tata Steel | VDA | SEW 094 |
|---|---|---|
| Grade | Grade | Grade |
| P260 | - | ZSt E260P |
EN-EngineeringAutomotive-Product-Cold-rolled-All Grades Surface aspectsTSE
Surface quality
Surface quality A
Defects that do not influence the formability or the application of surface coatings are permitted. They are defects such as pores, minor scratches, slight indentations, small grooves or slight discolouration.
Surface quality B
The better side must be free of defects that can spoil the uniform appearance of a high-quality paint or of an electrolytic coating. The other side must at least conform to surface quality A. Not all combinations of thickness and width are available in surface quality B. Please contact us for details.
Inspected side
As a rule, the upper side of the strip is inspected; on request, the strip can be wound so that the inspected side is the underside.
Surface texture/roughness
Cold-rolled annealed and skin-passed steel is available in several surface textures. Unless specified otherwise, Tata Steel will supply normal roughness. The table below shows the range of surface textures according to EN 10130:2006.
|
|
Roughness Ra (µm) |
|
|---|---|---|
|
EN 10130: 2006 |
Symbol |
cut off 0.8 mm |
|
extra-bright 1 |
- |
≤ 0.3 |
|
bright |
b |
≤ 0.4 |
|
semi-bright |
g |
≤ 0.9 |
|
normal |
m |
0.6 - 1.9 |
|
rough |
r |
> 1.6 |
|
extra-rough 2 |
- |
3.5 - 5 |
1. Not in EN 10130:2006 - Tata Steel’s own specification. Please contact us regarding the availability
2. Not in EN 10130:2006 - Tata Steel’s own specification, measured with a cut off of 2.5 mm
Other surface textures are available to meet your requirements - please contact us for details.
Preservative oil
The standard oil applied by Tata Steel acts as a protective coating. Other types of oil may be available to meet your requirement.
Tata Steel offers a range of oiling levels from 0.25 - 1.7 g/m2 per side.
Other oiling levels are available on request. Tata Steel is not responsible for the risk of corrosion during storage or shipment if material is ordered in the un-oiled condition.
Surface cleanliness
Tata Steel can guarantee improved surface cleanliness on request for batch-annealed products. The cleanliness is tested with a tape test, in which the loss of reflection is measured. The reflection gives an indication of the oil residue on the annealed product. Two levels of loss of reflectivity are available for batch annealed products: a maximum of 20% or a maximum of 30%.
EN-Engineering-Product-Cold-rolled-HSS-HC380LA-Properties TSE
Properties
Mechanical properties
The available grades have the following mechanical properties - these are measured perpendicular to the rolling direction (transverse test pieces):
Micro-alloyed grades
| EN 10268: 2006+A1:2013 | Grade | HC380LA |
|---|---|---|
| Yield strength Rp0,2 1 | N/mm2 | 380 - 480 |
| Tensile strength Rm | N/mm2 | 440 - 580 |
| Elongation 2 | % | 19 |
| Min. r-value r90 3 | - | |
| Min. n-value n90 | - |
1. If the yield strength is pronounced (yield flag), the values apply to the lower yield point (ReL).
2. When thickness ≤ 0.7mm, the minimum value for elongation is reduced by 2%.
Elongation after fracture A uses test piece length L0 = 80 mm.
3. For products with thickness > 2mm the minimum r90 is reduced by 0.2.
Chemical composition
Cold-rolled high-strength steels supplied by Tata Steel comply to the following cast analysis with maximum values unless otherwise shown:
Micro-alloyed grades
| EN 10268:2006+A1:2013 | Grade | HC380LA |
|---|---|---|
| C | Max. | 0.12 |
| Mn | Max. | 1.60 |
| Si | Max. | 0.50 |
| P | Max. | 0.030 |
| S | Max. | 0.025 |
| Al | Min. | 0.015 |
| Ti 1 | Max. | 0.15 |
| Nb 1 | Max. | 0.09 |
1. These additional elements may be used individually or in combination where they appear in the definition of the steel within the composition limits indicated. Vanadium and boron may also be added. However, the sum of the contents of these four dispersoidal elements shall not exceed 0.22%.
All values are in weight%.
EN-Engineering-Product-Cold-rolled-HSS-HC380LA-Dimensions TSE
Dimensional capability – Batch annealed (BA)
Dimensions in mm.
| Thickness | Max. width |
|---|---|
| From - up to | HC380LA |
| 0.60 - 0.65 | 1380 |
| 0.65 - 0.70 | 1430 |
| 0.70 - 0.80 | 1480 |
| 0.80 - 0.90 | 1580 |
| 0.90 - 1.00 | 1600 |
| 1.00 - 1.10 | 1620 |
| 1.10 - 1.20 | 1650 |
| 1.20 - 1.30 | 1680 |
| 1.30 - 1.40 | 1700 |
| 1.40 - 1.50 | 1720 |
| 1.50 - 1.60 | 1700 |
| 1.60 - 1.70 | 1680 |
| 1.70 - 1.80 | 1650 |
| 1.80 - 1.90 | 1640 |
| 1.90 - 2.00 | 1630 |
| 2.00 - 2.10 | 1610 |
| 2.10 - 2.20 | 1500 |
| 2.20 - 2.30 | 1420 |
| 2.30 - 2.40 | 1360 |
| 2.40 - 2.50 | 1300 |
| 2.50 - 2.60 | 1240 |
| 2.60 - 2.70 | 1200 |
| 2.70 - 2.80 | 1150 |
Minimum width is 1050 mm for HC380LA and HC420LA.
Other dimensions are available on request - please contact us.
Tolerances
Tolerances comply with standard EN 10131: 2006.
Tighter tolerances are available, please contact us for details.
EN-EngineeringAutomotive-Product-Cold-rolled-All Grades Shape and Dimensional TolerancesTSE
Tolerances on shape and dimensions comply with standard EN 10131: 2006
Tolerances on thickness
Tolerance (EN 10131: 2006) | Availability |
|---|---|
| Full thickness tolerance | Available |
| Special thickness tolerances | Available |
| 50% of full thickness tolerance | Refer before ordering |
Tolerances closer than special tolerances may be agreed at the time of enquiry.
Tolerances in mm.
Tolerances on thickness for steel grades with a specified minimum yield strength
Re < 260 N/mm2.
Nominal | Normal tolerances for a nominal width of 1 | Special tolerances (S) for a | |||||
|---|---|---|---|---|---|---|---|
| ≤ 1200 | > 1200 | > 1500 | ≤ 1200 | > 1200 | > 1500 | |
| ≤ 1500 |
|
| ≤ 1500 |
| ||
| ≥ 0.35 | ≤ 0.40 | ± 0.03 | ± 0.04 | ± 0.05 | ± 0.020 | ± 0.025 | ± 0.030 |
| > 0.40 | ≤ 0.60 | ± 0.03 | ± 0.04 | ± 0.05 | ± 0.025 | ± 0.030 | ± 0.035 |
| > 0.60 | ≤ 0.80 | ± 0.04 | ± 0.05 | ± 0.06 | ± 0.030 | ± 0.035 | ± 0.040 |
| > 0.80 | ≤ 1.00 | ± 0.05 | ± 0.06 | ± 0.07 | ± 0.035 | ± 0.040 | ± 0.050 |
| > 1.00 | ≤ 1.20 | ± 0.06 | ± 0.07 | ± 0.08 | ± 0.040 | ± 0.050 | ± 0.060 |
| > 1.20 | ≤ 1.60 | ± 0.08 | ± 0.09 | ± 0.10 | ± 0.050 | ± 0.060 | ± 0.070 |
| > 1.60 | ≤ 2.00 | ± 0.10 | ± 0.11 | ± 0.12 | ± 0.060 | ± 0.070 | ± 0.080 |
| > 2.00 | ≤ 2.50 | ± 0.12 | ± 0.13 | ± 0.14 | ± 0.080 | ± 0.090 | ± 0.100 |
| > 2.50 | ≤ 3.00 | ± 0.15 | ± 0.15 | ± 0.16 | ± 0.100 | ± 0.110 | ± 0.120 |
1. Around cold-rolled welds - the pickling welds - an increase of 20% at the most over the thickness
is allowed over a length of 15 metres.
2. For special tolerances, not all combinations of thickness and width are available in every product.
Please contact us for more details.
Tolerances on thickness for steel grades with a specified minimum yield strength
260 N/mm2 ≤ Re < 340 N/mm2.
Nominal | Normal tolerances for a nominal width of 1 | Special tolerances (S) for a | |||||
|---|---|---|---|---|---|---|---|
| ≤ 1200 | > 1200 | > 1500 | ≤ 1200 | > 1200 | > 1500 | |
| ≤ 1500 |
|
| ≤ 1500 |
| ||
| ≥ 0.35 | ≤ 0.40 | ± 0.04 | ± 0.05 | ± 0.06 | ± 0.025 | ± 0.030 | ± 0.035 |
| > 0.40 | ≤ 0.60 | ± 0.04 | ± 0.05 | ± 0.06 | ± 0.030 | ± 0.035 | ± 0.040 |
| > 0.60 | ≤ 0.80 | ± 0.05 | ± 0.06 | ± 0.07 | ± 0.035 | ± 0.040 | ± 0.050 |
| > 0.80 | ≤ 1.00 | ± 0.06 | ± 0.07 | ± 0.08 | ± 0.040 | ± 0.050 | ± 0.060 |
| > 1.00 | ≤ 1.20 | ± 0.07 | ± 0.08 | ± 0.10 | ± 0.050 | ± 0.060 | ± 0.070 |
| > 1.20 | ≤ 1.60 | ± 0.09 | ± 0.11 | ± 0.12 | ± 0.060 | ± 0.070 | ± 0.080 |
| > 1.60 | ≤ 2.00 | ± 0.12 | ± 0.13 | ± 0.14 | ± 0.070 | ± 0.080 | ± 0.100 |
| > 2.00 | ≤ 2.50 | ± 0.14 | ± 0.15 | ± 0.16 | ± 0.100 | ± 0.110 | ± 0.120 |
| > 2.50 | ≤ 3.00 | ± 0.17 | ± 0.18 | ± 0.18 | ± 0.120 | ± 0.130 | ± 0.140 |
1. Around cold-rolled welds - the pickling welds - an increase of 20% at the most over the thickness
is allowed over a length of 15 metres.
2. For special tolerances, not all combinations of thickness and width are available in every product.
Please contact us for more details.
Tolerances on thickness for steel grades with a specified minimum yield strength
340 N/mm2 ≤ Re ≤ 420 N/mm2.
Nominal | Normal tolerances for a nominal width of 1 | Special tolerances (S) for a | |||||
|---|---|---|---|---|---|---|---|
| ≤ 1200 | > 1200 | > 1500 | ≤ 1200 | > 1200 | > 1500 | |
| ≤ 1500 |
|
| ≤ 1500 |
| ||
| ≥ 0.35 | ≤ 0.40 | ± 0.04 | ± 0.05 | ± 0.06 | ± 0.030 | ± 0.035 | ± 0.040 |
| > 0.40 | ≤ 0.60 | ± 0.05 | ± 0.06 | ± 0.07 | ± 0.035 | ± 0.040 | ± 0.050 |
| > 0.60 | ≤ 0.80 | ± 0.06 | ± 0.07 | ± 0.08 | ± 0.040 | ± 0.050 | ± 0.060 |
| > 0.80 | ≤ 1.00 | ± 0.07 | ± 0.08 | ± 0.10 | ± 0.050 | ± 0.060 | ± 0.070 |
| > 1.00 | ≤ 1.20 | ± 0.09 | ± 0.10 | ± 0.11 | ± 0.060 | ± 0.070 | ± 0.080 |
| > 1.20 | ≤ 1.60 | ± 0.11 | ± 0.12 | ± 0.14 | ± 0.070 | ± 0.080 | ± 0.100 |
| > 1.60 | ≤ 2.00 | ± 0.14 | ± 0.15 | ± 0.17 | ± 0.080 | ± 0.100 | ± 0.110 |
| > 2.00 | ≤ 2.50 | ± 0.16 | ± 0.18 | ± 0.19 | ± 0.110 | ± 0.120 | ± 0.130 |
| > 2.50 | ≤ 3.00 | ± 0.20 | ± 0.20 | ± 0.21 | ± 0.130 | ± 0.140 | ± 0.150 |
1. Around cold-rolled welds - the pickling welds - an increase of 20% at the most over the thickness
is allowed over a length of 15 metres.
2. For special tolerances, not all combinations of thickness and width are available in every product.
Please contact us for more details.
Tolerances on thickness for steel grades with a specified minimum yield strength
Re > 420 N/mm2.
Nominal | Normal tolerances for a nominal width of 1 | Special tolerances (S) for a | |||||
|---|---|---|---|---|---|---|---|
| ≤ 1200 | > 1200 | > 1500 | ≤ 1200 | > 1200 | > 1500 | |
| ≤ 1500 |
|
| ≤ 1500 |
| ||
| ≥ 0.35 | ≤ 0.40 | ± 0.05 | ± 0.06 | ± 0.07 | ± 0.035 | ± 0.040 | ± 0.050 |
| > 0.40 | ≤ 0.60 | ± 0.05 | ± 0.07 | ± 0.08 | ± 0.040 | ± 0.050 | ± 0.060 |
| > 0.60 | ≤ 0.80 | ± 0.06 | ± 0.08 | ± 0.10 | ± 0.050 | ± 0.060 | ± 0.070 |
| > 0.80 | ≤ 1.00 | ± 0.08 | ± 0.10 | ± 0.11 | ± 0.060 | ± 0.070 | ± 0.080 |
| > 1.00 | ≤ 1.20 | ± 0.10 | ± 0.11 | ± 0.13 | ± 0.070 | ± 0.080 | ± 0.100 |
| > 1.20 | ≤ 1.60 | ± 0.13 | ± 0.14 | ± 0.16 | ± 0.080 | ± 0.100 | ± 0.110 |
| > 1.60 | ≤ 2.00 | ± 0.16 | ± 0.17 | ± 0.19 | ± 0.100 | ± 0.110 | ± 0.130 |
| > 2.00 | ≤ 2.50 | ± 0.19 | ± 0.20 | ± 0.22 | ± 0.130 | ± 0.140 | ± 0.160 |
| > 2.50 | ≤ 3.00 | ± 0.22 | ± 0.23 | ± 0.24 | ± 0.160 | ± 0.170 | ± 0.180 |
1. Around cold-rolled welds - the pickling welds - an increase of 20% at the most over the thickness
is allowed over a length of 15 metres.
2. For special tolerances, not all combinations of thickness and width are available in every product.
Please contact us for more details.
Tolerances on width
Tolerance | Availability |
|---|---|
| Normal width tolerances | Available |
| Special width tolerances | Refer (± 0.50 mm available on 750 - 2000 mm width) |
Nominal width w | Normal tolerances | Special tolerances (S) | ||
|---|---|---|---|---|
| Under | Over | Under | Over |
| w ≤ 1200 | 0 | 4 | 0 | 2 |
| 1200 < w ≤ 1500 | 0 | 5 | 0 | 2 |
| w > 1500 | 0 | 6 | 0 | 3 |
Out-of-squareness (products supplied as cut sheets only)
The deviation does not exceed 1% of the actual width of the sheet according to the EN 10131: 2006 standard. The deviation from the edge camber does not exceed 5 mm for a length of 2 metres as specified in EN 10131: 2006.
Flatness (products supplied as skin-passed cut sheets only)
Flatness complies with EN 10131: 2006
If there is a dispute about the flatness of material that was ordered to the special tolerances shown in table 8 of EN 10131:2006, then the minimum acceptable standards of flatness described below must be verified.
Criteria in case of disputes over special (FS) flatness tolerances (ReL < 260 N/mm2)
Dimensions in mm.
Nominal width | Edge-wave length | Maximum acceptable wave height |
|---|---|---|
| < 1500 | > 200 | < 1% of edge-wave length |
| ≥ 1500 | > 200 | < 1.5% of edge-wave length |
| – | < 200 | 2 mm |
Winding
For winding, there may be a maximum width gap of 3mm between two consecutive windings. The total width stagger across the coil wall will not exceed 10 mm.
Dimensions and coil weights
Tata Steel can supply cold-rolled steel with the following minimum and maximum dimensions and coil weights.
| Description | Availability |
|---|---|
| Coil diameter inner | 610 mm |
| (508 mm available on request) | |
| Coil diameter outer | 10/7 x width max. |
| 1000 mm min. | |
| 2800 mm max. | |
| Coil weight | 30 t max. |
| 30 - 45 t max. available after consultation | |
| Coil weight limited by maximum outer diameter | |
| Maximum weight allowed by road/rail transport | |
| Some products may have different coil weight ranges available | |
| Usually a minimum coil weight up to 85% of the maximum coil weight can be requested | |
| KIM: width ≤ 1200 mm | 11.9 - 21.5 kg/mm width |
| KIM: 1200mm < width ≤ 1700 mm | 11.9 - 21 kg/mm width |
| KIM: width > 1700 mm | 10.3 kg/mm width and 11.9 - 21 kg/mm width |
| Minimum tonnage per order | Refer to price list for order quantity details |
| Minimum order quantities may apply |
Coil welds
For batch-annealed coils, in general, pickling line welds are included. The number of permissible recoiling line welds is determined in consultation with the customer. If welds are permitted, Tata Steel is better able to implement the best coil weight. A recoiling line weld is marked with a single hole in the centre of the strip, close to the weld. On request the identifying hole can be left out. You can find details on how to get in touch with us in 'Contact Us' below.
EN-EngineeringAutomotive-Product-Cold-rolled-All grades Further processingTSE
Further processing
We have a broad network of Tata Steel service centres across Europe, offering decoiling and slitting services from stock and against short lead times
Light gauge processing
| Processing type | Slitting | Decoiling | Blanking |
|---|---|---|---|
| Thickness range (mm) | 0.2 - 7.0 | 0.3 - 6.0 | 0.3 - 6.0 |
| Width range (mm) | 10 - 2050 | 50 - 2600 | 200 - 2600 |
| Length range | - | up to 6 m | up to 6 m |
| Locations | Netherlands Germany France Spain Sweden Norway Finland |
Netherlands Germany France Spain Sweden Norway Finland |
Netherlands |
For further information please visit our Service Centre webpages.
EN-Automotive-Product-Cold-rolled-HSS-HSLA420 TSE
EN-Automotive-Product-Cold-rolled-HSS-All Grades OverviewTSE
Micro-alloyed grades
Micro-alloyed grades have high-strength levels through precipitation and grain refinement hardening. Careful use of alloying elements ensures high mechanical resistance and good weldability. Micro alloyed grades are suited to pressed or stamped parts that require high strength and good formability eg. in seating or body in white structural parts.
Tata Steel supplies high-strength micro-alloyed (HSLA) steel which complies with European standard EN 10268:2006+A1:2013 and to VDA 239-100.
Rephosphorised grades
These grades deliver high mechanical resistance and good suitability for cold forming due to solid solution hardening by phosphorus. Our rephosphorised grades are highly suited to the manufacture of car body panels and structural components because of their good resistance to impact and fatigue.
Applications
Automotive components.
Relationship with standards
Tata Steel can supply the following cold-rolled high-strength steel grades:
Micro-alloyed grades
| Tata Steel | VDA (L) | EN 10268:2006+A1:2013 (T) | EN 10268:1998 (L) |
|---|---|---|---|
| Grade | Grade | Grade | Grade |
| HSLA220 | CR210LA | - | - |
| HSLA260 | CR240LA | HC260LA | H240LA |
| HSLA300 | CR270LA | HC300LA | H280LA |
| HSLA340 | CR300LA | HC340LA | H320LA |
| HSLA380 | CR340LA | HC380LA | H360LA |
| HSLA420 | CR380LA | HC420LA | H400LA |
L = longitudinal test direction, T= transverse test direction
Test direction can be specified
Rephosphorised grades
| Tata Steel | VDA | SEW 094 |
|---|---|---|
| Grade | Grade | Grade |
| P260 | - | ZSt E260P |
EN-EngineeringAutomotive-Product-Cold-rolled-All Grades Surface aspectsTSE
Surface quality
Surface quality A
Defects that do not influence the formability or the application of surface coatings are permitted. They are defects such as pores, minor scratches, slight indentations, small grooves or slight discolouration.
Surface quality B
The better side must be free of defects that can spoil the uniform appearance of a high-quality paint or of an electrolytic coating. The other side must at least conform to surface quality A. Not all combinations of thickness and width are available in surface quality B. Please contact us for details.
Inspected side
As a rule, the upper side of the strip is inspected; on request, the strip can be wound so that the inspected side is the underside.
Surface texture/roughness
Cold-rolled annealed and skin-passed steel is available in several surface textures. Unless specified otherwise, Tata Steel will supply normal roughness. The table below shows the range of surface textures according to EN 10130:2006.
|
|
Roughness Ra (µm) |
|
|---|---|---|
|
EN 10130: 2006 |
Symbol |
cut off 0.8 mm |
|
extra-bright 1 |
- |
≤ 0.3 |
|
bright |
b |
≤ 0.4 |
|
semi-bright |
g |
≤ 0.9 |
|
normal |
m |
0.6 - 1.9 |
|
rough |
r |
> 1.6 |
|
extra-rough 2 |
- |
3.5 - 5 |
1. Not in EN 10130:2006 - Tata Steel’s own specification. Please contact us regarding the availability
2. Not in EN 10130:2006 - Tata Steel’s own specification, measured with a cut off of 2.5 mm
Other surface textures are available to meet your requirements - please contact us for details.
Preservative oil
The standard oil applied by Tata Steel acts as a protective coating. Other types of oil may be available to meet your requirement.
Tata Steel offers a range of oiling levels from 0.25 - 1.7 g/m2 per side.
Other oiling levels are available on request. Tata Steel is not responsible for the risk of corrosion during storage or shipment if material is ordered in the un-oiled condition.
Surface cleanliness
Tata Steel can guarantee improved surface cleanliness on request for batch-annealed products. The cleanliness is tested with a tape test, in which the loss of reflection is measured. The reflection gives an indication of the oil residue on the annealed product. Two levels of loss of reflectivity are available for batch annealed products: a maximum of 20% or a maximum of 30%.
EN-Automotive-Product-Cold-rolled-HSS-HSLA420-Properties TSE
Properties
Mechanical properties
The available grades have the following mechanical properties - these are measured perpendicular to the rolling direction (transverse test pieces):
Micro-alloyed grades
| EN 10268: 2006+A1:2013 | Grade | HSLA420 |
|---|---|---|
| Yield strength Rp0,2 1 | N/mm2 | 420 - 520 |
| Tensile strength Rm | N/mm2 | 470 - 600 |
| Elongation 2 | % | 17 |
| Min. r-value r90 3 | - | |
| Min. n-value n90 | - |
1. If the yield strength is pronounced (yield flag), the values apply to the lower yield point (ReL).
2. When thickness ≤ 0.7mm, the minimum value for elongation is reduced by 2%.
Elongation after fracture A uses test piece length L0 = 80 mm.
3. For products with thickness > 2mm the minimum r90 is reduced by 0.2.
Chemical composition
Cold-rolled high-strength steels supplied by Tata Steel comply to the following cast analysis with maximum values unless otherwise shown:
Micro-alloyed grades
| EN 10268:2006+A1:2013 | Grade | HSLA420 |
|---|---|---|
| C | Max. | 0.14 |
| Mn | Max. | 1.60 |
| Si | Max. | 0.50 |
| P | Max. | 0.030 |
| S | Max. | 0.025 |
| Al | Min. | 0.015 |
| Ti 1 | Max. | 0.15 |
| Nb 1 | Max. | 0.09 |
1. These additional elements may be used individually or in combination where they appear in the definition of the steel within the composition limits indicated. Vanadium and boron may also be added. However, the sum of the contents of these four dispersoidal elements shall not exceed 0.22%.
All values are in weight%.
EN-Automotive-Product-Cold-rolled-HSS-HSLA420-Dimensions TSE
Dimensional capability - Continuously annealed (CA)
Dimensions in mm.
| Thickness | Max. width |
|---|---|
| From - up to | HSLA420 |
| 0.38 - 0.80 | - |
| 0.80 - 0.90 | 1300 |
| 0.90 - 1.00 | 1320 |
| 1.00 - 1.20 | 1400 |
| 1.20 - 1.80 | 1450 |
| 1.80 - 2.00 | - |
Minimum width is 825 mm.
Dimensional capability – Batch annealed (BA)
Dimensions in mm.
| Thickness | Max. width |
|---|---|
| From - up to | HSLA420 |
| 0.40 - 0.60 | - |
| 0.60 - 0.65 | 1100 |
| 0.65 - 0.70 | 1170 |
| 0.70 - 0.80 | 1190 |
| 0.80 - 0.90 | 1340 |
| 0.90 - 1.00 | 1380 |
| 1.00 - 1.10 | 1450 |
| 1.10 - 1.20 | 1480 |
| 1.20 - 1.30 | 1510 |
| 1.30 - 1.40 | 1560 |
| 1.40 - 1.50 | 1630 |
| 1.50 - 1.60 | 1580 |
| 1.60 - 1.70 | 1530 |
| 1.70 - 1.80 | 1500 |
| 1.80 - 1.90 | 1470 |
| 1.90 - 2.00 | 1440 |
| 2.00 - 2.10 | 1430 |
| 2.10 - 2.20 | 1410 |
| 2.20 - 2.30 | 1400 |
| 2.30 - 2.40 | 1390 |
| 2.40 - 2.50 | 1370 |
| 2.50 - 2.60 | 1320 |
| 2.60 - 2.70 | 1290 |
| 2.70 - 2.80 | 1250 |
| 2.80 - 2.90 | 1210 |
| 2.90 - 3.00 | 1170 |
Minimum width is 1050 mm for HC380LA and HC420LA.
Other dimensions are available on request - please contact us.
Tolerances
Tolerances comply with standard EN 10131: 2006.
Tighter tolerances are available, please contact us for details.
EN-EngineeringAutomotive-Product-Cold-rolled-All Grades Shape and Dimensional TolerancesTSE
Tolerances on shape and dimensions comply with standard EN 10131: 2006
Tolerances on thickness
Tolerance (EN 10131: 2006) | Availability |
|---|---|
| Full thickness tolerance | Available |
| Special thickness tolerances | Available |
| 50% of full thickness tolerance | Refer before ordering |
Tolerances closer than special tolerances may be agreed at the time of enquiry.
Tolerances in mm.
Tolerances on thickness for steel grades with a specified minimum yield strength
Re < 260 N/mm2.
Nominal | Normal tolerances for a nominal width of 1 | Special tolerances (S) for a | |||||
|---|---|---|---|---|---|---|---|
| ≤ 1200 | > 1200 | > 1500 | ≤ 1200 | > 1200 | > 1500 | |
| ≤ 1500 |
|
| ≤ 1500 |
| ||
| ≥ 0.35 | ≤ 0.40 | ± 0.03 | ± 0.04 | ± 0.05 | ± 0.020 | ± 0.025 | ± 0.030 |
| > 0.40 | ≤ 0.60 | ± 0.03 | ± 0.04 | ± 0.05 | ± 0.025 | ± 0.030 | ± 0.035 |
| > 0.60 | ≤ 0.80 | ± 0.04 | ± 0.05 | ± 0.06 | ± 0.030 | ± 0.035 | ± 0.040 |
| > 0.80 | ≤ 1.00 | ± 0.05 | ± 0.06 | ± 0.07 | ± 0.035 | ± 0.040 | ± 0.050 |
| > 1.00 | ≤ 1.20 | ± 0.06 | ± 0.07 | ± 0.08 | ± 0.040 | ± 0.050 | ± 0.060 |
| > 1.20 | ≤ 1.60 | ± 0.08 | ± 0.09 | ± 0.10 | ± 0.050 | ± 0.060 | ± 0.070 |
| > 1.60 | ≤ 2.00 | ± 0.10 | ± 0.11 | ± 0.12 | ± 0.060 | ± 0.070 | ± 0.080 |
| > 2.00 | ≤ 2.50 | ± 0.12 | ± 0.13 | ± 0.14 | ± 0.080 | ± 0.090 | ± 0.100 |
| > 2.50 | ≤ 3.00 | ± 0.15 | ± 0.15 | ± 0.16 | ± 0.100 | ± 0.110 | ± 0.120 |
1. Around cold-rolled welds - the pickling welds - an increase of 20% at the most over the thickness
is allowed over a length of 15 metres.
2. For special tolerances, not all combinations of thickness and width are available in every product.
Please contact us for more details.
Tolerances on thickness for steel grades with a specified minimum yield strength
260 N/mm2 ≤ Re < 340 N/mm2.
Nominal | Normal tolerances for a nominal width of 1 | Special tolerances (S) for a | |||||
|---|---|---|---|---|---|---|---|
| ≤ 1200 | > 1200 | > 1500 | ≤ 1200 | > 1200 | > 1500 | |
| ≤ 1500 |
|
| ≤ 1500 |
| ||
| ≥ 0.35 | ≤ 0.40 | ± 0.04 | ± 0.05 | ± 0.06 | ± 0.025 | ± 0.030 | ± 0.035 |
| > 0.40 | ≤ 0.60 | ± 0.04 | ± 0.05 | ± 0.06 | ± 0.030 | ± 0.035 | ± 0.040 |
| > 0.60 | ≤ 0.80 | ± 0.05 | ± 0.06 | ± 0.07 | ± 0.035 | ± 0.040 | ± 0.050 |
| > 0.80 | ≤ 1.00 | ± 0.06 | ± 0.07 | ± 0.08 | ± 0.040 | ± 0.050 | ± 0.060 |
| > 1.00 | ≤ 1.20 | ± 0.07 | ± 0.08 | ± 0.10 | ± 0.050 | ± 0.060 | ± 0.070 |
| > 1.20 | ≤ 1.60 | ± 0.09 | ± 0.11 | ± 0.12 | ± 0.060 | ± 0.070 | ± 0.080 |
| > 1.60 | ≤ 2.00 | ± 0.12 | ± 0.13 | ± 0.14 | ± 0.070 | ± 0.080 | ± 0.100 |
| > 2.00 | ≤ 2.50 | ± 0.14 | ± 0.15 | ± 0.16 | ± 0.100 | ± 0.110 | ± 0.120 |
| > 2.50 | ≤ 3.00 | ± 0.17 | ± 0.18 | ± 0.18 | ± 0.120 | ± 0.130 | ± 0.140 |
1. Around cold-rolled welds - the pickling welds - an increase of 20% at the most over the thickness
is allowed over a length of 15 metres.
2. For special tolerances, not all combinations of thickness and width are available in every product.
Please contact us for more details.
Tolerances on thickness for steel grades with a specified minimum yield strength
340 N/mm2 ≤ Re ≤ 420 N/mm2.
Nominal | Normal tolerances for a nominal width of 1 | Special tolerances (S) for a | |||||
|---|---|---|---|---|---|---|---|
| ≤ 1200 | > 1200 | > 1500 | ≤ 1200 | > 1200 | > 1500 | |
| ≤ 1500 |
|
| ≤ 1500 |
| ||
| ≥ 0.35 | ≤ 0.40 | ± 0.04 | ± 0.05 | ± 0.06 | ± 0.030 | ± 0.035 | ± 0.040 |
| > 0.40 | ≤ 0.60 | ± 0.05 | ± 0.06 | ± 0.07 | ± 0.035 | ± 0.040 | ± 0.050 |
| > 0.60 | ≤ 0.80 | ± 0.06 | ± 0.07 | ± 0.08 | ± 0.040 | ± 0.050 | ± 0.060 |
| > 0.80 | ≤ 1.00 | ± 0.07 | ± 0.08 | ± 0.10 | ± 0.050 | ± 0.060 | ± 0.070 |
| > 1.00 | ≤ 1.20 | ± 0.09 | ± 0.10 | ± 0.11 | ± 0.060 | ± 0.070 | ± 0.080 |
| > 1.20 | ≤ 1.60 | ± 0.11 | ± 0.12 | ± 0.14 | ± 0.070 | ± 0.080 | ± 0.100 |
| > 1.60 | ≤ 2.00 | ± 0.14 | ± 0.15 | ± 0.17 | ± 0.080 | ± 0.100 | ± 0.110 |
| > 2.00 | ≤ 2.50 | ± 0.16 | ± 0.18 | ± 0.19 | ± 0.110 | ± 0.120 | ± 0.130 |
| > 2.50 | ≤ 3.00 | ± 0.20 | ± 0.20 | ± 0.21 | ± 0.130 | ± 0.140 | ± 0.150 |
1. Around cold-rolled welds - the pickling welds - an increase of 20% at the most over the thickness
is allowed over a length of 15 metres.
2. For special tolerances, not all combinations of thickness and width are available in every product.
Please contact us for more details.
Tolerances on thickness for steel grades with a specified minimum yield strength
Re > 420 N/mm2.
Nominal | Normal tolerances for a nominal width of 1 | Special tolerances (S) for a | |||||
|---|---|---|---|---|---|---|---|
| ≤ 1200 | > 1200 | > 1500 | ≤ 1200 | > 1200 | > 1500 | |
| ≤ 1500 |
|
| ≤ 1500 |
| ||
| ≥ 0.35 | ≤ 0.40 | ± 0.05 | ± 0.06 | ± 0.07 | ± 0.035 | ± 0.040 | ± 0.050 |
| > 0.40 | ≤ 0.60 | ± 0.05 | ± 0.07 | ± 0.08 | ± 0.040 | ± 0.050 | ± 0.060 |
| > 0.60 | ≤ 0.80 | ± 0.06 | ± 0.08 | ± 0.10 | ± 0.050 | ± 0.060 | ± 0.070 |
| > 0.80 | ≤ 1.00 | ± 0.08 | ± 0.10 | ± 0.11 | ± 0.060 | ± 0.070 | ± 0.080 |
| > 1.00 | ≤ 1.20 | ± 0.10 | ± 0.11 | ± 0.13 | ± 0.070 | ± 0.080 | ± 0.100 |
| > 1.20 | ≤ 1.60 | ± 0.13 | ± 0.14 | ± 0.16 | ± 0.080 | ± 0.100 | ± 0.110 |
| > 1.60 | ≤ 2.00 | ± 0.16 | ± 0.17 | ± 0.19 | ± 0.100 | ± 0.110 | ± 0.130 |
| > 2.00 | ≤ 2.50 | ± 0.19 | ± 0.20 | ± 0.22 | ± 0.130 | ± 0.140 | ± 0.160 |
| > 2.50 | ≤ 3.00 | ± 0.22 | ± 0.23 | ± 0.24 | ± 0.160 | ± 0.170 | ± 0.180 |
1. Around cold-rolled welds - the pickling welds - an increase of 20% at the most over the thickness
is allowed over a length of 15 metres.
2. For special tolerances, not all combinations of thickness and width are available in every product.
Please contact us for more details.
Tolerances on width
Tolerance | Availability |
|---|---|
| Normal width tolerances | Available |
| Special width tolerances | Refer (± 0.50 mm available on 750 - 2000 mm width) |
Nominal width w | Normal tolerances | Special tolerances (S) | ||
|---|---|---|---|---|
| Under | Over | Under | Over |
| w ≤ 1200 | 0 | 4 | 0 | 2 |
| 1200 < w ≤ 1500 | 0 | 5 | 0 | 2 |
| w > 1500 | 0 | 6 | 0 | 3 |
Out-of-squareness (products supplied as cut sheets only)
The deviation does not exceed 1% of the actual width of the sheet according to the EN 10131: 2006 standard. The deviation from the edge camber does not exceed 5 mm for a length of 2 metres as specified in EN 10131: 2006.
Flatness (products supplied as skin-passed cut sheets only)
Flatness complies with EN 10131: 2006
If there is a dispute about the flatness of material that was ordered to the special tolerances shown in table 8 of EN 10131:2006, then the minimum acceptable standards of flatness described below must be verified.
Criteria in case of disputes over special (FS) flatness tolerances (ReL < 260 N/mm2)
Dimensions in mm.
Nominal width | Edge-wave length | Maximum acceptable wave height |
|---|---|---|
| < 1500 | > 200 | < 1% of edge-wave length |
| ≥ 1500 | > 200 | < 1.5% of edge-wave length |
| – | < 200 | 2 mm |
Winding
For winding, there may be a maximum width gap of 3mm between two consecutive windings. The total width stagger across the coil wall will not exceed 10 mm.
Dimensions and coil weights
Tata Steel can supply cold-rolled steel with the following minimum and maximum dimensions and coil weights.
| Description | Availability |
|---|---|
| Coil diameter inner | 610 mm |
| (508 mm available on request) | |
| Coil diameter outer | 10/7 x width max. |
| 1000 mm min. | |
| 2800 mm max. | |
| Coil weight | 30 t max. |
| 30 - 45 t max. available after consultation | |
| Coil weight limited by maximum outer diameter | |
| Maximum weight allowed by road/rail transport | |
| Some products may have different coil weight ranges available | |
| Usually a minimum coil weight up to 85% of the maximum coil weight can be requested | |
| KIM: width ≤ 1200 mm | 11.9 - 21.5 kg/mm width |
| KIM: 1200mm < width ≤ 1700 mm | 11.9 - 21 kg/mm width |
| KIM: width > 1700 mm | 10.3 kg/mm width and 11.9 - 21 kg/mm width |
| Minimum tonnage per order | Refer to price list for order quantity details |
| Minimum order quantities may apply |
Coil welds
For batch-annealed coils, in general, pickling line welds are included. The number of permissible recoiling line welds is determined in consultation with the customer. If welds are permitted, Tata Steel is better able to implement the best coil weight. A recoiling line weld is marked with a single hole in the centre of the strip, close to the weld. On request the identifying hole can be left out. You can find details on how to get in touch with us in 'Contact Us' below.
EN-EngineeringAutomotive-Product-Cold-rolled-All grades Further processingTSE
Further processing
We have a broad network of Tata Steel service centres across Europe, offering decoiling and slitting services from stock and against short lead times
Light gauge processing
| Processing type | Slitting | Decoiling | Blanking |
|---|---|---|---|
| Thickness range (mm) | 0.2 - 7.0 | 0.3 - 6.0 | 0.3 - 6.0 |
| Width range (mm) | 10 - 2050 | 50 - 2600 | 200 - 2600 |
| Length range | - | up to 6 m | up to 6 m |
| Locations | Netherlands Germany France Spain Sweden Norway Finland |
Netherlands Germany France Spain Sweden Norway Finland |
Netherlands |
For further information please visit our Service Centre webpages.
EN-Automotive-Product-Cold-rolled-HSS-P260 TSN
EN-Engineering-Product-Cold-rolled-HSS-All Grades OverviewTSE
Grades
Micro-alloyed grades
Micro-alloyed grades have high-strength levels through precipitation and grain refinement hardening. Careful use of alloying elements ensures high mechanical resistance and good weldability. There is limited scope for cold forming.
Tata Steel supplies high-strength micro-alloyed (HSLA) steel which complies with European standard EN 10268:2006+A1:2013.
Rephosphorised grades
These grades deliver high mechanical resistance and good suitability for cold forming due to solid solution hardening by phosphorus. Our rephosphorised grades are highly suited to the manufacture of car body panels and structural components because of their good resistance to impact and fatigue.
Applications
- Automotive components
- Construction components
- Furniture
- Precision tubes
- Steel panel radiators
Relationship with standards
Tata Steel can supply the following cold-rolled high-strength steel grades:
Micro-alloyed grades
| EN 10268:2006+A1:2013 (T) | EN 10268:1998 (L) |
|---|---|
| Grade | Grade |
| - | - |
| HC260LA | H240LA |
| HC300LA | H280LA |
| HC340LA | H320LA |
| HC380LA | H360LA |
| HC420LA | H400LA |
Rephosphorised grades
| Grade | SEW 094 Grade |
|---|---|
| HC260P | ZSt E260P |
EN-EngineeringAutomotive-Product-Cold-rolled-All Grades Surface aspectsTSE
Surface quality
Surface quality A
Defects that do not influence the formability or the application of surface coatings are permitted. They are defects such as pores, minor scratches, slight indentations, small grooves or slight discolouration.
Surface quality B
The better side must be free of defects that can spoil the uniform appearance of a high-quality paint or of an electrolytic coating. The other side must at least conform to surface quality A. Not all combinations of thickness and width are available in surface quality B. Please contact us for details.
Inspected side
As a rule, the upper side of the strip is inspected; on request, the strip can be wound so that the inspected side is the underside.
Surface texture/roughness
Cold-rolled annealed and skin-passed steel is available in several surface textures. Unless specified otherwise, Tata Steel will supply normal roughness. The table below shows the range of surface textures according to EN 10130:2006.
|
|
Roughness Ra (µm) |
|
|---|---|---|
|
EN 10130: 2006 |
Symbol |
cut off 0.8 mm |
|
extra-bright 1 |
- |
≤ 0.3 |
|
bright |
b |
≤ 0.4 |
|
semi-bright |
g |
≤ 0.9 |
|
normal |
m |
0.6 - 1.9 |
|
rough |
r |
> 1.6 |
|
extra-rough 2 |
- |
3.5 - 5 |
1. Not in EN 10130:2006 - Tata Steel’s own specification. Please contact us regarding the availability
2. Not in EN 10130:2006 - Tata Steel’s own specification, measured with a cut off of 2.5 mm
Other surface textures are available to meet your requirements - please contact us for details.
Preservative oil
The standard oil applied by Tata Steel acts as a protective coating. Other types of oil may be available to meet your requirement.
Tata Steel offers a range of oiling levels from 0.25 - 1.7 g/m2 per side.
Other oiling levels are available on request. Tata Steel is not responsible for the risk of corrosion during storage or shipment if material is ordered in the un-oiled condition.
Surface cleanliness
Tata Steel can guarantee improved surface cleanliness on request for batch-annealed products. The cleanliness is tested with a tape test, in which the loss of reflection is measured. The reflection gives an indication of the oil residue on the annealed product. Two levels of loss of reflectivity are available for batch annealed products: a maximum of 20% or a maximum of 30%.
EN-Automotive-Product-Cold-rolled-HSS-P260-Properties TSN
Properties
Mechanical properties
The available grades have the following mechanical properties - these are measured perpendicular to the rolling direction (transverse test pieces):
Rephosphorised grades
| Tata Steel | Grade | P260 |
|---|---|---|
| Yield strength Re 1 | N/mm2 | 260 - 320 |
| Tensile strength Rm | N/mm2 | 360 - 440 |
| Elongation 2 | % | 29 |
| Min. r-value 3 | - | |
| Min. n-value n90 | - |
1. If the yield strength is pronounced (yield flag), the values apply to the lower yield point (ReL).
2. When thickness ≤ 0.7mm, the minimum value for elongation is reduced by 2%.
Elongation after fracture A uses test piece length L0 = 80 mm.
3. For products with thickness > 2mm the minimum r90 is reduced by 0.2.
Chemical composition
Cold-rolled high-strength steels supplied by Tata Steel comply to the following cast analysis with maximum values unless otherwise shown:
Rephosphorised grades
| Tata Steel | Grade | P260 |
|---|---|---|
| C | Max. | 0.08 |
| Mn | Max. | 0.7 |
| Si | Max. | 0.5 |
| P | Max. | 0.1 |
| S | Max. | 0.025 |
| Al | Min. | 0.015 |
All values are in weight%.
EN-Automotive-Product-Cold-rolled-HSS-P260-Dimensions TSN
Dimensional capability – Batch annealed (BA)
Dimensions in mm.
| Thickness | Max. width |
|---|---|
| From - up to | P260 |
| 0.40 - 0.50 | - |
| 0.50 - 0.60 | 1500 |
| 0.60 - 1.00 | 1800 |
| 1.00 - 2.20 | 1800 |
| 2.20 - 2.40 | 1700 |
| 2.40 - 2.70 | 1600 |
| 2.70 - 3.00 | 1400 |
Minimum width is 900 mm.
Other dimensions are available on request - please contact us.
Tolerances
Tolerances comply with standard EN 10131: 2006.
Tighter tolerances are available, please contact us for details.
EN-EngineeringAutomotive-Product-Cold-rolled-All Grades Shape and Dimensional TolerancesTSE
Tolerances on shape and dimensions comply with standard EN 10131: 2006
Tolerances on thickness
Tolerance (EN 10131: 2006) | Availability |
|---|---|
| Full thickness tolerance | Available |
| Special thickness tolerances | Available |
| 50% of full thickness tolerance | Refer before ordering |
Tolerances closer than special tolerances may be agreed at the time of enquiry.
Tolerances in mm.
Tolerances on thickness for steel grades with a specified minimum yield strength
Re < 260 N/mm2.
Nominal | Normal tolerances for a nominal width of 1 | Special tolerances (S) for a | |||||
|---|---|---|---|---|---|---|---|
| ≤ 1200 | > 1200 | > 1500 | ≤ 1200 | > 1200 | > 1500 | |
| ≤ 1500 |
|
| ≤ 1500 |
| ||
| ≥ 0.35 | ≤ 0.40 | ± 0.03 | ± 0.04 | ± 0.05 | ± 0.020 | ± 0.025 | ± 0.030 |
| > 0.40 | ≤ 0.60 | ± 0.03 | ± 0.04 | ± 0.05 | ± 0.025 | ± 0.030 | ± 0.035 |
| > 0.60 | ≤ 0.80 | ± 0.04 | ± 0.05 | ± 0.06 | ± 0.030 | ± 0.035 | ± 0.040 |
| > 0.80 | ≤ 1.00 | ± 0.05 | ± 0.06 | ± 0.07 | ± 0.035 | ± 0.040 | ± 0.050 |
| > 1.00 | ≤ 1.20 | ± 0.06 | ± 0.07 | ± 0.08 | ± 0.040 | ± 0.050 | ± 0.060 |
| > 1.20 | ≤ 1.60 | ± 0.08 | ± 0.09 | ± 0.10 | ± 0.050 | ± 0.060 | ± 0.070 |
| > 1.60 | ≤ 2.00 | ± 0.10 | ± 0.11 | ± 0.12 | ± 0.060 | ± 0.070 | ± 0.080 |
| > 2.00 | ≤ 2.50 | ± 0.12 | ± 0.13 | ± 0.14 | ± 0.080 | ± 0.090 | ± 0.100 |
| > 2.50 | ≤ 3.00 | ± 0.15 | ± 0.15 | ± 0.16 | ± 0.100 | ± 0.110 | ± 0.120 |
1. Around cold-rolled welds - the pickling welds - an increase of 20% at the most over the thickness
is allowed over a length of 15 metres.
2. For special tolerances, not all combinations of thickness and width are available in every product.
Please contact us for more details.
Tolerances on thickness for steel grades with a specified minimum yield strength
260 N/mm2 ≤ Re < 340 N/mm2.
Nominal | Normal tolerances for a nominal width of 1 | Special tolerances (S) for a | |||||
|---|---|---|---|---|---|---|---|
| ≤ 1200 | > 1200 | > 1500 | ≤ 1200 | > 1200 | > 1500 | |
| ≤ 1500 |
|
| ≤ 1500 |
| ||
| ≥ 0.35 | ≤ 0.40 | ± 0.04 | ± 0.05 | ± 0.06 | ± 0.025 | ± 0.030 | ± 0.035 |
| > 0.40 | ≤ 0.60 | ± 0.04 | ± 0.05 | ± 0.06 | ± 0.030 | ± 0.035 | ± 0.040 |
| > 0.60 | ≤ 0.80 | ± 0.05 | ± 0.06 | ± 0.07 | ± 0.035 | ± 0.040 | ± 0.050 |
| > 0.80 | ≤ 1.00 | ± 0.06 | ± 0.07 | ± 0.08 | ± 0.040 | ± 0.050 | ± 0.060 |
| > 1.00 | ≤ 1.20 | ± 0.07 | ± 0.08 | ± 0.10 | ± 0.050 | ± 0.060 | ± 0.070 |
| > 1.20 | ≤ 1.60 | ± 0.09 | ± 0.11 | ± 0.12 | ± 0.060 | ± 0.070 | ± 0.080 |
| > 1.60 | ≤ 2.00 | ± 0.12 | ± 0.13 | ± 0.14 | ± 0.070 | ± 0.080 | ± 0.100 |
| > 2.00 | ≤ 2.50 | ± 0.14 | ± 0.15 | ± 0.16 | ± 0.100 | ± 0.110 | ± 0.120 |
| > 2.50 | ≤ 3.00 | ± 0.17 | ± 0.18 | ± 0.18 | ± 0.120 | ± 0.130 | ± 0.140 |
1. Around cold-rolled welds - the pickling welds - an increase of 20% at the most over the thickness
is allowed over a length of 15 metres.
2. For special tolerances, not all combinations of thickness and width are available in every product.
Please contact us for more details.
Tolerances on thickness for steel grades with a specified minimum yield strength
340 N/mm2 ≤ Re ≤ 420 N/mm2.
Nominal | Normal tolerances for a nominal width of 1 | Special tolerances (S) for a | |||||
|---|---|---|---|---|---|---|---|
| ≤ 1200 | > 1200 | > 1500 | ≤ 1200 | > 1200 | > 1500 | |
| ≤ 1500 |
|
| ≤ 1500 |
| ||
| ≥ 0.35 | ≤ 0.40 | ± 0.04 | ± 0.05 | ± 0.06 | ± 0.030 | ± 0.035 | ± 0.040 |
| > 0.40 | ≤ 0.60 | ± 0.05 | ± 0.06 | ± 0.07 | ± 0.035 | ± 0.040 | ± 0.050 |
| > 0.60 | ≤ 0.80 | ± 0.06 | ± 0.07 | ± 0.08 | ± 0.040 | ± 0.050 | ± 0.060 |
| > 0.80 | ≤ 1.00 | ± 0.07 | ± 0.08 | ± 0.10 | ± 0.050 | ± 0.060 | ± 0.070 |
| > 1.00 | ≤ 1.20 | ± 0.09 | ± 0.10 | ± 0.11 | ± 0.060 | ± 0.070 | ± 0.080 |
| > 1.20 | ≤ 1.60 | ± 0.11 | ± 0.12 | ± 0.14 | ± 0.070 | ± 0.080 | ± 0.100 |
| > 1.60 | ≤ 2.00 | ± 0.14 | ± 0.15 | ± 0.17 | ± 0.080 | ± 0.100 | ± 0.110 |
| > 2.00 | ≤ 2.50 | ± 0.16 | ± 0.18 | ± 0.19 | ± 0.110 | ± 0.120 | ± 0.130 |
| > 2.50 | ≤ 3.00 | ± 0.20 | ± 0.20 | ± 0.21 | ± 0.130 | ± 0.140 | ± 0.150 |
1. Around cold-rolled welds - the pickling welds - an increase of 20% at the most over the thickness
is allowed over a length of 15 metres.
2. For special tolerances, not all combinations of thickness and width are available in every product.
Please contact us for more details.
Tolerances on thickness for steel grades with a specified minimum yield strength
Re > 420 N/mm2.
Nominal | Normal tolerances for a nominal width of 1 | Special tolerances (S) for a | |||||
|---|---|---|---|---|---|---|---|
| ≤ 1200 | > 1200 | > 1500 | ≤ 1200 | > 1200 | > 1500 | |
| ≤ 1500 |
|
| ≤ 1500 |
| ||
| ≥ 0.35 | ≤ 0.40 | ± 0.05 | ± 0.06 | ± 0.07 | ± 0.035 | ± 0.040 | ± 0.050 |
| > 0.40 | ≤ 0.60 | ± 0.05 | ± 0.07 | ± 0.08 | ± 0.040 | ± 0.050 | ± 0.060 |
| > 0.60 | ≤ 0.80 | ± 0.06 | ± 0.08 | ± 0.10 | ± 0.050 | ± 0.060 | ± 0.070 |
| > 0.80 | ≤ 1.00 | ± 0.08 | ± 0.10 | ± 0.11 | ± 0.060 | ± 0.070 | ± 0.080 |
| > 1.00 | ≤ 1.20 | ± 0.10 | ± 0.11 | ± 0.13 | ± 0.070 | ± 0.080 | ± 0.100 |
| > 1.20 | ≤ 1.60 | ± 0.13 | ± 0.14 | ± 0.16 | ± 0.080 | ± 0.100 | ± 0.110 |
| > 1.60 | ≤ 2.00 | ± 0.16 | ± 0.17 | ± 0.19 | ± 0.100 | ± 0.110 | ± 0.130 |
| > 2.00 | ≤ 2.50 | ± 0.19 | ± 0.20 | ± 0.22 | ± 0.130 | ± 0.140 | ± 0.160 |
| > 2.50 | ≤ 3.00 | ± 0.22 | ± 0.23 | ± 0.24 | ± 0.160 | ± 0.170 | ± 0.180 |
1. Around cold-rolled welds - the pickling welds - an increase of 20% at the most over the thickness
is allowed over a length of 15 metres.
2. For special tolerances, not all combinations of thickness and width are available in every product.
Please contact us for more details.
Tolerances on width
Tolerance | Availability |
|---|---|
| Normal width tolerances | Available |
| Special width tolerances | Refer (± 0.50 mm available on 750 - 2000 mm width) |
Nominal width w | Normal tolerances | Special tolerances (S) | ||
|---|---|---|---|---|
| Under | Over | Under | Over |
| w ≤ 1200 | 0 | 4 | 0 | 2 |
| 1200 < w ≤ 1500 | 0 | 5 | 0 | 2 |
| w > 1500 | 0 | 6 | 0 | 3 |
Out-of-squareness (products supplied as cut sheets only)
The deviation does not exceed 1% of the actual width of the sheet according to the EN 10131: 2006 standard. The deviation from the edge camber does not exceed 5 mm for a length of 2 metres as specified in EN 10131: 2006.
Flatness (products supplied as skin-passed cut sheets only)
Flatness complies with EN 10131: 2006
If there is a dispute about the flatness of material that was ordered to the special tolerances shown in table 8 of EN 10131:2006, then the minimum acceptable standards of flatness described below must be verified.
Criteria in case of disputes over special (FS) flatness tolerances (ReL < 260 N/mm2)
Dimensions in mm.
Nominal width | Edge-wave length | Maximum acceptable wave height |
|---|---|---|
| < 1500 | > 200 | < 1% of edge-wave length |
| ≥ 1500 | > 200 | < 1.5% of edge-wave length |
| – | < 200 | 2 mm |
Winding
For winding, there may be a maximum width gap of 3mm between two consecutive windings. The total width stagger across the coil wall will not exceed 10 mm.
Dimensions and coil weights
Tata Steel can supply cold-rolled steel with the following minimum and maximum dimensions and coil weights.
| Description | Availability |
|---|---|
| Coil diameter inner | 610 mm |
| (508 mm available on request) | |
| Coil diameter outer | 10/7 x width max. |
| 1000 mm min. | |
| 2800 mm max. | |
| Coil weight | 30 t max. |
| 30 - 45 t max. available after consultation | |
| Coil weight limited by maximum outer diameter | |
| Maximum weight allowed by road/rail transport | |
| Some products may have different coil weight ranges available | |
| Usually a minimum coil weight up to 85% of the maximum coil weight can be requested | |
| KIM: width ≤ 1200 mm | 11.9 - 21.5 kg/mm width |
| KIM: 1200mm < width ≤ 1700 mm | 11.9 - 21 kg/mm width |
| KIM: width > 1700 mm | 10.3 kg/mm width and 11.9 - 21 kg/mm width |
| Minimum tonnage per order | Refer to price list for order quantity details |
| Minimum order quantities may apply |
Coil welds
For batch-annealed coils, in general, pickling line welds are included. The number of permissible recoiling line welds is determined in consultation with the customer. If welds are permitted, Tata Steel is better able to implement the best coil weight. A recoiling line weld is marked with a single hole in the centre of the strip, close to the weld. On request the identifying hole can be left out. You can find details on how to get in touch with us in 'Contact Us' below.
EN-EngineeringAutomotive-Product-Cold-rolled-All grades Further processingTSE
Further processing
We have a broad network of Tata Steel service centres across Europe, offering decoiling and slitting services from stock and against short lead times
Light gauge processing
| Processing type | Slitting | Decoiling | Blanking |
|---|---|---|---|
| Thickness range (mm) | 0.2 - 7.0 | 0.3 - 6.0 | 0.3 - 6.0 |
| Width range (mm) | 10 - 2050 | 50 - 2600 | 200 - 2600 |
| Length range | - | up to 6 m | up to 6 m |
| Locations | Netherlands Germany France Spain Sweden Norway Finland |
Netherlands Germany France Spain Sweden Norway Finland |
Netherlands |
For further information please visit our Service Centre webpages.
EN-Automotive-Contact-General sales - Automotive - general
Enquiries and customer services
Automotive sales enquiries and customer services
connect.automotive@tatasteeleurope.com
Please contact us for further information, questions and enquiries. Working together on sustainable vehicles and value chains.


