Steel for forming
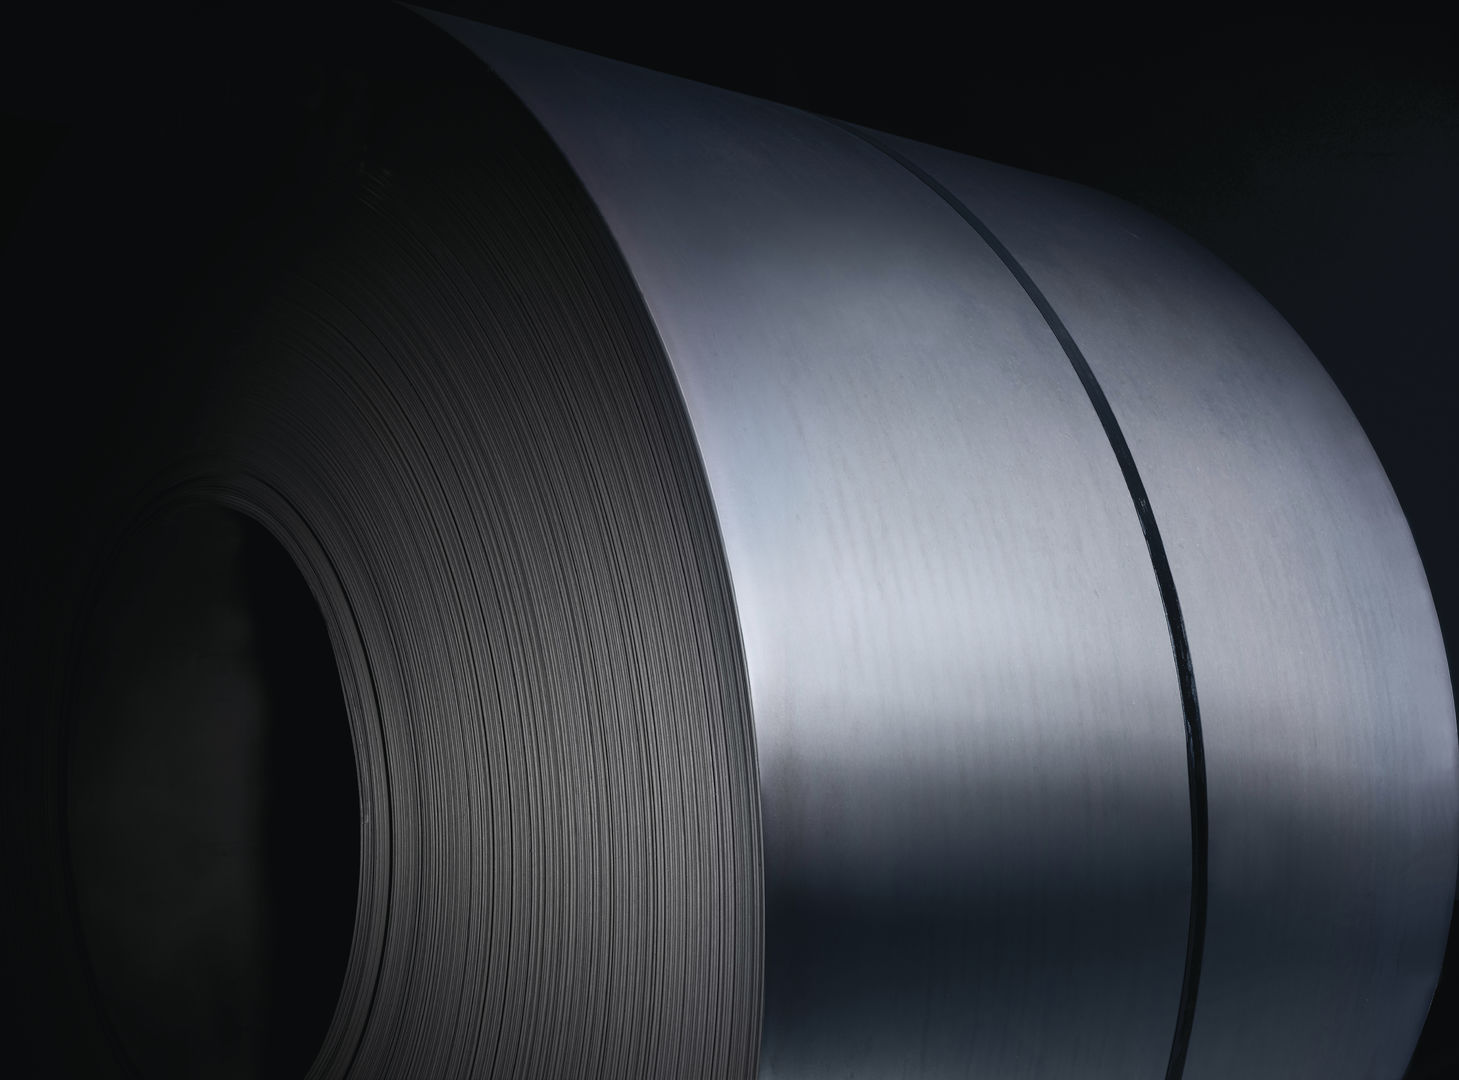
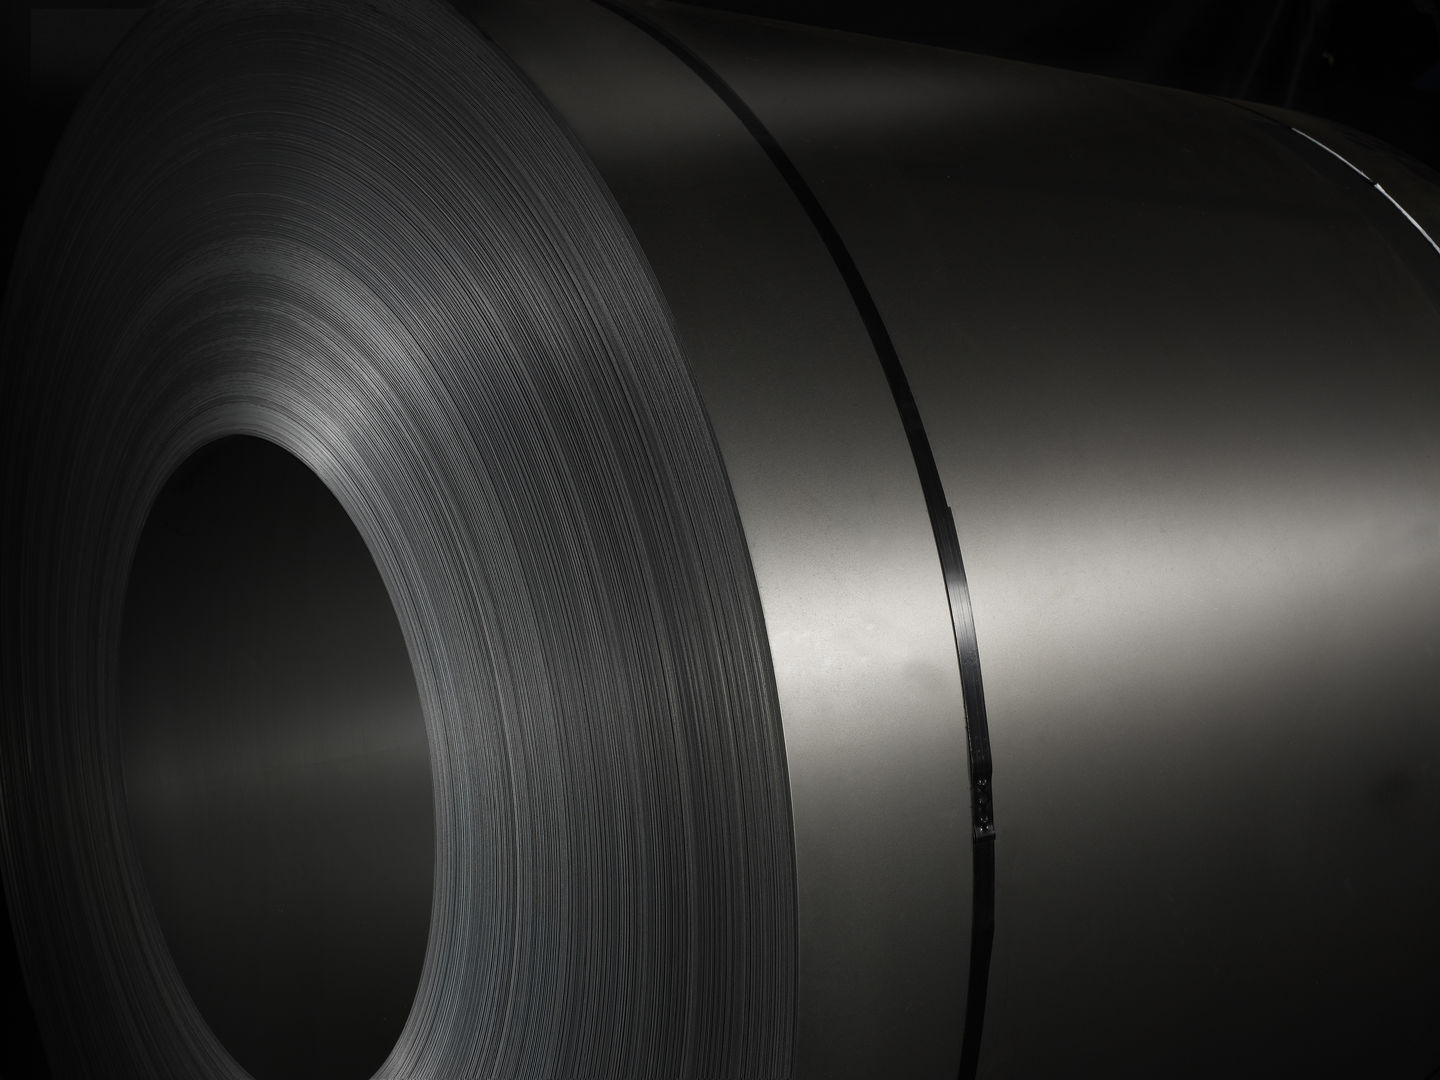
Hot-rolled steel for cold forming is used for bending and deep drawing.
Tata Steel’s forming grades offer consistency for reliable processing and low carbon content for excellent welding performance.
EN-Automotive-Product-Hot-Rolled-Forming-DD11 TSE
EN-Automotive-Product-Hot-Rolled-Forming-All grades OverviewTSE
Applications
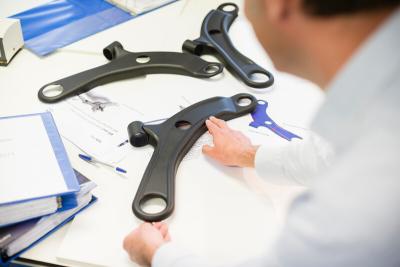
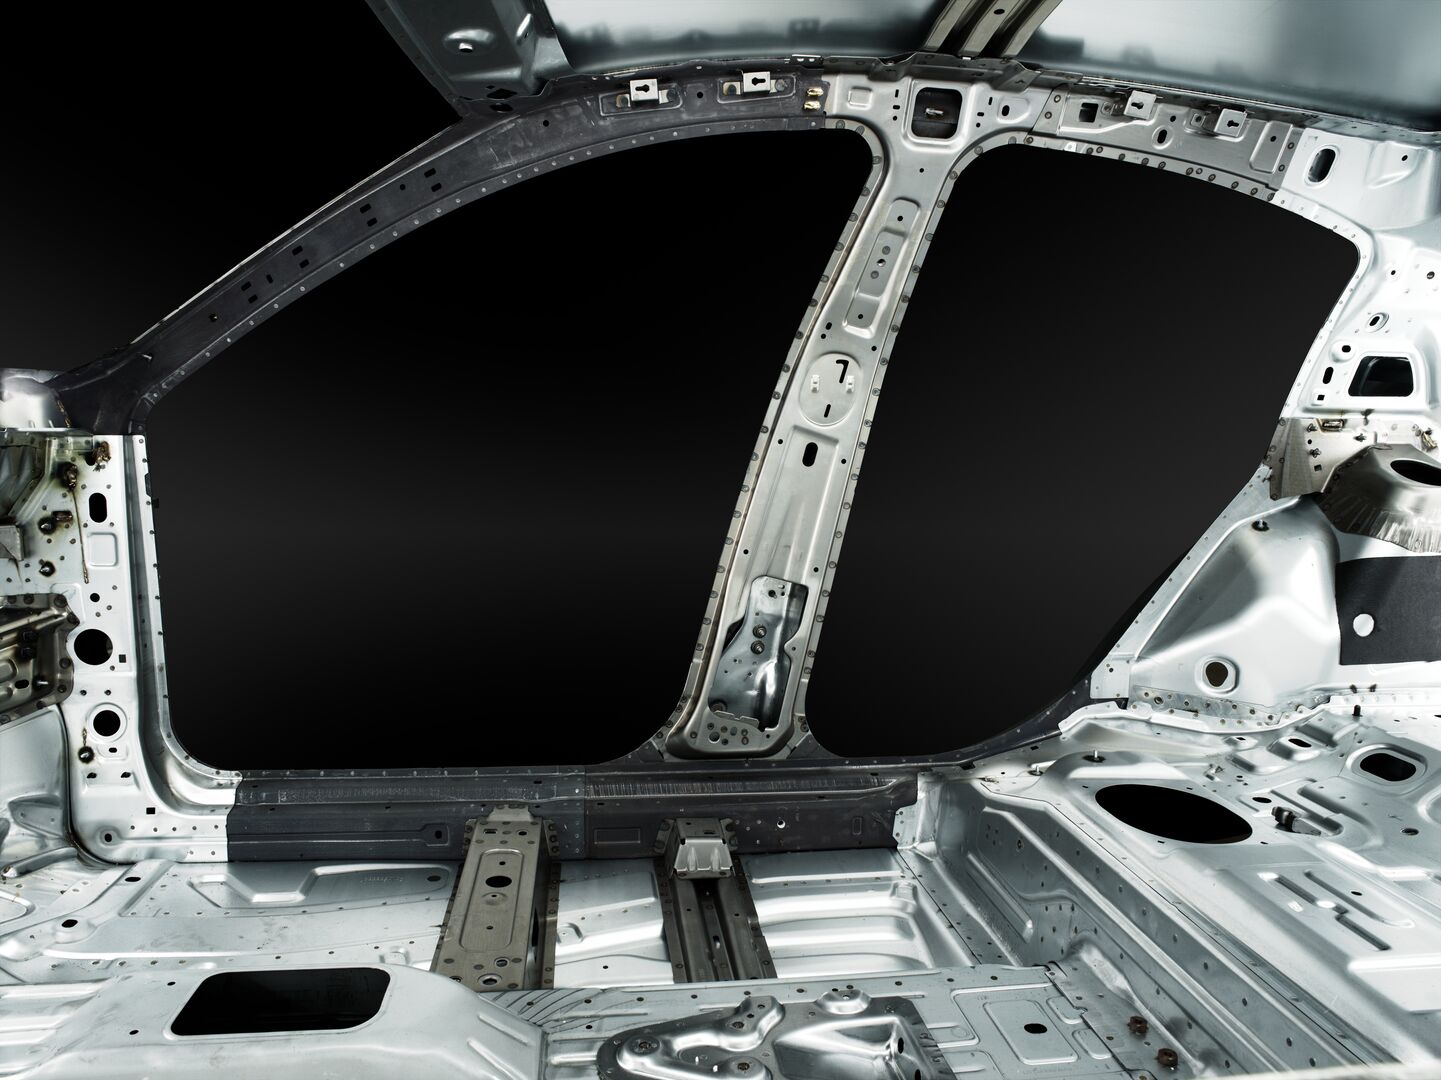
- Automotive components
Relationship with standards
Tata Steel offers hot-rolled steel for forming in grades that comply with EN 10111: 2008 and in a special Tata Steel grade as shown in the table below. All grades are available in qualities suitable for galvanising.
As the EN standard applies only to steel ≤ 11mm thick, please consult us about the properties of steel in other thicknesses.
| Tata Steel | VDA | European standard |
|---|---|---|
| Grade | VDA 239-100-16 | EN 10111: 2008 |
| DD11 | - | DD11 1 |
| DD12 | - | DD12 |
| DD13 | - | DD13 |
| DD14 | HR2 | DD14 |
1. DD11 products should be used within one month of their availability
EN-EngineeringAutomotive-Product-Hot-rolled-All Grades Surface aspects Supply Conditions TSE
Supply - product conditions
Hot-rolled steel can be supplied with these product conditions and finishes and with this surface treatment:
| Side/surface condition | non-pickled | pickled | pickled and oiled |
|---|---|---|---|
| Mill edges | Yes | Yes | Yes |
| Trimmed edges | - | Yes | Yes |
Trimmed edges available in thicknesses up to 8.0 mm. The steel grades shown on the following pages belong to the standard range offered by Tata Steel.
Please contact us regarding other specifications we may have that meet your needs.
Surface aspects
| Description | Availability |
|---|---|
| Surface finish | Coils are available in non-pickled and pickled finish |
| Oiling | Pickled finish is available with rolling or preservative oil applied. Oil weight normally 0.5-2.5 g/m2 |
Alternative oiling ranges are available.
Please contact us for details.
EN-EngineeringAutomotive-Product-Hot-Rolled-Forming-DD11-Properties TSE
Properties
Mechanical properties
The values shown for the mechanical properties in the table below are for test pieces taken transverse to the rolling direction:
| EN 10111: 2008 | Grade | DD11 |
|---|---|---|
| Yield strength ReL (N/mm2) | 1.5 ≤ t < 2 | 170 - 360 |
| 2 ≤ t < 11 | 170 - 340 | |
| Max. tensile strength Rm (N/mm2) | 440 | |
| Elongation (%) | 1.5 ≤ t < 2 | 23 |
| 2 ≤ t < 3 | 24 | |
| 3 ≤ t < 11 | 28 | |
| Min. bend test diameter | 1t |
Values are for test pieces taken transverse to the rolling direction:
t - material thickness in mm
Lower yield strength or 0.2% proof stress applies.
Test piece length L0 = 80 mm for thicknesses < 3mm and L0 = 5.65√S0 for thicknesses ≥3 mm
Chemical composition
Hot-rolled steel for forming meets the requirements of the cast analysis in the standard as shown in the table below:
| EN 10111: 2008 | Grade | DD11 |
|---|---|---|
| C | Max. | 0.12 |
| Mn | Max. | 0.60 |
| P | Max. | 0.045 |
| S | Max. | 0.045 |
Not in EN 10111: 2008. Tata Steel’s own specification.
All values are in weight%.
EN-Automotive-Product-Hot-Rolled-Forming-DD11-Dimensions TSE
Dimensions
Dimensional capability – pickled.
Dimensions in mm..
| Thickness | Max. width |
|---|---|
| From - up to | DD11 |
| 1.50 - 1.60 | 1330 |
| 1.60 - 1.70 | 1405 |
| 1.70 - 1.80 | 1480 |
| 1.80 - 1.90 | 1555 |
| 1.90 - 2.00 | 1630 |
| 2.00 - 2.20 | 1705 |
| 2.20 - 2.40 | 1820 |
| 2.40 - 2.50 | 1925 |
| 2.50 - 2.60 | 1970 |
| 2.60 - 2.70 | 2020 |
| 2.70 - 6.35 | 2070 |
The minimum width is 1000 mm.
For trimmed edges, reduce the maximum widths shown by 23 mm.
Thicknesses up to 11 mm may be available - please contact us.
Non-pickled (dry) condition is also available.
Please contact us with your specific requirements
EN-EngineeringAutomotive-Product-Hot-rolled-All grades Shape and dimensional tolerances TSE
Shape and dimensional tolerances
The specified values for wide strip do not apply to the uncropped ends of the coil (‘head’ and ‘tail’).
The length of these uncropped ends is calculated using the following formula:
length (in metres) = 90/nominal thickness (in mm), with a maximum of 20 metres.
If required, this part of the coil can be removed, however an additional cost may be charged for this.
Tolerances on thickness
Tata Steel can supply to full thickness tolerance specified in EN 10051:2010.
Tighter tolerances are available as shown below:
| Product type | Thickness tolerances available | |||||
|---|---|---|---|---|---|---|
| (% of full EN 10051:2010 tolerance) | ||||||
| 100% | 75% | 66% | 60% | 50% | 33% | |
| Steel for forming | Yes | Yes | Yes | Yes | Yes | Yes 1 |
| High-strength low-alloy (HSLA EN 10149-2) | Yes | Yes | Yes | Yes | Yes | Yes 1 |
| Ympress® HSLA | Yes | Yes 1 | ||||
| Ympress® Laser | Yes | Yes 1 | ||||
| Structural steel | Yes | Yes | Yes | Yes | Yes | Yes 1 |
| Manganese boron steel | Yes | Yes | Yes | Yes | Yes | |
| Case-hardening steel | Yes | Yes | Yes | Yes | Yes | |
| High-carbon steel | Yes | |||||
| Dual phase steel | Yes | |||||
| Hot forming steel | Yes | |||||
| Valast® abrasion resistant steel | Yes | Yes | Yes | Yes | Yes | |
| Steel for pressure vessels | Yes | |||||
| Steel for gas cylinders | Yes | |||||
| Steel for line pipe | Yes | |||||
| Ship plate | Yes | |||||
1. Available for certain grades and thicknesses between 3.0 mm and 6.0 mm.
Please contact us on the availability of special tolerances to meet your requirements.
Tolerances on thickness for hot-rolled steel with a low carbon content
for cold forming (DD11-DD14 in EN 10111:2008)
| Nominal thickness | Tolerances for a nominal width of | ||||
|---|---|---|---|---|---|
| ≤ 1200 | > 1200 | > 1500 | > 1800 | ||
| ≤ 1500 | ≤ 1800 | ||||
| ≤ 2.00 | ± 0.13 | ± 0.14 | ± 0.16 | - | |
| > 2.00 | ≤ 2.50 | ± 0.14 | ± 0.16 | ± 0.17 | ± 0.19 |
| > 2.50 | ≤ 3.00 | ± 0.15 | ± 0.17 | ± 0.18 | ± 0.20 |
| > 3.00 | ≤ 4.00 | ± 0.17 | ± 0.18 | ± 0.20 | ± 0.20 |
| > 4.00 | ≤ 5.00 | ± 0.18 | ± 0.20 | ± 0.21 | ± 0.22 |
| > 5.00 | ≤ 6.00 | ± 0.20 | ± 0.21 | ± 0.22 | ± 0.23 |
| > 6.00 | ≤ 8.00 | ± 0.22 | ± 0.23 | ± 0.23 | ± 0.26 |
| > 8.00 | ≤ 11.00 | ± 0.24 | ± 0.25 | ± 0.25 | ± 0.28 |
All dimensions are mm.
Tolerances on thickness of steel grades with a specified minimum
yield strength Re ≤ 300 N/mm2 (category A)
| Nominal thickness | Tolerances for a nominal width of | ||||
|---|---|---|---|---|---|
| ≤ 1200 | > 1200 | > 1500 | > 1800 | ||
| ≤ 1500 | ≤ 1800 | ||||
| ≤ 2.00 | ± 0.17 | ± 0.19 | ± 0.21 | - | |
| > 2.00 | ≤ 2.50 | ± 0.18 | ± 0.21 | ± 0.23 | ± 0.25 |
| > 2.50 | ≤ 3.00 | ± 0.20 | ± 0.22 | ± 0.24 | ± 0.26 |
| > 3.00 | ≤ 4.00 | ± 0.22 | ± 0.24 | ± 0.26 | ± 0.27 |
| > 4.00 | ≤ 5.00 | ± 0.24 | ± 0.26 | ± 0.28 | ± 0.29 |
| > 5.00 | ≤ 6.00 | ± 0.26 | ± 0.28 | ± 0.29 | ± 0.31 |
| > 6.00 | ≤ 8.00 | ± 0.29 | ± 0.30 | ± 0.31 | ± 0.35 |
| > 8.00 | ≤ 10.00 | ± 0.32 | ± 0.33 | ± 0.34 | ± 0.40 |
| > 10.00 | ≤ 12.50 | ± 0.35 | ± 0.36 | ± 0.37 | ± 0.43 |
| > 12.50 | ≤ 15.00 | ± 0.37 | ± 0.38 | ± 0.40 | ± 0.46 |
| > 15.00 | ≤ 25.00 | ± 0.40 | ± 0.42 | ± 0.45 | ± 0.50 |
All dimensions are mm.
Tolerances on thickness of steel grades with a specified minimum
yield strength 300 N/mm2 < Re ≤ 360 N/mm2 (category B)
| Nominal thickness | Tolerances for a nominal width of | ||||
|---|---|---|---|---|---|
| ≤ 1200 | > 1200 | > 1500 | > 1800 | ||
| ≤ 1500 | ≤ 1800 | ||||
| ≤ 2.00 | ± 0.20 | ± 0.22 | ± 0.24 | - | |
| > 2.00 | ≤ 2.50 | ± 0.21 | ± 0.24 | ± 0.26 | ± 0.29 |
| > 2.50 | ≤ 3.00 | ± 0.23 | ± 0.25 | ± 0.28 | ± 0.30 |
| > 3.00 | ≤ 4.00 | ± 0.25 | ± 0.28 | ± 0.30 | ± 0.31 |
| > 4.00 | ≤ 5.00 | ± 0.28 | ± 0.30 | ± 0.32 | ± 0.33 |
| > 5.00 | ≤ 6.00 | ± 0.30 | ± 0.32 | ± 0.33 | ± 0.36 |
| > 6.00 | ≤ 8.00 | ± 0.33 | ± 0.35 | ± 0.36 | ± 0.40 |
| > 8.00 | ≤ 10.00 | ± 0.37 | ± 0.38 | ± 0.39 | ± 0.46 |
| > 10.00 | ≤ 12.50 | ± 0.40 | ± 0.41 | ± 0.43 | ± 0.49 |
| > 12.50 | ≤ 15.00 | ± 0.43 | ± 0.44 | ± 0.46 | ± 0.53 |
| > 15.00 | ≤ 25.00 | ± 0.46 | ± 0.48 | ± 0.52 | ± 0.58 |
All dimensions are mm.
Tolerances on thickness of steel grades with a specified minimum
yield strength 360 N/mm2 < Re ≤ 420 N/mm2 (category C)
| Nominal thickness | Tolerances for a nominal width of | ||||
|---|---|---|---|---|---|
| ≤ 1200 | > 1200 | > 1500 | > 1800 | ||
| ≤ 1500 | ≤ 1800 | ||||
| ≤ 2.00 | ± 0.22 | ± 0.25 | ± 0.27 | - | |
| > 2.00 | ≤ 2.50 | ± 0.23 | ± 0.27 | ± 0.30 | ± 0.33 |
| > 2.50 | ≤ 3.00 | ± 0.26 | ± 0.29 | ± 0.31 | ± 0.34 |
| > 3.00 | ≤ 4.00 | ± 0.29 | ± 0.31 | ± 0.34 | ± 0.35 |
| > 4.00 | ≤ 5.00 | ± 0.31 | ± 0.34 | ± 0.36 | ± 0.38 |
| > 5.00 | ≤ 6.00 | ± 0.34 | ± 0.36 | ± 0.38 | ± 0.40 |
| > 6.00 | ≤ 8.00 | ± 0.38 | ± 0.39 | ± 0.40 | ± 0.46 |
| > 8.00 | ≤ 10.00 | ± 0.42 | ± 0.43 | ± 0.44 | ± 0.52 |
| > 10.00 | ≤ 12.50 | ± 0.46 | ± 0.47 | ± 0.48 | ± 0.56 |
| > 12.50 | ≤ 15.00 | ± 0.48 | ± 0.49 | ± 0.52 | ± 0.60 |
| > 15.00 | ≤ 25.00 | ± 0.52 | ± 0.55 | ± 0.59 | ± 0.65 |
All dimensions are mm.
Tolerances on thickness of steel grades with a specified minimum
yield strength 420 N/mm2 < Re ≤ 900 N/mm2 (category D)
| Nominal thickness | Tolerances for a nominal width of | ||||
|---|---|---|---|---|---|
| ≤ 1200 | > 1200 | > 1500 | > 1800 | ||
| ≤ 1500 | ≤ 1800 | ||||
| ≤ 2.00 | ± 0.24 | ± 0.27 | ± 0.29 | - | |
| > 2.00 | ≤ 2.50 | ± 0.25 | ± 0.29 | ± 0.32 | ± 0.35 |
| > 2.50 | ≤ 3.00 | ± 0.28 | ± 0.31 | ± 0.34 | ± 0.36 |
| > 3.00 | ≤ 4.00 | ± 0.31 | ± 0.34 | ± 0.36 | ± 0.38 |
| > 4.00 | ≤ 5.00 | ± 0.34 | ± 0.36 | ± 0.39 | ± 0.41 |
| > 5.00 | ≤ 6.00 | ± 0.36 | ± 0.39 | ± 0.41 | ± 0.43 |
| > 6.00 | ≤ 8.00 | ± 0.41 | ± 0.42 | ± 0.43 | ± 0.49 |
| > 8.00 | ≤ 10.00 | ± 0.45 | ± 0.46 | ± 0.48 | ± 0.56 |
| > 10.00 | ≤ 12.50 | ± 0.49 | ± 0.50 | ± 0.52 | ± 0.60 |
| > 12.50 | ≤ 15.00 | ± 0.52 | ± 0.53 | ± 0.56 | ± 0.64 |
| > 15.00 | ≤ 25.00 | ± 0.56 | ± 0.59 | ± 0.63 | ± 0.70 |
All dimensions are mm.
Tolerances on width
Tolerances in mm.
| Nominal width w | ||||
|---|---|---|---|---|
| Mill edges | Trimmed edges | |||
| lower | upper | lower | upper | |
| w ≤ 1200 | 0 | 20 | 0 | 3 |
| 1200 < w ≤ 1850 | 0 | 20 | 0 | 5 |
| w > 1850 | 0 | 25 | 0 | 6 |
Tolerances in mm for wide strip and slit wide strip
The tolerances for wide strip and slit wide strip comply with standard EN 10051:2010.
The specified values for wide strip do not apply to the uncropped ends of the coil (‘head’ and ‘tail’).
The length of these uncropped ends is calculated using the following formula:
length (in metres) = 90/nominal thickness (in mm), with a maximum of 20 metres.
If required, this part of the coil can be removed, however an additional cost may be charged for this.
Edge camber
The deviation from the edge over a length of 5000 mm:
• with mill edges, no more than 20 mm
• with trimmed edges, no more than 15 mm
Flatness
Requirements as regards flatness can be agreed at the time of enquiry.
Option for maximum crown values
The following high crown C40 options available for hot-rolled products.
Crown values on the C20-position as well as minimum crown values
on both C20 and C40 position are also available on request.
Maximum Crown C40 in µm values for hot-rolled steel
with a low carbon content for cold forming (DD11-DD14 in EN 10111:2008)
Category 1 | C40 | ||||
|---|---|---|---|---|---|
| Nominal Thickness | ≤ 1200 | > 1200 | > 1500 | > 1800 | |
| ≤ 1500 | ≤ 1800 | ||||
| > 1.47 | ≤ 2.00 | 40 | 40 | 40 | 40 |
| > 2.00 | ≤ 2.50 | 40 | 40 | 50 | 50 |
| > 2.50 | ≤ 3.00 | 40 | 40 | 50 | 50 |
| > 3.00 | ≤ 6.00 | 40 | 50 | 50 | 50 |
| > 6.00 | ≤ 11.00 | 50 | 50 | 50 | 50 |
Maximum Crown C40 in µm values of structural steel grades
(S185-S235-S275 ≤ 10mm in EN 10025-2:2004)
Category 2 | C40 | ||||
|---|---|---|---|---|---|
| Nominal Thickness | ≤ 1200 | > 1200 | > 1500 | > 1800 | |
≤ 1500 | ≤ 1800 | ||||
| > 1.47 | ≤ 2.00 | 40 | 40 | 40 | 40 |
| > 2.00 | ≤ 2.50 | 40 | 40 | 50 | 50 |
| > 2.50 | ≤ 20.00 | 50 | 50 | 50 | 50 |
Maximum Crown C40 in µm values of structural steel grades
(S275 > 10mm in EN 10025-2:2004) and HSLA grades (S315MC in EN 10149-2:1996)
Category 3 | C40 | ||||
|---|---|---|---|---|---|
| Nominal Thickness | ≤ 1200 | > 1200 | > 1500 | > 1800 | |
≤ 1500 | ≤ 1800 | ||||
| > 1.47 | ≤ 2.00 | 50 | 50 | 60 | 60 |
| > 2.00 | ≤ 2.50 | 50 | 60 | 60 | 60 |
| > 2.50 | ≤ 3.00 | 50 | 60 | 60 | 60 |
| > 3.00 | ≤ 20.00 | 60 | 60 | 70 | 70 |
Maximum Crown C40 in µm values of HSLA grades
(S355MC, S420MC, S460MC, S500MC, S550MC in EN 10149-2:1996)
| Category 4 | C40 | ||||
|---|---|---|---|---|---|
| Nominal Thickness | ≤ 1200 | > 1200 | > 1500 | > 1800 | |
| ≤ 1500 | ≤ 1800 | ||||
| > 1.47 | ≤ 2.00 | 60 | 70 | 70 | 70 |
| > 2.00 | ≤ 2.50 | 60 | 70 | 80 | 80 |
| > 2.50 | ≤ 3.00 | 60 | 70 | 80 | 80 |
| > 3.00 | ≤ 5.00 | 70 | 70 | 80 | 80 |
| > 5.00 | ≤ 20.00 | 80 | 80 | 80 | 80 |
Dimensions and coil weights
Tata Steel can supply hot-rolled steels with the following minimum and maximum dimensions and weights:
| Description | Availability |
|---|---|
| Coil diameter inner non-pickled | 762 mm |
| Coil diameter inner pickled | 610 mm standard |
| 762 mm on request | |
| Tolerance on inner diameter | +0/-50 mm |
| Coil diameter outer non-pickled | Outer diameter available is 10/7 x width |
| to reduce possibility of coil tipping over | |
| Max. 2300 mm | |
| Min. 1200 mm | |
| Coil diameter outer pickled and oiled | Outer diameter available is 10/7 x width |
| to reduce possibility of coil tipping over | |
| Outer diameter | |
| limit 2200 mm | |
| Min. 1050 mm | |
| Coil weight | Max. 38,5 tonnes |
| Additional maximum limits from transport | |
| limits and outer coil diameter | |
| Some HR products may have different | |
| coil weight ranges | |
| KIM*: width ≤ 1200 mm | max. 23.1 kg/mm width |
| KIM*: 1200 < width ≤ 1700 mm | max. 21.6 kg/mm width |
| KIM*: 1700 < width ≤ 1900 mm | max. 20.9 kg/mm width |
| KIM*: width > 1900 mm | max. 18.8 kg/mm width |
| Minimum tonnage per order | Please refer to price list for order quantity details |
| Minimum order quantities may apply |
* Other KIM values may be available - please contact us.
EN-EngineeringAutomotive-Product-Hot-rolled-Heavy+Light further processing TSE
Further processing
We have a broad network of Tata Steel service centres across Europe, offering decoiling and slitting services from stock and against short lead times.
Heavy gauge processing
| Processing type | Decoiling |
|---|---|
| Thickness range (mm) | 1.4 - 25.4 |
| Width range (mm) | 300 - 2600 |
| Length range | up to 18.4 m |
| Locations | Netherlands |
Light gauge processing
| Processing type | Slitting | Decoiling | Blanking |
|---|---|---|---|
| Thickness range (mm) | 0.2 - 7.0 | 0.3 - 6.0 | 0.3 - 6.0 |
| Width range (mm) | 10 - 2050 | 50 - 2600 | 200 - 2600 |
| Length range | - | up to 6 m | up to 6 m |
| Locations | Netherlands Germany France Spain Sweden Norway Finland | Netherlands Germany France Spain Sweden Norway Finland | Netherlands |
EN-Automotive-Product-Hot-Rolled-Forming-DD12 TSE
EN-Automotive-Product-Hot-Rolled-Forming-All grades OverviewTSE
Applications
- Automotive components
Relationship with standards
Tata Steel offers hot-rolled steel for forming in grades that comply with EN 10111: 2008 and in a special Tata Steel grade as shown in the table below. All grades are available in qualities suitable for galvanising.
As the EN standard applies only to steel ≤ 11mm thick, please consult us about the properties of steel in other thicknesses.
| Tata Steel | VDA | European standard |
|---|---|---|
| Grade | VDA 239-100-16 | EN 10111: 2008 |
| DD11 | - | DD11 1 |
| DD12 | - | DD12 |
| DD13 | - | DD13 |
| DD14 | HR2 | DD14 |
1. DD11 products should be used within one month of their availability
EN-EngineeringAutomotive-Product-Hot-rolled-All Grades Surface aspects Supply Conditions TSE
Supply - product conditions
Hot-rolled steel can be supplied with these product conditions and finishes and with this surface treatment:
| Side/surface condition | non-pickled | pickled | pickled and oiled |
|---|---|---|---|
| Mill edges | Yes | Yes | Yes |
| Trimmed edges | - | Yes | Yes |
Trimmed edges available in thicknesses up to 8.0 mm. The steel grades shown on the following pages belong to the standard range offered by Tata Steel.
Please contact us regarding other specifications we may have that meet your needs.
Surface aspects
| Description | Availability |
|---|---|
| Surface finish | Coils are available in non-pickled and pickled finish |
| Oiling | Pickled finish is available with rolling or preservative oil applied. Oil weight normally 0.5-2.5 g/m2 |
Alternative oiling ranges are available.
Please contact us for details.
EN-EngineeringAutomotive-Product-Hot-Rolled-Forming-DD12-Properties TSE
Properties
Mechanical properties
The values shown for the mechanical properties in the table below are for test pieces taken transverse to the rolling direction:
| EN 10111: 2008 | Grade | DD12 |
|---|---|---|
| Yield strength ReL (N/mm2) | 1.5 ≤ t < 2 | 170 - 340 |
| 2 ≤ t < 11 | 170 - 320 | |
| Max. tensile strength Rm (N/mm2) | 420 | |
| Elongation (%) | 1.5 ≤ t < 2 | 25 |
| 2 ≤ t < 3 | 26 | |
| 3 ≤ t < 11 | 30 | |
| Min. bend test diameter | 0t |
Values are for test pieces taken transverse to the rolling direction:
t - material thickness in mm
Lower yield strength or 0.2% proof stress applies.
Test piece length L0 = 80 mm for thicknesses <3 mm and L0 = 5.65√S0 for thicknesses ≥ 3 mm
Chemical composition
Hot-rolled steel for forming meets the requirements of the cast analysis in the standard as shown in the table below:
| EN 10111: 2008 | Grade | DD12 |
|---|---|---|
| C | Max. | 0.10 |
| Mn | Max. | 0.45 |
| P | Max. | 0.035 |
| S | Max. | 0.035 |
All values are in weight%.
EN-Automotive-Product-Hot-Rolled-Forming-DD12-Dimensions TSE
Dimensions
Dimensional capability – pickled.
Dimensions in mm.
| Thickness | Max. width |
|---|---|
| From - up to | DD12 |
| 1.50 - 1.60 | 1330 |
| 1.60 - 1.70 | 1405 |
| 1.70 - 1.80 | 1480 |
| 1.80 - 1.90 | 1555 |
| 1.90 - 2.00 | 1630 |
| 2.00 - 2.20 | 1705 |
| 2.20 - 2.40 | 1820 |
| 2.40 - 2.50 | 1925 |
| 2.50 - 2.60 | 1970 |
| 2.60 - 2.70 | 2030 |
| 2.70 - 4.76 | 2070 |
| 4.76 - 4.90 | 2040 |
| 4.90 - 5.00 | 2000 |
| 5.00 - 5.10 | 1960 |
| 5.10 - 5.20 | 1925 |
| 5.20 - 5.30 | 1885 |
| 5.30 - 5.40 | 1850 |
| 5.40 - 5.50 | 1820 |
| 5.50 - 5.60 | 1785 |
| 5.60 - 5.70 | 1755 |
| 5.70 - 5.80 | 1725 |
| 5.80 - 5.90 | 1695 |
| 5.90 - 6.35 | 1670 |
The minimum width is 735 mm.
For trimmed edges, reduce the maximum widths shown by 23 mm.
Thicknesses up to 20 mm may be available - please contact us.
Non-pickled (dry) condition is also available.
Please contact us with your specific requirements
EN-EngineeringAutomotive-Product-Hot-rolled-All grades Shape and dimensional tolerances TSE
Shape and dimensional tolerances
The specified values for wide strip do not apply to the uncropped ends of the coil (‘head’ and ‘tail’).
The length of these uncropped ends is calculated using the following formula:
length (in metres) = 90/nominal thickness (in mm), with a maximum of 20 metres.
If required, this part of the coil can be removed, however an additional cost may be charged for this.
Tolerances on thickness
Tata Steel can supply to full thickness tolerance specified in EN 10051:2010.
Tighter tolerances are available as shown below:
| Product type | Thickness tolerances available | |||||
|---|---|---|---|---|---|---|
| (% of full EN 10051:2010 tolerance) | ||||||
| 100% | 75% | 66% | 60% | 50% | 33% | |
| Steel for forming | Yes | Yes | Yes | Yes | Yes | Yes 1 |
| High-strength low-alloy (HSLA EN 10149-2) | Yes | Yes | Yes | Yes | Yes | Yes 1 |
| Ympress® HSLA | Yes | Yes 1 | ||||
| Ympress® Laser | Yes | Yes 1 | ||||
| Structural steel | Yes | Yes | Yes | Yes | Yes | Yes 1 |
| Manganese boron steel | Yes | Yes | Yes | Yes | Yes | |
| Case-hardening steel | Yes | Yes | Yes | Yes | Yes | |
| High-carbon steel | Yes | |||||
| Dual phase steel | Yes | |||||
| Hot forming steel | Yes | |||||
| Valast® abrasion resistant steel | Yes | Yes | Yes | Yes | Yes | |
| Steel for pressure vessels | Yes | |||||
| Steel for gas cylinders | Yes | |||||
| Steel for line pipe | Yes | |||||
| Ship plate | Yes | |||||
1. Available for certain grades and thicknesses between 3.0 mm and 6.0 mm.
Please contact us on the availability of special tolerances to meet your requirements.
Tolerances on thickness for hot-rolled steel with a low carbon content
for cold forming (DD11-DD14 in EN 10111:2008)
| Nominal thickness | Tolerances for a nominal width of | ||||
|---|---|---|---|---|---|
| ≤ 1200 | > 1200 | > 1500 | > 1800 | ||
| ≤ 1500 | ≤ 1800 | ||||
| ≤ 2.00 | ± 0.13 | ± 0.14 | ± 0.16 | - | |
| > 2.00 | ≤ 2.50 | ± 0.14 | ± 0.16 | ± 0.17 | ± 0.19 |
| > 2.50 | ≤ 3.00 | ± 0.15 | ± 0.17 | ± 0.18 | ± 0.20 |
| > 3.00 | ≤ 4.00 | ± 0.17 | ± 0.18 | ± 0.20 | ± 0.20 |
| > 4.00 | ≤ 5.00 | ± 0.18 | ± 0.20 | ± 0.21 | ± 0.22 |
| > 5.00 | ≤ 6.00 | ± 0.20 | ± 0.21 | ± 0.22 | ± 0.23 |
| > 6.00 | ≤ 8.00 | ± 0.22 | ± 0.23 | ± 0.23 | ± 0.26 |
| > 8.00 | ≤ 11.00 | ± 0.24 | ± 0.25 | ± 0.25 | ± 0.28 |
All dimensions are mm.
Tolerances on thickness of steel grades with a specified minimum
yield strength Re ≤ 300 N/mm2 (category A)
| Nominal thickness | Tolerances for a nominal width of | ||||
|---|---|---|---|---|---|
| ≤ 1200 | > 1200 | > 1500 | > 1800 | ||
| ≤ 1500 | ≤ 1800 | ||||
| ≤ 2.00 | ± 0.17 | ± 0.19 | ± 0.21 | - | |
| > 2.00 | ≤ 2.50 | ± 0.18 | ± 0.21 | ± 0.23 | ± 0.25 |
| > 2.50 | ≤ 3.00 | ± 0.20 | ± 0.22 | ± 0.24 | ± 0.26 |
| > 3.00 | ≤ 4.00 | ± 0.22 | ± 0.24 | ± 0.26 | ± 0.27 |
| > 4.00 | ≤ 5.00 | ± 0.24 | ± 0.26 | ± 0.28 | ± 0.29 |
| > 5.00 | ≤ 6.00 | ± 0.26 | ± 0.28 | ± 0.29 | ± 0.31 |
| > 6.00 | ≤ 8.00 | ± 0.29 | ± 0.30 | ± 0.31 | ± 0.35 |
| > 8.00 | ≤ 10.00 | ± 0.32 | ± 0.33 | ± 0.34 | ± 0.40 |
| > 10.00 | ≤ 12.50 | ± 0.35 | ± 0.36 | ± 0.37 | ± 0.43 |
| > 12.50 | ≤ 15.00 | ± 0.37 | ± 0.38 | ± 0.40 | ± 0.46 |
| > 15.00 | ≤ 25.00 | ± 0.40 | ± 0.42 | ± 0.45 | ± 0.50 |
All dimensions are mm.
Tolerances on thickness of steel grades with a specified minimum
yield strength 300 N/mm2 < Re ≤ 360 N/mm2 (category B)
| Nominal thickness | Tolerances for a nominal width of | ||||
|---|---|---|---|---|---|
| ≤ 1200 | > 1200 | > 1500 | > 1800 | ||
| ≤ 1500 | ≤ 1800 | ||||
| ≤ 2.00 | ± 0.20 | ± 0.22 | ± 0.24 | - | |
| > 2.00 | ≤ 2.50 | ± 0.21 | ± 0.24 | ± 0.26 | ± 0.29 |
| > 2.50 | ≤ 3.00 | ± 0.23 | ± 0.25 | ± 0.28 | ± 0.30 |
| > 3.00 | ≤ 4.00 | ± 0.25 | ± 0.28 | ± 0.30 | ± 0.31 |
| > 4.00 | ≤ 5.00 | ± 0.28 | ± 0.30 | ± 0.32 | ± 0.33 |
| > 5.00 | ≤ 6.00 | ± 0.30 | ± 0.32 | ± 0.33 | ± 0.36 |
| > 6.00 | ≤ 8.00 | ± 0.33 | ± 0.35 | ± 0.36 | ± 0.40 |
| > 8.00 | ≤ 10.00 | ± 0.37 | ± 0.38 | ± 0.39 | ± 0.46 |
| > 10.00 | ≤ 12.50 | ± 0.40 | ± 0.41 | ± 0.43 | ± 0.49 |
| > 12.50 | ≤ 15.00 | ± 0.43 | ± 0.44 | ± 0.46 | ± 0.53 |
| > 15.00 | ≤ 25.00 | ± 0.46 | ± 0.48 | ± 0.52 | ± 0.58 |
All dimensions are mm.
Tolerances on thickness of steel grades with a specified minimum
yield strength 360 N/mm2 < Re ≤ 420 N/mm2 (category C)
| Nominal thickness | Tolerances for a nominal width of | ||||
|---|---|---|---|---|---|
| ≤ 1200 | > 1200 | > 1500 | > 1800 | ||
| ≤ 1500 | ≤ 1800 | ||||
| ≤ 2.00 | ± 0.22 | ± 0.25 | ± 0.27 | - | |
| > 2.00 | ≤ 2.50 | ± 0.23 | ± 0.27 | ± 0.30 | ± 0.33 |
| > 2.50 | ≤ 3.00 | ± 0.26 | ± 0.29 | ± 0.31 | ± 0.34 |
| > 3.00 | ≤ 4.00 | ± 0.29 | ± 0.31 | ± 0.34 | ± 0.35 |
| > 4.00 | ≤ 5.00 | ± 0.31 | ± 0.34 | ± 0.36 | ± 0.38 |
| > 5.00 | ≤ 6.00 | ± 0.34 | ± 0.36 | ± 0.38 | ± 0.40 |
| > 6.00 | ≤ 8.00 | ± 0.38 | ± 0.39 | ± 0.40 | ± 0.46 |
| > 8.00 | ≤ 10.00 | ± 0.42 | ± 0.43 | ± 0.44 | ± 0.52 |
| > 10.00 | ≤ 12.50 | ± 0.46 | ± 0.47 | ± 0.48 | ± 0.56 |
| > 12.50 | ≤ 15.00 | ± 0.48 | ± 0.49 | ± 0.52 | ± 0.60 |
| > 15.00 | ≤ 25.00 | ± 0.52 | ± 0.55 | ± 0.59 | ± 0.65 |
All dimensions are mm.
Tolerances on thickness of steel grades with a specified minimum
yield strength 420 N/mm2 < Re ≤ 900 N/mm2 (category D)
| Nominal thickness | Tolerances for a nominal width of | ||||
|---|---|---|---|---|---|
| ≤ 1200 | > 1200 | > 1500 | > 1800 | ||
| ≤ 1500 | ≤ 1800 | ||||
| ≤ 2.00 | ± 0.24 | ± 0.27 | ± 0.29 | - | |
| > 2.00 | ≤ 2.50 | ± 0.25 | ± 0.29 | ± 0.32 | ± 0.35 |
| > 2.50 | ≤ 3.00 | ± 0.28 | ± 0.31 | ± 0.34 | ± 0.36 |
| > 3.00 | ≤ 4.00 | ± 0.31 | ± 0.34 | ± 0.36 | ± 0.38 |
| > 4.00 | ≤ 5.00 | ± 0.34 | ± 0.36 | ± 0.39 | ± 0.41 |
| > 5.00 | ≤ 6.00 | ± 0.36 | ± 0.39 | ± 0.41 | ± 0.43 |
| > 6.00 | ≤ 8.00 | ± 0.41 | ± 0.42 | ± 0.43 | ± 0.49 |
| > 8.00 | ≤ 10.00 | ± 0.45 | ± 0.46 | ± 0.48 | ± 0.56 |
| > 10.00 | ≤ 12.50 | ± 0.49 | ± 0.50 | ± 0.52 | ± 0.60 |
| > 12.50 | ≤ 15.00 | ± 0.52 | ± 0.53 | ± 0.56 | ± 0.64 |
| > 15.00 | ≤ 25.00 | ± 0.56 | ± 0.59 | ± 0.63 | ± 0.70 |
All dimensions are mm.
Tolerances on width
Tolerances in mm.
| Nominal width w | ||||
|---|---|---|---|---|
| Mill edges | Trimmed edges | |||
| lower | upper | lower | upper | |
| w ≤ 1200 | 0 | 20 | 0 | 3 |
| 1200 < w ≤ 1850 | 0 | 20 | 0 | 5 |
| w > 1850 | 0 | 25 | 0 | 6 |
Tolerances in mm for wide strip and slit wide strip
The tolerances for wide strip and slit wide strip comply with standard EN 10051:2010.
The specified values for wide strip do not apply to the uncropped ends of the coil (‘head’ and ‘tail’).
The length of these uncropped ends is calculated using the following formula:
length (in metres) = 90/nominal thickness (in mm), with a maximum of 20 metres.
If required, this part of the coil can be removed, however an additional cost may be charged for this.
Edge camber
The deviation from the edge over a length of 5000 mm:
• with mill edges, no more than 20 mm
• with trimmed edges, no more than 15 mm
Flatness
Requirements as regards flatness can be agreed at the time of enquiry.
Option for maximum crown values
The following high crown C40 options available for hot-rolled products.
Crown values on the C20-position as well as minimum crown values
on both C20 and C40 position are also available on request.
Maximum Crown C40 in µm values for hot-rolled steel
with a low carbon content for cold forming (DD11-DD14 in EN 10111:2008)
Category 1 | C40 | ||||
|---|---|---|---|---|---|
| Nominal Thickness | ≤ 1200 | > 1200 | > 1500 | > 1800 | |
| ≤ 1500 | ≤ 1800 | ||||
| > 1.47 | ≤ 2.00 | 40 | 40 | 40 | 40 |
| > 2.00 | ≤ 2.50 | 40 | 40 | 50 | 50 |
| > 2.50 | ≤ 3.00 | 40 | 40 | 50 | 50 |
| > 3.00 | ≤ 6.00 | 40 | 50 | 50 | 50 |
| > 6.00 | ≤ 11.00 | 50 | 50 | 50 | 50 |
Maximum Crown C40 in µm values of structural steel grades
(S185-S235-S275 ≤ 10mm in EN 10025-2:2004)
Category 2 | C40 | ||||
|---|---|---|---|---|---|
| Nominal Thickness | ≤ 1200 | > 1200 | > 1500 | > 1800 | |
≤ 1500 | ≤ 1800 | ||||
| > 1.47 | ≤ 2.00 | 40 | 40 | 40 | 40 |
| > 2.00 | ≤ 2.50 | 40 | 40 | 50 | 50 |
| > 2.50 | ≤ 20.00 | 50 | 50 | 50 | 50 |
Maximum Crown C40 in µm values of structural steel grades
(S275 > 10mm in EN 10025-2:2004) and HSLA grades (S315MC in EN 10149-2:1996)
Category 3 | C40 | ||||
|---|---|---|---|---|---|
| Nominal Thickness | ≤ 1200 | > 1200 | > 1500 | > 1800 | |
≤ 1500 | ≤ 1800 | ||||
| > 1.47 | ≤ 2.00 | 50 | 50 | 60 | 60 |
| > 2.00 | ≤ 2.50 | 50 | 60 | 60 | 60 |
| > 2.50 | ≤ 3.00 | 50 | 60 | 60 | 60 |
| > 3.00 | ≤ 20.00 | 60 | 60 | 70 | 70 |
Maximum Crown C40 in µm values of HSLA grades
(S355MC, S420MC, S460MC, S500MC, S550MC in EN 10149-2:1996)
| Category 4 | C40 | ||||
|---|---|---|---|---|---|
| Nominal Thickness | ≤ 1200 | > 1200 | > 1500 | > 1800 | |
| ≤ 1500 | ≤ 1800 | ||||
| > 1.47 | ≤ 2.00 | 60 | 70 | 70 | 70 |
| > 2.00 | ≤ 2.50 | 60 | 70 | 80 | 80 |
| > 2.50 | ≤ 3.00 | 60 | 70 | 80 | 80 |
| > 3.00 | ≤ 5.00 | 70 | 70 | 80 | 80 |
| > 5.00 | ≤ 20.00 | 80 | 80 | 80 | 80 |
Dimensions and coil weights
Tata Steel can supply hot-rolled steels with the following minimum and maximum dimensions and weights:
| Description | Availability |
|---|---|
| Coil diameter inner non-pickled | 762 mm |
| Coil diameter inner pickled | 610 mm standard |
| 762 mm on request | |
| Tolerance on inner diameter | +0/-50 mm |
| Coil diameter outer non-pickled | Outer diameter available is 10/7 x width |
| to reduce possibility of coil tipping over | |
| Max. 2300 mm | |
| Min. 1200 mm | |
| Coil diameter outer pickled and oiled | Outer diameter available is 10/7 x width |
| to reduce possibility of coil tipping over | |
| Outer diameter | |
| limit 2200 mm | |
| Min. 1050 mm | |
| Coil weight | Max. 38,5 tonnes |
| Additional maximum limits from transport | |
| limits and outer coil diameter | |
| Some HR products may have different | |
| coil weight ranges | |
| KIM*: width ≤ 1200 mm | max. 23.1 kg/mm width |
| KIM*: 1200 < width ≤ 1700 mm | max. 21.6 kg/mm width |
| KIM*: 1700 < width ≤ 1900 mm | max. 20.9 kg/mm width |
| KIM*: width > 1900 mm | max. 18.8 kg/mm width |
| Minimum tonnage per order | Please refer to price list for order quantity details |
| Minimum order quantities may apply |
* Other KIM values may be available - please contact us.
EN-EngineeringAutomotive-Product-Hot-rolled-Heavy+Light further processing TSE
Further processing
We have a broad network of Tata Steel service centres across Europe, offering decoiling and slitting services from stock and against short lead times.
Heavy gauge processing
| Processing type | Decoiling |
|---|---|
| Thickness range (mm) | 1.4 - 25.4 |
| Width range (mm) | 300 - 2600 |
| Length range | up to 18.4 m |
| Locations | Netherlands |
Light gauge processing
| Processing type | Slitting | Decoiling | Blanking |
|---|---|---|---|
| Thickness range (mm) | 0.2 - 7.0 | 0.3 - 6.0 | 0.3 - 6.0 |
| Width range (mm) | 10 - 2050 | 50 - 2600 | 200 - 2600 |
| Length range | - | up to 6 m | up to 6 m |
| Locations | Netherlands Germany France Spain Sweden Norway Finland | Netherlands Germany France Spain Sweden Norway Finland | Netherlands |
EN-Product-Hot-Rolled-Forming-Download TSUK
Download:
EN-Automotive-Product-Hot-Rolled-Forming-DD13 TSE
EN-Automotive-Product-Hot-Rolled-Forming-All grades OverviewTSE
Applications
- Automotive components
Relationship with standards
Tata Steel offers hot-rolled steel for forming in grades that comply with EN 10111: 2008 and in a special Tata Steel grade as shown in the table below. All grades are available in qualities suitable for galvanising.
As the EN standard applies only to steel ≤ 11mm thick, please consult us about the properties of steel in other thicknesses.
| Tata Steel | VDA | European standard |
|---|---|---|
| Grade | VDA 239-100-16 | EN 10111: 2008 |
| DD11 | - | DD11 1 |
| DD12 | - | DD12 |
| DD13 | - | DD13 |
| DD14 | HR2 | DD14 |
1. DD11 products should be used within one month of their availability
EN-EngineeringAutomotive-Product-Hot-rolled-All Grades Surface aspects Supply Conditions TSE
Supply - product conditions
Hot-rolled steel can be supplied with these product conditions and finishes and with this surface treatment:
| Side/surface condition | non-pickled | pickled | pickled and oiled |
|---|---|---|---|
| Mill edges | Yes | Yes | Yes |
| Trimmed edges | - | Yes | Yes |
Trimmed edges available in thicknesses up to 8.0 mm. The steel grades shown on the following pages belong to the standard range offered by Tata Steel.
Please contact us regarding other specifications we may have that meet your needs.
Surface aspects
| Description | Availability |
|---|---|
| Surface finish | Coils are available in non-pickled and pickled finish |
| Oiling | Pickled finish is available with rolling or preservative oil applied. Oil weight normally 0.5-2.5 g/m2 |
Alternative oiling ranges are available.
Please contact us for details.
EN-EngineeringAutomotive-Product-Hot-Rolled-Forming-DD13-Properties TSE
Properties
Mechanical properties
The values shown for the mechanical properties in the table below are for test pieces taken transverse to the rolling direction:
| EN 10111: 2008 | Grade | DD13 |
|---|---|---|
| Yield strength ReL (N/mm2) | 1.5 ≤ t < 2 | 170 - 330 |
| 2 ≤ t < 11 | 170 - 310 | |
| Max. tensile strength Rm (N/mm2) | 400 | |
| Elongation (%) | 1.5 ≤ t < 2 | 28 |
| 2 ≤ t < 3 | 29 | |
| 3 ≤ t < 11 | 33 | |
| Min. bend test diameter | 0t |
Values are for test pieces taken transverse to the rolling direction:
t - material thickness in mm
Lower yield strength or 0.2% proof stress applies.
Test piece length L0 = 80 mm for thicknesses <3 mm and L0 = 5.65√S0 for thicknesses ≥3 mm
Chemical composition
Hot-rolled steel for forming meets the requirements of the cast analysis in the standard as shown in the table below:
| EN 10111: 2008 | Grade | DD13 |
|---|---|---|
| C | Max. | 0.08 |
| Mn | Max. | 0.40 |
| P | Max. | 0.030 |
| S | Max. | 0.030 |
All values are in weight%.
EN-Automotive-Product-Hot-Rolled-Forming-DD13-Dimensions TSE
Dimensions
Dimensional capability – pickled.
Dimensions in mm.
| Thickness | Max. width |
|---|---|
| From - up to | DD13 |
| 1.50 - 1.60 | 1330 |
| 1.60 - 1.70 | 1405 |
| 1.70 - 1.80 | 1480 |
| 1.80 - 1.90 | 1555 |
| 1.90 - 2.00 | 1630 |
| 2.00 - 2.20 | 1705 |
| 2.20 - 2.40 | 1820 |
| 2.40 - 2.50 | 1925 |
| 2.50 - 2.60 | 1970 |
| 2.60 - 2.70 | 2030 |
| 2.70 - 4.76 | 2070 |
| 4.76 - 4.90 | 2040 |
| 4.90 - 5.00 | 2000 |
| 5.00 - 5.10 | 1960 |
| 5.10 - 5.20 | 1925 |
| 5.20 - 5.30 | 1885 |
| 5.30 - 5.40 | 1850 |
| 5.40 - 5.50 | 1820 |
| 5.50 - 5.60 | 1785 |
| 5.60 - 5.70 | 1755 |
| 5.70 - 5.80 | 1725 |
| 5.80 - 5.90 | 1695 |
| 5.90 - 6.35 | 1670 |
The minimum width is 735 mm.
For trimmed edges, reduce the maximum widths shown by 23 mm.
Thicknesses up to 20 mm may be available - please contact us.
Non-pickled (dry) condition is also available.
Please contact us with your specific requirements
EN-EngineeringAutomotive-Product-Hot-rolled-All grades Shape and dimensional tolerances TSE
Shape and dimensional tolerances
The specified values for wide strip do not apply to the uncropped ends of the coil (‘head’ and ‘tail’).
The length of these uncropped ends is calculated using the following formula:
length (in metres) = 90/nominal thickness (in mm), with a maximum of 20 metres.
If required, this part of the coil can be removed, however an additional cost may be charged for this.
Tolerances on thickness
Tata Steel can supply to full thickness tolerance specified in EN 10051:2010.
Tighter tolerances are available as shown below:
| Product type | Thickness tolerances available | |||||
|---|---|---|---|---|---|---|
| (% of full EN 10051:2010 tolerance) | ||||||
| 100% | 75% | 66% | 60% | 50% | 33% | |
| Steel for forming | Yes | Yes | Yes | Yes | Yes | Yes 1 |
| High-strength low-alloy (HSLA EN 10149-2) | Yes | Yes | Yes | Yes | Yes | Yes 1 |
| Ympress® HSLA | Yes | Yes 1 | ||||
| Ympress® Laser | Yes | Yes 1 | ||||
| Structural steel | Yes | Yes | Yes | Yes | Yes | Yes 1 |
| Manganese boron steel | Yes | Yes | Yes | Yes | Yes | |
| Case-hardening steel | Yes | Yes | Yes | Yes | Yes | |
| High-carbon steel | Yes | |||||
| Dual phase steel | Yes | |||||
| Hot forming steel | Yes | |||||
| Valast® abrasion resistant steel | Yes | Yes | Yes | Yes | Yes | |
| Steel for pressure vessels | Yes | |||||
| Steel for gas cylinders | Yes | |||||
| Steel for line pipe | Yes | |||||
| Ship plate | Yes | |||||
1. Available for certain grades and thicknesses between 3.0 mm and 6.0 mm.
Please contact us on the availability of special tolerances to meet your requirements.
Tolerances on thickness for hot-rolled steel with a low carbon content
for cold forming (DD11-DD14 in EN 10111:2008)
| Nominal thickness | Tolerances for a nominal width of | ||||
|---|---|---|---|---|---|
| ≤ 1200 | > 1200 | > 1500 | > 1800 | ||
| ≤ 1500 | ≤ 1800 | ||||
| ≤ 2.00 | ± 0.13 | ± 0.14 | ± 0.16 | - | |
| > 2.00 | ≤ 2.50 | ± 0.14 | ± 0.16 | ± 0.17 | ± 0.19 |
| > 2.50 | ≤ 3.00 | ± 0.15 | ± 0.17 | ± 0.18 | ± 0.20 |
| > 3.00 | ≤ 4.00 | ± 0.17 | ± 0.18 | ± 0.20 | ± 0.20 |
| > 4.00 | ≤ 5.00 | ± 0.18 | ± 0.20 | ± 0.21 | ± 0.22 |
| > 5.00 | ≤ 6.00 | ± 0.20 | ± 0.21 | ± 0.22 | ± 0.23 |
| > 6.00 | ≤ 8.00 | ± 0.22 | ± 0.23 | ± 0.23 | ± 0.26 |
| > 8.00 | ≤ 11.00 | ± 0.24 | ± 0.25 | ± 0.25 | ± 0.28 |
All dimensions are mm.
Tolerances on thickness of steel grades with a specified minimum
yield strength Re ≤ 300 N/mm2 (category A)
| Nominal thickness | Tolerances for a nominal width of | ||||
|---|---|---|---|---|---|
| ≤ 1200 | > 1200 | > 1500 | > 1800 | ||
| ≤ 1500 | ≤ 1800 | ||||
| ≤ 2.00 | ± 0.17 | ± 0.19 | ± 0.21 | - | |
| > 2.00 | ≤ 2.50 | ± 0.18 | ± 0.21 | ± 0.23 | ± 0.25 |
| > 2.50 | ≤ 3.00 | ± 0.20 | ± 0.22 | ± 0.24 | ± 0.26 |
| > 3.00 | ≤ 4.00 | ± 0.22 | ± 0.24 | ± 0.26 | ± 0.27 |
| > 4.00 | ≤ 5.00 | ± 0.24 | ± 0.26 | ± 0.28 | ± 0.29 |
| > 5.00 | ≤ 6.00 | ± 0.26 | ± 0.28 | ± 0.29 | ± 0.31 |
| > 6.00 | ≤ 8.00 | ± 0.29 | ± 0.30 | ± 0.31 | ± 0.35 |
| > 8.00 | ≤ 10.00 | ± 0.32 | ± 0.33 | ± 0.34 | ± 0.40 |
| > 10.00 | ≤ 12.50 | ± 0.35 | ± 0.36 | ± 0.37 | ± 0.43 |
| > 12.50 | ≤ 15.00 | ± 0.37 | ± 0.38 | ± 0.40 | ± 0.46 |
| > 15.00 | ≤ 25.00 | ± 0.40 | ± 0.42 | ± 0.45 | ± 0.50 |
All dimensions are mm.
Tolerances on thickness of steel grades with a specified minimum
yield strength 300 N/mm2 < Re ≤ 360 N/mm2 (category B)
| Nominal thickness | Tolerances for a nominal width of | ||||
|---|---|---|---|---|---|
| ≤ 1200 | > 1200 | > 1500 | > 1800 | ||
| ≤ 1500 | ≤ 1800 | ||||
| ≤ 2.00 | ± 0.20 | ± 0.22 | ± 0.24 | - | |
| > 2.00 | ≤ 2.50 | ± 0.21 | ± 0.24 | ± 0.26 | ± 0.29 |
| > 2.50 | ≤ 3.00 | ± 0.23 | ± 0.25 | ± 0.28 | ± 0.30 |
| > 3.00 | ≤ 4.00 | ± 0.25 | ± 0.28 | ± 0.30 | ± 0.31 |
| > 4.00 | ≤ 5.00 | ± 0.28 | ± 0.30 | ± 0.32 | ± 0.33 |
| > 5.00 | ≤ 6.00 | ± 0.30 | ± 0.32 | ± 0.33 | ± 0.36 |
| > 6.00 | ≤ 8.00 | ± 0.33 | ± 0.35 | ± 0.36 | ± 0.40 |
| > 8.00 | ≤ 10.00 | ± 0.37 | ± 0.38 | ± 0.39 | ± 0.46 |
| > 10.00 | ≤ 12.50 | ± 0.40 | ± 0.41 | ± 0.43 | ± 0.49 |
| > 12.50 | ≤ 15.00 | ± 0.43 | ± 0.44 | ± 0.46 | ± 0.53 |
| > 15.00 | ≤ 25.00 | ± 0.46 | ± 0.48 | ± 0.52 | ± 0.58 |
All dimensions are mm.
Tolerances on thickness of steel grades with a specified minimum
yield strength 360 N/mm2 < Re ≤ 420 N/mm2 (category C)
| Nominal thickness | Tolerances for a nominal width of | ||||
|---|---|---|---|---|---|
| ≤ 1200 | > 1200 | > 1500 | > 1800 | ||
| ≤ 1500 | ≤ 1800 | ||||
| ≤ 2.00 | ± 0.22 | ± 0.25 | ± 0.27 | - | |
| > 2.00 | ≤ 2.50 | ± 0.23 | ± 0.27 | ± 0.30 | ± 0.33 |
| > 2.50 | ≤ 3.00 | ± 0.26 | ± 0.29 | ± 0.31 | ± 0.34 |
| > 3.00 | ≤ 4.00 | ± 0.29 | ± 0.31 | ± 0.34 | ± 0.35 |
| > 4.00 | ≤ 5.00 | ± 0.31 | ± 0.34 | ± 0.36 | ± 0.38 |
| > 5.00 | ≤ 6.00 | ± 0.34 | ± 0.36 | ± 0.38 | ± 0.40 |
| > 6.00 | ≤ 8.00 | ± 0.38 | ± 0.39 | ± 0.40 | ± 0.46 |
| > 8.00 | ≤ 10.00 | ± 0.42 | ± 0.43 | ± 0.44 | ± 0.52 |
| > 10.00 | ≤ 12.50 | ± 0.46 | ± 0.47 | ± 0.48 | ± 0.56 |
| > 12.50 | ≤ 15.00 | ± 0.48 | ± 0.49 | ± 0.52 | ± 0.60 |
| > 15.00 | ≤ 25.00 | ± 0.52 | ± 0.55 | ± 0.59 | ± 0.65 |
All dimensions are mm.
Tolerances on thickness of steel grades with a specified minimum
yield strength 420 N/mm2 < Re ≤ 900 N/mm2 (category D)
| Nominal thickness | Tolerances for a nominal width of | ||||
|---|---|---|---|---|---|
| ≤ 1200 | > 1200 | > 1500 | > 1800 | ||
| ≤ 1500 | ≤ 1800 | ||||
| ≤ 2.00 | ± 0.24 | ± 0.27 | ± 0.29 | - | |
| > 2.00 | ≤ 2.50 | ± 0.25 | ± 0.29 | ± 0.32 | ± 0.35 |
| > 2.50 | ≤ 3.00 | ± 0.28 | ± 0.31 | ± 0.34 | ± 0.36 |
| > 3.00 | ≤ 4.00 | ± 0.31 | ± 0.34 | ± 0.36 | ± 0.38 |
| > 4.00 | ≤ 5.00 | ± 0.34 | ± 0.36 | ± 0.39 | ± 0.41 |
| > 5.00 | ≤ 6.00 | ± 0.36 | ± 0.39 | ± 0.41 | ± 0.43 |
| > 6.00 | ≤ 8.00 | ± 0.41 | ± 0.42 | ± 0.43 | ± 0.49 |
| > 8.00 | ≤ 10.00 | ± 0.45 | ± 0.46 | ± 0.48 | ± 0.56 |
| > 10.00 | ≤ 12.50 | ± 0.49 | ± 0.50 | ± 0.52 | ± 0.60 |
| > 12.50 | ≤ 15.00 | ± 0.52 | ± 0.53 | ± 0.56 | ± 0.64 |
| > 15.00 | ≤ 25.00 | ± 0.56 | ± 0.59 | ± 0.63 | ± 0.70 |
All dimensions are mm.
Tolerances on width
Tolerances in mm.
| Nominal width w | ||||
|---|---|---|---|---|
| Mill edges | Trimmed edges | |||
| lower | upper | lower | upper | |
| w ≤ 1200 | 0 | 20 | 0 | 3 |
| 1200 < w ≤ 1850 | 0 | 20 | 0 | 5 |
| w > 1850 | 0 | 25 | 0 | 6 |
Tolerances in mm for wide strip and slit wide strip
The tolerances for wide strip and slit wide strip comply with standard EN 10051:2010.
The specified values for wide strip do not apply to the uncropped ends of the coil (‘head’ and ‘tail’).
The length of these uncropped ends is calculated using the following formula:
length (in metres) = 90/nominal thickness (in mm), with a maximum of 20 metres.
If required, this part of the coil can be removed, however an additional cost may be charged for this.
Edge camber
The deviation from the edge over a length of 5000 mm:
• with mill edges, no more than 20 mm
• with trimmed edges, no more than 15 mm
Flatness
Requirements as regards flatness can be agreed at the time of enquiry.
Option for maximum crown values
The following high crown C40 options available for hot-rolled products.
Crown values on the C20-position as well as minimum crown values
on both C20 and C40 position are also available on request.
Maximum Crown C40 in µm values for hot-rolled steel
with a low carbon content for cold forming (DD11-DD14 in EN 10111:2008)
Category 1 | C40 | ||||
|---|---|---|---|---|---|
| Nominal Thickness | ≤ 1200 | > 1200 | > 1500 | > 1800 | |
| ≤ 1500 | ≤ 1800 | ||||
| > 1.47 | ≤ 2.00 | 40 | 40 | 40 | 40 |
| > 2.00 | ≤ 2.50 | 40 | 40 | 50 | 50 |
| > 2.50 | ≤ 3.00 | 40 | 40 | 50 | 50 |
| > 3.00 | ≤ 6.00 | 40 | 50 | 50 | 50 |
| > 6.00 | ≤ 11.00 | 50 | 50 | 50 | 50 |
Maximum Crown C40 in µm values of structural steel grades
(S185-S235-S275 ≤ 10mm in EN 10025-2:2004)
Category 2 | C40 | ||||
|---|---|---|---|---|---|
| Nominal Thickness | ≤ 1200 | > 1200 | > 1500 | > 1800 | |
≤ 1500 | ≤ 1800 | ||||
| > 1.47 | ≤ 2.00 | 40 | 40 | 40 | 40 |
| > 2.00 | ≤ 2.50 | 40 | 40 | 50 | 50 |
| > 2.50 | ≤ 20.00 | 50 | 50 | 50 | 50 |
Maximum Crown C40 in µm values of structural steel grades
(S275 > 10mm in EN 10025-2:2004) and HSLA grades (S315MC in EN 10149-2:1996)
Category 3 | C40 | ||||
|---|---|---|---|---|---|
| Nominal Thickness | ≤ 1200 | > 1200 | > 1500 | > 1800 | |
≤ 1500 | ≤ 1800 | ||||
| > 1.47 | ≤ 2.00 | 50 | 50 | 60 | 60 |
| > 2.00 | ≤ 2.50 | 50 | 60 | 60 | 60 |
| > 2.50 | ≤ 3.00 | 50 | 60 | 60 | 60 |
| > 3.00 | ≤ 20.00 | 60 | 60 | 70 | 70 |
Maximum Crown C40 in µm values of HSLA grades
(S355MC, S420MC, S460MC, S500MC, S550MC in EN 10149-2:1996)
| Category 4 | C40 | ||||
|---|---|---|---|---|---|
| Nominal Thickness | ≤ 1200 | > 1200 | > 1500 | > 1800 | |
| ≤ 1500 | ≤ 1800 | ||||
| > 1.47 | ≤ 2.00 | 60 | 70 | 70 | 70 |
| > 2.00 | ≤ 2.50 | 60 | 70 | 80 | 80 |
| > 2.50 | ≤ 3.00 | 60 | 70 | 80 | 80 |
| > 3.00 | ≤ 5.00 | 70 | 70 | 80 | 80 |
| > 5.00 | ≤ 20.00 | 80 | 80 | 80 | 80 |
Dimensions and coil weights
Tata Steel can supply hot-rolled steels with the following minimum and maximum dimensions and weights:
| Description | Availability |
|---|---|
| Coil diameter inner non-pickled | 762 mm |
| Coil diameter inner pickled | 610 mm standard |
| 762 mm on request | |
| Tolerance on inner diameter | +0/-50 mm |
| Coil diameter outer non-pickled | Outer diameter available is 10/7 x width |
| to reduce possibility of coil tipping over | |
| Max. 2300 mm | |
| Min. 1200 mm | |
| Coil diameter outer pickled and oiled | Outer diameter available is 10/7 x width |
| to reduce possibility of coil tipping over | |
| Outer diameter | |
| limit 2200 mm | |
| Min. 1050 mm | |
| Coil weight | Max. 38,5 tonnes |
| Additional maximum limits from transport | |
| limits and outer coil diameter | |
| Some HR products may have different | |
| coil weight ranges | |
| KIM*: width ≤ 1200 mm | max. 23.1 kg/mm width |
| KIM*: 1200 < width ≤ 1700 mm | max. 21.6 kg/mm width |
| KIM*: 1700 < width ≤ 1900 mm | max. 20.9 kg/mm width |
| KIM*: width > 1900 mm | max. 18.8 kg/mm width |
| Minimum tonnage per order | Please refer to price list for order quantity details |
| Minimum order quantities may apply |
* Other KIM values may be available - please contact us.
EN-EngineeringAutomotive-Product-Hot-rolled-Heavy+Light further processing TSE
Further processing
We have a broad network of Tata Steel service centres across Europe, offering decoiling and slitting services from stock and against short lead times.
Heavy gauge processing
| Processing type | Decoiling |
|---|---|
| Thickness range (mm) | 1.4 - 25.4 |
| Width range (mm) | 300 - 2600 |
| Length range | up to 18.4 m |
| Locations | Netherlands |
Light gauge processing
| Processing type | Slitting | Decoiling | Blanking |
|---|---|---|---|
| Thickness range (mm) | 0.2 - 7.0 | 0.3 - 6.0 | 0.3 - 6.0 |
| Width range (mm) | 10 - 2050 | 50 - 2600 | 200 - 2600 |
| Length range | - | up to 6 m | up to 6 m |
| Locations | Netherlands Germany France Spain Sweden Norway Finland | Netherlands Germany France Spain Sweden Norway Finland | Netherlands |
EN-Product-Hot-Rolled-Forming-Download TSUK
Download:
EN-Automotive-Product-Hot-Rolled-Forming-DD14 TSE
EN-Automotive-Product-Hot-Rolled-Forming-All grades OverviewTSE
Applications
- Automotive components
Relationship with standards
Tata Steel offers hot-rolled steel for forming in grades that comply with EN 10111: 2008 and in a special Tata Steel grade as shown in the table below. All grades are available in qualities suitable for galvanising.
As the EN standard applies only to steel ≤ 11mm thick, please consult us about the properties of steel in other thicknesses.
| Tata Steel | VDA | European standard |
|---|---|---|
| Grade | VDA 239-100-16 | EN 10111: 2008 |
| DD11 | - | DD11 1 |
| DD12 | - | DD12 |
| DD13 | - | DD13 |
| DD14 | HR2 | DD14 |
1. DD11 products should be used within one month of their availability
EN-EngineeringAutomotive-Product-Hot-rolled-All Grades Surface aspects Supply Conditions TSE
Supply - product conditions
Hot-rolled steel can be supplied with these product conditions and finishes and with this surface treatment:
| Side/surface condition | non-pickled | pickled | pickled and oiled |
|---|---|---|---|
| Mill edges | Yes | Yes | Yes |
| Trimmed edges | - | Yes | Yes |
Trimmed edges available in thicknesses up to 8.0 mm. The steel grades shown on the following pages belong to the standard range offered by Tata Steel.
Please contact us regarding other specifications we may have that meet your needs.
Surface aspects
| Description | Availability |
|---|---|
| Surface finish | Coils are available in non-pickled and pickled finish |
| Oiling | Pickled finish is available with rolling or preservative oil applied. Oil weight normally 0.5-2.5 g/m2 |
Alternative oiling ranges are available.
Please contact us for details.
EN-EngineeringAutomotive-Product-Hot-Rolled-Forming-DD14-Properties TSE
Properties
Mechanical properties
The values shown for the mechanical properties in the table below are for test pieces taken transverse to the rolling direction:
| EN 10111: 2008 | Grade | DD14 |
|---|---|---|
| Yield strength ReL (N/mm2) | 1.5 ≤ t < 2 | 170 - 310 |
| 2 ≤ t < 11 | 170 - 290 | |
| Max. tensile strength Rm (N/mm2) | 380 | |
| Elongation (%) | 1.5 ≤ t < 2 | 31 |
| 2 ≤ t < 3 | 32 | |
| 3 ≤ t < 11 | 36 | |
| Min. bend test diameter | 0t |
Values are for test pieces taken transverse to the rolling direction:
t - material thickness in mm
Lower yield strength or 0.2% proof stress applies.
Test piece length L0 = 80 mm for thicknesses <3 mm and L0 = 5.65√S0 for thicknesses ≥3 mm
Chemical composition
Hot-rolled steel for forming meets the requirements of the cast analysis in the standard as shown in the table below:
| EN 10111: 2008 | Grade | DD14 |
|---|---|---|
| C | Max. | 0.08 |
| Mn | Max. | 0.35 |
| P | Max. | 0.025 |
| S | Max. | 0.025 |
All values are in weight%.
EN-Automotive-Product-Hot-Rolled-Forming-DD14-Dimensions TSE
Dimensions
Dimensional capability – pickled.
Dimensions in mm.
| Thickness | Max. width |
|---|---|
| From - up to | DD14 |
| 1.50 - 1.60 | 1330 |
| 1.60 - 1.70 | 1405 |
| 1.70 - 1.80 | 1480 |
| 1.80 - 1.90 | 1555 |
| 1.90 - 2.00 | 1630 |
| 2.00 - 2.20 | 1705 |
| 2.20 - 2.40 | 1820 |
| 2.40 - 2.50 | 1925 |
| 2.50 - 2.60 | 1970 |
| 2.60 - 2.70 | 2030 |
| 2.70 - 4.76 | 2070 |
| 4.76 - 4.90 | 2040 |
| 4.90 - 5.00 | 2000 |
| 5.00 - 5.10 | 1960 |
| 5.10 - 5.20 | 1925 |
| 5.20 - 5.30 | 1885 |
| 5.30 - 5.40 | 1850 |
| 5.40 - 5.50 | 1820 |
| 5.50 - 5.60 | 1785 |
| 5.60 - 5.70 | 1755 |
| 5.70 - 5.80 | 1725 |
| 5.80 - 5.90 | 1695 |
| 5.90 - 6.35 | 1670 |
The minimum width is 735 mm.
For trimmed edges, reduce the maximum widths shown by 23 mm.
Thicknesses up to 20 mm may be available - please contact us.
Non-pickled (dry) condition is also available.
Please contact us with your specific requirements
EN-EngineeringAutomotive-Product-Hot-rolled-All grades Shape and dimensional tolerances TSE
Shape and dimensional tolerances
The specified values for wide strip do not apply to the uncropped ends of the coil (‘head’ and ‘tail’).
The length of these uncropped ends is calculated using the following formula:
length (in metres) = 90/nominal thickness (in mm), with a maximum of 20 metres.
If required, this part of the coil can be removed, however an additional cost may be charged for this.
Tolerances on thickness
Tata Steel can supply to full thickness tolerance specified in EN 10051:2010.
Tighter tolerances are available as shown below:
| Product type | Thickness tolerances available | |||||
|---|---|---|---|---|---|---|
| (% of full EN 10051:2010 tolerance) | ||||||
| 100% | 75% | 66% | 60% | 50% | 33% | |
| Steel for forming | Yes | Yes | Yes | Yes | Yes | Yes 1 |
| High-strength low-alloy (HSLA EN 10149-2) | Yes | Yes | Yes | Yes | Yes | Yes 1 |
| Ympress® HSLA | Yes | Yes 1 | ||||
| Ympress® Laser | Yes | Yes 1 | ||||
| Structural steel | Yes | Yes | Yes | Yes | Yes | Yes 1 |
| Manganese boron steel | Yes | Yes | Yes | Yes | Yes | |
| Case-hardening steel | Yes | Yes | Yes | Yes | Yes | |
| High-carbon steel | Yes | |||||
| Dual phase steel | Yes | |||||
| Hot forming steel | Yes | |||||
| Valast® abrasion resistant steel | Yes | Yes | Yes | Yes | Yes | |
| Steel for pressure vessels | Yes | |||||
| Steel for gas cylinders | Yes | |||||
| Steel for line pipe | Yes | |||||
| Ship plate | Yes | |||||
1. Available for certain grades and thicknesses between 3.0 mm and 6.0 mm.
Please contact us on the availability of special tolerances to meet your requirements.
Tolerances on thickness for hot-rolled steel with a low carbon content
for cold forming (DD11-DD14 in EN 10111:2008)
| Nominal thickness | Tolerances for a nominal width of | ||||
|---|---|---|---|---|---|
| ≤ 1200 | > 1200 | > 1500 | > 1800 | ||
| ≤ 1500 | ≤ 1800 | ||||
| ≤ 2.00 | ± 0.13 | ± 0.14 | ± 0.16 | - | |
| > 2.00 | ≤ 2.50 | ± 0.14 | ± 0.16 | ± 0.17 | ± 0.19 |
| > 2.50 | ≤ 3.00 | ± 0.15 | ± 0.17 | ± 0.18 | ± 0.20 |
| > 3.00 | ≤ 4.00 | ± 0.17 | ± 0.18 | ± 0.20 | ± 0.20 |
| > 4.00 | ≤ 5.00 | ± 0.18 | ± 0.20 | ± 0.21 | ± 0.22 |
| > 5.00 | ≤ 6.00 | ± 0.20 | ± 0.21 | ± 0.22 | ± 0.23 |
| > 6.00 | ≤ 8.00 | ± 0.22 | ± 0.23 | ± 0.23 | ± 0.26 |
| > 8.00 | ≤ 11.00 | ± 0.24 | ± 0.25 | ± 0.25 | ± 0.28 |
All dimensions are mm.
Tolerances on thickness of steel grades with a specified minimum
yield strength Re ≤ 300 N/mm2 (category A)
| Nominal thickness | Tolerances for a nominal width of | ||||
|---|---|---|---|---|---|
| ≤ 1200 | > 1200 | > 1500 | > 1800 | ||
| ≤ 1500 | ≤ 1800 | ||||
| ≤ 2.00 | ± 0.17 | ± 0.19 | ± 0.21 | - | |
| > 2.00 | ≤ 2.50 | ± 0.18 | ± 0.21 | ± 0.23 | ± 0.25 |
| > 2.50 | ≤ 3.00 | ± 0.20 | ± 0.22 | ± 0.24 | ± 0.26 |
| > 3.00 | ≤ 4.00 | ± 0.22 | ± 0.24 | ± 0.26 | ± 0.27 |
| > 4.00 | ≤ 5.00 | ± 0.24 | ± 0.26 | ± 0.28 | ± 0.29 |
| > 5.00 | ≤ 6.00 | ± 0.26 | ± 0.28 | ± 0.29 | ± 0.31 |
| > 6.00 | ≤ 8.00 | ± 0.29 | ± 0.30 | ± 0.31 | ± 0.35 |
| > 8.00 | ≤ 10.00 | ± 0.32 | ± 0.33 | ± 0.34 | ± 0.40 |
| > 10.00 | ≤ 12.50 | ± 0.35 | ± 0.36 | ± 0.37 | ± 0.43 |
| > 12.50 | ≤ 15.00 | ± 0.37 | ± 0.38 | ± 0.40 | ± 0.46 |
| > 15.00 | ≤ 25.00 | ± 0.40 | ± 0.42 | ± 0.45 | ± 0.50 |
All dimensions are mm.
Tolerances on thickness of steel grades with a specified minimum
yield strength 300 N/mm2 < Re ≤ 360 N/mm2 (category B)
| Nominal thickness | Tolerances for a nominal width of | ||||
|---|---|---|---|---|---|
| ≤ 1200 | > 1200 | > 1500 | > 1800 | ||
| ≤ 1500 | ≤ 1800 | ||||
| ≤ 2.00 | ± 0.20 | ± 0.22 | ± 0.24 | - | |
| > 2.00 | ≤ 2.50 | ± 0.21 | ± 0.24 | ± 0.26 | ± 0.29 |
| > 2.50 | ≤ 3.00 | ± 0.23 | ± 0.25 | ± 0.28 | ± 0.30 |
| > 3.00 | ≤ 4.00 | ± 0.25 | ± 0.28 | ± 0.30 | ± 0.31 |
| > 4.00 | ≤ 5.00 | ± 0.28 | ± 0.30 | ± 0.32 | ± 0.33 |
| > 5.00 | ≤ 6.00 | ± 0.30 | ± 0.32 | ± 0.33 | ± 0.36 |
| > 6.00 | ≤ 8.00 | ± 0.33 | ± 0.35 | ± 0.36 | ± 0.40 |
| > 8.00 | ≤ 10.00 | ± 0.37 | ± 0.38 | ± 0.39 | ± 0.46 |
| > 10.00 | ≤ 12.50 | ± 0.40 | ± 0.41 | ± 0.43 | ± 0.49 |
| > 12.50 | ≤ 15.00 | ± 0.43 | ± 0.44 | ± 0.46 | ± 0.53 |
| > 15.00 | ≤ 25.00 | ± 0.46 | ± 0.48 | ± 0.52 | ± 0.58 |
All dimensions are mm.
Tolerances on thickness of steel grades with a specified minimum
yield strength 360 N/mm2 < Re ≤ 420 N/mm2 (category C)
| Nominal thickness | Tolerances for a nominal width of | ||||
|---|---|---|---|---|---|
| ≤ 1200 | > 1200 | > 1500 | > 1800 | ||
| ≤ 1500 | ≤ 1800 | ||||
| ≤ 2.00 | ± 0.22 | ± 0.25 | ± 0.27 | - | |
| > 2.00 | ≤ 2.50 | ± 0.23 | ± 0.27 | ± 0.30 | ± 0.33 |
| > 2.50 | ≤ 3.00 | ± 0.26 | ± 0.29 | ± 0.31 | ± 0.34 |
| > 3.00 | ≤ 4.00 | ± 0.29 | ± 0.31 | ± 0.34 | ± 0.35 |
| > 4.00 | ≤ 5.00 | ± 0.31 | ± 0.34 | ± 0.36 | ± 0.38 |
| > 5.00 | ≤ 6.00 | ± 0.34 | ± 0.36 | ± 0.38 | ± 0.40 |
| > 6.00 | ≤ 8.00 | ± 0.38 | ± 0.39 | ± 0.40 | ± 0.46 |
| > 8.00 | ≤ 10.00 | ± 0.42 | ± 0.43 | ± 0.44 | ± 0.52 |
| > 10.00 | ≤ 12.50 | ± 0.46 | ± 0.47 | ± 0.48 | ± 0.56 |
| > 12.50 | ≤ 15.00 | ± 0.48 | ± 0.49 | ± 0.52 | ± 0.60 |
| > 15.00 | ≤ 25.00 | ± 0.52 | ± 0.55 | ± 0.59 | ± 0.65 |
All dimensions are mm.
Tolerances on thickness of steel grades with a specified minimum
yield strength 420 N/mm2 < Re ≤ 900 N/mm2 (category D)
| Nominal thickness | Tolerances for a nominal width of | ||||
|---|---|---|---|---|---|
| ≤ 1200 | > 1200 | > 1500 | > 1800 | ||
| ≤ 1500 | ≤ 1800 | ||||
| ≤ 2.00 | ± 0.24 | ± 0.27 | ± 0.29 | - | |
| > 2.00 | ≤ 2.50 | ± 0.25 | ± 0.29 | ± 0.32 | ± 0.35 |
| > 2.50 | ≤ 3.00 | ± 0.28 | ± 0.31 | ± 0.34 | ± 0.36 |
| > 3.00 | ≤ 4.00 | ± 0.31 | ± 0.34 | ± 0.36 | ± 0.38 |
| > 4.00 | ≤ 5.00 | ± 0.34 | ± 0.36 | ± 0.39 | ± 0.41 |
| > 5.00 | ≤ 6.00 | ± 0.36 | ± 0.39 | ± 0.41 | ± 0.43 |
| > 6.00 | ≤ 8.00 | ± 0.41 | ± 0.42 | ± 0.43 | ± 0.49 |
| > 8.00 | ≤ 10.00 | ± 0.45 | ± 0.46 | ± 0.48 | ± 0.56 |
| > 10.00 | ≤ 12.50 | ± 0.49 | ± 0.50 | ± 0.52 | ± 0.60 |
| > 12.50 | ≤ 15.00 | ± 0.52 | ± 0.53 | ± 0.56 | ± 0.64 |
| > 15.00 | ≤ 25.00 | ± 0.56 | ± 0.59 | ± 0.63 | ± 0.70 |
All dimensions are mm.
Tolerances on width
Tolerances in mm.
| Nominal width w | ||||
|---|---|---|---|---|
| Mill edges | Trimmed edges | |||
| lower | upper | lower | upper | |
| w ≤ 1200 | 0 | 20 | 0 | 3 |
| 1200 < w ≤ 1850 | 0 | 20 | 0 | 5 |
| w > 1850 | 0 | 25 | 0 | 6 |
Tolerances in mm for wide strip and slit wide strip
The tolerances for wide strip and slit wide strip comply with standard EN 10051:2010.
The specified values for wide strip do not apply to the uncropped ends of the coil (‘head’ and ‘tail’).
The length of these uncropped ends is calculated using the following formula:
length (in metres) = 90/nominal thickness (in mm), with a maximum of 20 metres.
If required, this part of the coil can be removed, however an additional cost may be charged for this.
Edge camber
The deviation from the edge over a length of 5000 mm:
• with mill edges, no more than 20 mm
• with trimmed edges, no more than 15 mm
Flatness
Requirements as regards flatness can be agreed at the time of enquiry.
Option for maximum crown values
The following high crown C40 options available for hot-rolled products.
Crown values on the C20-position as well as minimum crown values
on both C20 and C40 position are also available on request.
Maximum Crown C40 in µm values for hot-rolled steel
with a low carbon content for cold forming (DD11-DD14 in EN 10111:2008)
Category 1 | C40 | ||||
|---|---|---|---|---|---|
| Nominal Thickness | ≤ 1200 | > 1200 | > 1500 | > 1800 | |
| ≤ 1500 | ≤ 1800 | ||||
| > 1.47 | ≤ 2.00 | 40 | 40 | 40 | 40 |
| > 2.00 | ≤ 2.50 | 40 | 40 | 50 | 50 |
| > 2.50 | ≤ 3.00 | 40 | 40 | 50 | 50 |
| > 3.00 | ≤ 6.00 | 40 | 50 | 50 | 50 |
| > 6.00 | ≤ 11.00 | 50 | 50 | 50 | 50 |
Maximum Crown C40 in µm values of structural steel grades
(S185-S235-S275 ≤ 10mm in EN 10025-2:2004)
Category 2 | C40 | ||||
|---|---|---|---|---|---|
| Nominal Thickness | ≤ 1200 | > 1200 | > 1500 | > 1800 | |
≤ 1500 | ≤ 1800 | ||||
| > 1.47 | ≤ 2.00 | 40 | 40 | 40 | 40 |
| > 2.00 | ≤ 2.50 | 40 | 40 | 50 | 50 |
| > 2.50 | ≤ 20.00 | 50 | 50 | 50 | 50 |
Maximum Crown C40 in µm values of structural steel grades
(S275 > 10mm in EN 10025-2:2004) and HSLA grades (S315MC in EN 10149-2:1996)
Category 3 | C40 | ||||
|---|---|---|---|---|---|
| Nominal Thickness | ≤ 1200 | > 1200 | > 1500 | > 1800 | |
≤ 1500 | ≤ 1800 | ||||
| > 1.47 | ≤ 2.00 | 50 | 50 | 60 | 60 |
| > 2.00 | ≤ 2.50 | 50 | 60 | 60 | 60 |
| > 2.50 | ≤ 3.00 | 50 | 60 | 60 | 60 |
| > 3.00 | ≤ 20.00 | 60 | 60 | 70 | 70 |
Maximum Crown C40 in µm values of HSLA grades
(S355MC, S420MC, S460MC, S500MC, S550MC in EN 10149-2:1996)
| Category 4 | C40 | ||||
|---|---|---|---|---|---|
| Nominal Thickness | ≤ 1200 | > 1200 | > 1500 | > 1800 | |
| ≤ 1500 | ≤ 1800 | ||||
| > 1.47 | ≤ 2.00 | 60 | 70 | 70 | 70 |
| > 2.00 | ≤ 2.50 | 60 | 70 | 80 | 80 |
| > 2.50 | ≤ 3.00 | 60 | 70 | 80 | 80 |
| > 3.00 | ≤ 5.00 | 70 | 70 | 80 | 80 |
| > 5.00 | ≤ 20.00 | 80 | 80 | 80 | 80 |
Dimensions and coil weights
Tata Steel can supply hot-rolled steels with the following minimum and maximum dimensions and weights:
| Description | Availability |
|---|---|
| Coil diameter inner non-pickled | 762 mm |
| Coil diameter inner pickled | 610 mm standard |
| 762 mm on request | |
| Tolerance on inner diameter | +0/-50 mm |
| Coil diameter outer non-pickled | Outer diameter available is 10/7 x width |
| to reduce possibility of coil tipping over | |
| Max. 2300 mm | |
| Min. 1200 mm | |
| Coil diameter outer pickled and oiled | Outer diameter available is 10/7 x width |
| to reduce possibility of coil tipping over | |
| Outer diameter | |
| limit 2200 mm | |
| Min. 1050 mm | |
| Coil weight | Max. 38,5 tonnes |
| Additional maximum limits from transport | |
| limits and outer coil diameter | |
| Some HR products may have different | |
| coil weight ranges | |
| KIM*: width ≤ 1200 mm | max. 23.1 kg/mm width |
| KIM*: 1200 < width ≤ 1700 mm | max. 21.6 kg/mm width |
| KIM*: 1700 < width ≤ 1900 mm | max. 20.9 kg/mm width |
| KIM*: width > 1900 mm | max. 18.8 kg/mm width |
| Minimum tonnage per order | Please refer to price list for order quantity details |
| Minimum order quantities may apply |
* Other KIM values may be available - please contact us.
EN-EngineeringAutomotive-Product-Hot-rolled-Heavy+Light further processing TSE
Further processing
We have a broad network of Tata Steel service centres across Europe, offering decoiling and slitting services from stock and against short lead times.
Heavy gauge processing
| Processing type | Decoiling |
|---|---|
| Thickness range (mm) | 1.4 - 25.4 |
| Width range (mm) | 300 - 2600 |
| Length range | up to 18.4 m |
| Locations | Netherlands |
Light gauge processing
| Processing type | Slitting | Decoiling | Blanking |
|---|---|---|---|
| Thickness range (mm) | 0.2 - 7.0 | 0.3 - 6.0 | 0.3 - 6.0 |
| Width range (mm) | 10 - 2050 | 50 - 2600 | 200 - 2600 |
| Length range | - | up to 6 m | up to 6 m |
| Locations | Netherlands Germany France Spain Sweden Norway Finland | Netherlands Germany France Spain Sweden Norway Finland | Netherlands |
EN-Product-Hot-Rolled-Forming-Download TSUK
Download:
EN-Automotive-Contact-General sales - Automotive - general
Enquiries and customer services
Please contact us for further information, questions and enquiries. Working together on sustainable vehicles and value chains.


